How to Apply Polyurethane – Achieving the Perfect Finish
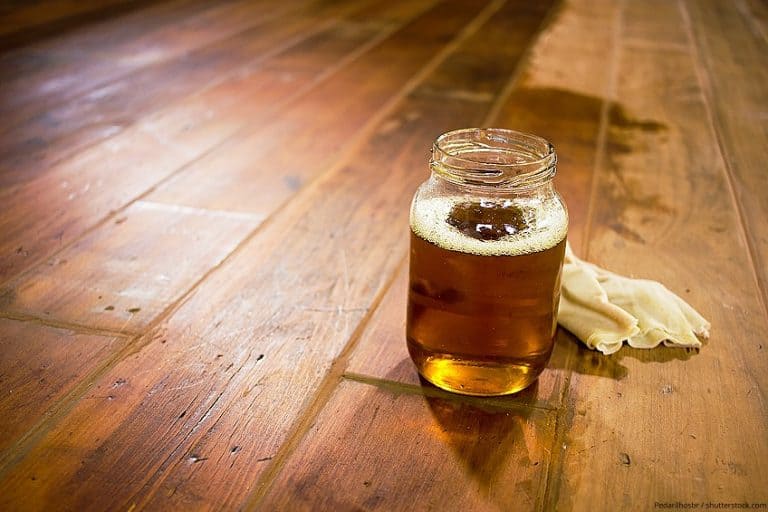
Polyurethane is the ultimate wood protector. It adds a defensive exterior layer to your wooden furniture or patio decking, thus protecting against any scratches or scrapes or liquid or chemical spills that might wear the wood down. You might like the look of stained wood for the accentuation of the grain in the wood. In this case, a layering of polyurethane is still recommended to protect and prolong the life and efficacy of the wood. If you are on the search for information and directions on the methods of polyurethane application, then keep reading, because we have laid it all out for you!
Selecting Your Polyurethane Finish
General wear and tear of your wooden surfaces will be a lesser worry after having been treated to a polyurethane coating. Polyurethane is considered by many to be one of the hardiest and longest-lasting of all the wood finishes. Its protective abilities prevent the impact of the environment or foot traffic from tarnishing the appearance. This also makes it spill-proof, ensuring that no liquids of any kind are not soaked into the wood.
One thing to consider when purchasing polyurethane is the nature of the task you are undertaking. Are you wanting to coat an indoor wall panel or an outside decking, or perhaps a picnic table? It is important to use the right polyurethane for the right wooden surface, so identifying what you want to be coated first is necessary.
Whether the weather! If you are living in a humid and sunny environment and you are wanting to protect your outdoor furniture, you are going to have to consider both the impact of the sun and the humidity! A protective layer against both is needed.
Type of Polyurethane
If you are faced with the decision of choosing a polyurethane, you will need to pick either an oil- or water-based polyurethane. You need not fret too much about this decision, as both types have the same application methods and overall finishes. There are, however, some key differences between water- and oil-based polyurethane, making each best suited for various projects.
If a quick drying time is what you desire, then water-based polyurethane is the one for you. Its water base means that it is much easier to clean up – just a little bit of water and soap and voilà! The water base also means that this type of polyurethane emits fewer toxic fumes and volatile organic compounds (VOCs), making it a safer option. Water-based polyurethane also has an ability to level itself, which for some makes the application easier, although it does have a tendency to get watermarks. Be careful of what wood stain may be on the surface already because a water-based polyurethane can raise the wood grain.
Where a water-based polyurethane needs at least four coats to be effective, an oil-based one only requires two, maybe three. This type of polyurethane is of a thicker consistency because of the number of solid aspects in the formula, which makes for an easier application. Make sure that the area you are coating is well protected from dust or insects while it is drying, however, as oil-based polyurethane takes quite a bit longer to dry. Oil-based polyurethane does require a bit more effort in the cleaning department – some mineral spirits should do the trick. This polyurethane is also known to produce higher levels of VOCs and fumes.
In general, water-based polyurethane is best suited for indoor furniture as it does not possess the same durability and weather resistance as its oil-based counterpart. Thus, oil-based polyurethane is best used on exterior surfaces or areas that are used frequently. This works out in terms of the polyurethane’s level of toxicity, as you will want to apply an oil-based one in as ventilated an area as possible, whereas you can get away with applying a water-based polyurethane indoors with the windows and doors open.
Polyurethane Color and Sheen
One benefit that oil-based polyurethanes have over water-based ones is that they have a more brilliant finish in terms of color definition. Oil-based polyurethane provides a warmer finish with a reddish undertone to your wooden surface, whereas water-based polyurethane leaves a completely clear finish. Note that while the water-based polyurethane may appear more opaque upon application, it will become clear as it dries!
If you would like to add a bit more shine to your wooden surface, you can opt for a glossy or semi-glossy finish, although these do tend to highlight any flaws in the wood. Regardless of whether you choose a glossy or matte finish, you can rest assured knowing that this decision will have no impact on the durability of the protective layer.
The table below illustrates the different aspects of both water- and oil-based polyurethanes. Both options provide an attractive finish and are equally as easy to apply, so it the choice is up to you and your project requirements.
| Oil-Based | Water-Based | |
| Toxicity | High levels of VOCs and fumes – Protective gear is needed | Fumes are less intense |
| Consistency | Thicker consistency – Not as many coats required | Thin consistency – More coats required |
| Appearance | Brings a warm, glowy look while bringing the color of the wood out | Transparent – Does not change the look of the wood |
| Drying Time | 24 to 48 hours to dry | Dries quickly within just 8 to 10 hours |
| Endurance | Long-lasting – 10 years, more or less | Does not last as long – Two years, more or less |
| Cost | More costly | Fairly affordable |
Best Polyurethane Products
Now that you know the difference between the two types of polyurethane, it is time to pick a suitable option for your woodworking project. This could be for applying a protective layer over your vintage lounge furniture with wooden armrests, or to finish off your wooden patio decking. It is important to know which type of polyurethane to use for your particular project in order to get the best results.
Best Oil-Based Polyurethane: Fast-Drying Polyurethane By MINWAX
Typically, water-based polyurethane dries faster than oil-based ones, but not in this case. Minwax’s fast-drying oil-based polyurethane has a fast drying time, as stipulated by the name. It only needs a 10-hour waiting time before the next layer can be applied, and 24 hours until you can work with and touch it again without affecting the result.
This product is designed to work best on wooden skirtings, floors, furniture, and more, and comes in a choice of a satin, gloss, or semi-gloss finish. This is one of the most durable polyurethane coatings for wooden surfaces, and it can be applied to both finished and unfinished wood, although it is limited to that of indoor furniture and surfaces.
PROS
- Can be used on finished or unfinished pieces of wood
- Very durable
- Low VOC levels
- Dries quickly
- Aerosol canister available
CONS
- A yellow tinge may develop in the clear polyurethane
- Can only be used on interior surfaces
Best Water-Based Polyurethane: Water-Based Polycrylic Protective Finish by MINWAX
This water-based protective finish is from one of the leading brands for wood finishes. It provides you with a crystal-clear finish, making it ideal for light woods such as ash, maple, and birch. This product provides a protective topcoat that dries ultra-quickly, allowing you to recoat within just two hours. It is also available in ultra-flat, satin, matt, semi-gloss, and gloss sheens.
This polyurethane product can be applied using a synthetic bristle brush or via an aerosol spray can. It is advised that you apply three coats for the perfect finish. Because it is water-based, this polyurethane has low VOC levels that give off a low odor. And when you are done, cleaning up is a breeze! All you need is some water and soap. This product comes highly recommended because of how long it lasts and the beautiful result.
PROS
- Best suited for light-colored woods
- Stays transparent in appearance
- Minimal VOCs and low odor
- Variety of finishes
- Simple to clean
- Fast-drying product
CONS
- Can only be used on indoor surfaces
How to Apply Polyurethane
First, you need to take stock of your plans for this project. Do you need to brush on the polyurethane or spray it? Is it an outdoor project or an indoor one? These factors will define the method of application for your polyurethane.
Tools and Materials Needed
Every crafter will know about the frustration one can feel once they have started a project and only realized halfway through that they are missing a few tools or materials. This can impact your work negatively and be a waste of time. So let us go through the list of possible tools you might need in order to complete this task without a hindrance.
- Mineral spirits (for oil-based polyurethane) or water (for water-based polyurethane) for thinning and cleaning
- Hoover or vacuum cleaner
- Sandpaper in grits 120, 180, 220, and 320
- Sanding tool or sanding block
- Clean and dry cloths
- Automotive rubbing compound
- Automotive polishing compound
- Natural bristle brush (for oil-based polyurethane) or a nylon bristle brush (for water-based polyurethane)
Prepare the Work Area
Your first step would be to open the windows to allow all the light to flow in. If there are not enough windows to create light, bring some lights in. Opening the windows not only helps you see if you missed a spot, but it also allows for better air ventilation, which will help with the toxic fumes released by polyurethane in its liquid state.
A clean space is a happy workspace. If there is any dust lying around, it will settle in your newly laid polyurethane coating, tarnishing the way it looks. Thus, it is imperative that you clean the work area thoroughly before beginning.
Make sure you get into every corner, using a hoover or a vacuum cleaner to clean up any fallen hair or dust. Also, be sure to clear away any clutter. Any objects that are not to be coated must be removed temporarily in case of any spills or splatters. This brings us to our last tip: If you do not wish for drops of polyurethane to dribble onto your floors, then you must make sure that you use a protective cloth like a tarp underneath your project.
Prepare the Wood Surface
If the job you are doing starts from scratch, you will need to use sandpaper to sand down the wood so as to ensure it is clean and free of imperfections. You have the choice of 180- to 320-grit in the sandpaper for the smoother feel, but much rougher sandpaper like one of 100-grit might be needed occasionally.
If your job is redoing the coating on an existing wooden piece, make sure that the original coats are removed. This could be a varnish, acrylic layer, shellac, or lacquer. It is best to complete these tasks outdoors so that you have better ventilation and less mess.
Opening the windows not only helps to add light to the room but also increases airflow. However, ventilation and airflow alone are not enough – you will need protective gear, inclusive of a respirator mask for any fumes or dust particles. A hoover or a vacuum cleaner is necessary after the sanding because there will be a fair amount of dust lying around, which could seriously affect your work. To be 100% satisfied with the lack of dust, you can also dip a clean cloth into some rubbing alcohol to wipe away any residual dust.
The Best Way to Apply Polyurethane
This question is very important as it will affect the finish of your project. There are three different ways in which you can apply polyurethane. Sometimes you do not even have to choose what method to use, and you can make use of all three techniques together when applying polyurethane. For a fully successful job done, it is recommended that you use all three methods, depending on the surface you are tackling. The three methods of applying polyurethane are as follows:
- Wiping it on
- Brushing it on
- Spraying it on
If the job you are busy with has a flat or horizontal surface, you might find that the brush-on method will work best, but for larges surface areas as well as hard-to-reach spots, a spray canister of polyurethane might be your best option.
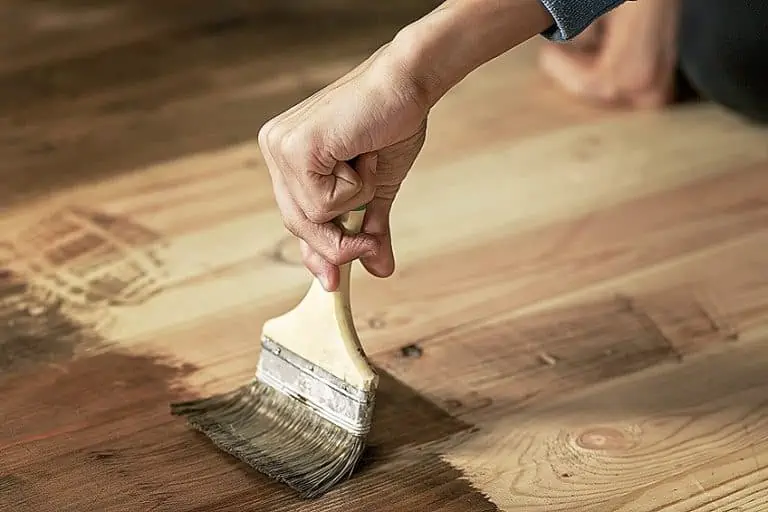
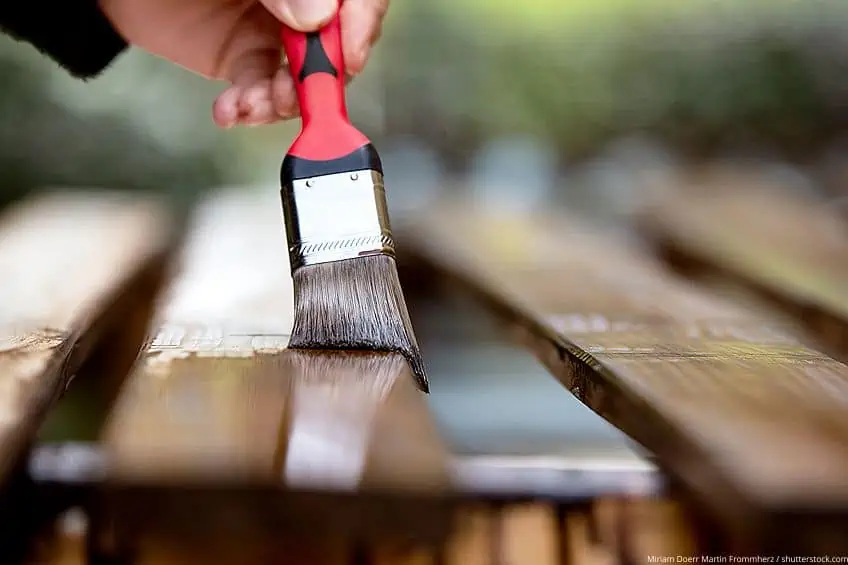
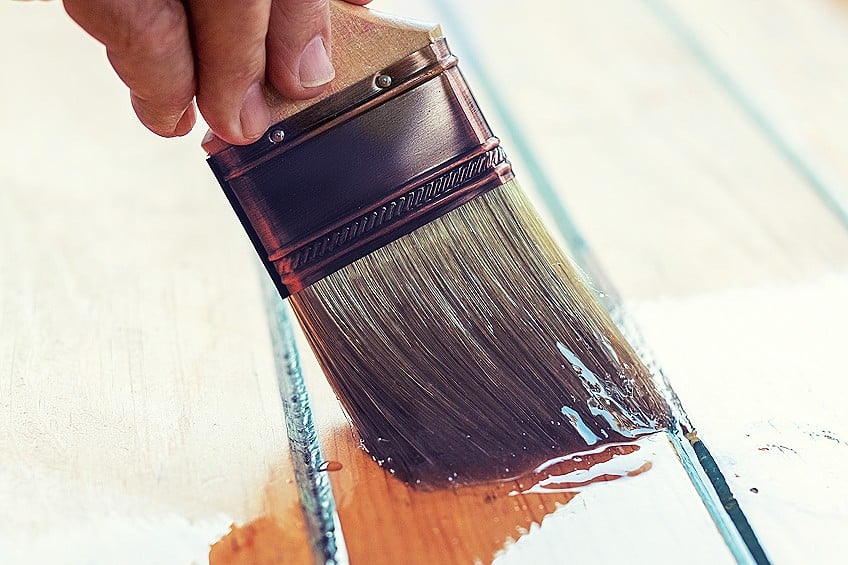
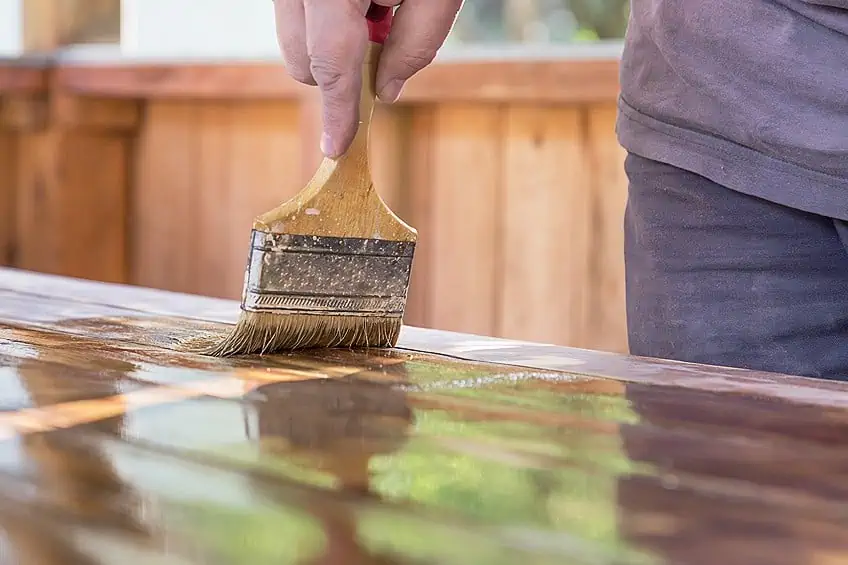
Brush-On Technique
This method requires fewer layers of polyurethane in order to be fully protected. Using the brush-on technique when you apply polyurethane is best for horizontal or flat surfaces. You must also make sure that you are using the correct type of bristles for either oil-based or water-based polyurethane – you will need nylon bristles for water-based and a natural bristle for oil-based polyurethane.
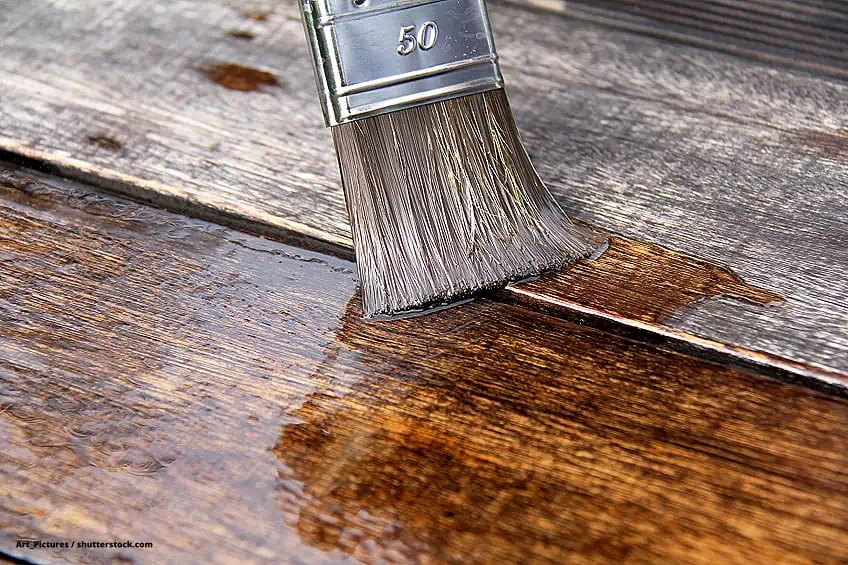
- Use a back and forth motion, collecting leftover drips from the first stroke.
- When dipping your brush, only dip the bristles about an inch into the polyurethane.
- Brush in the same direction as the grain.
- Prevent any gaps by ensuring each brushstroke starts over the previous one.
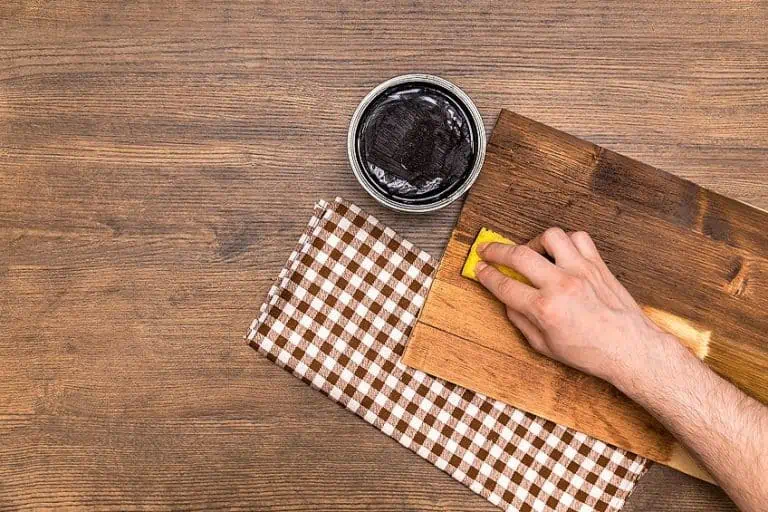
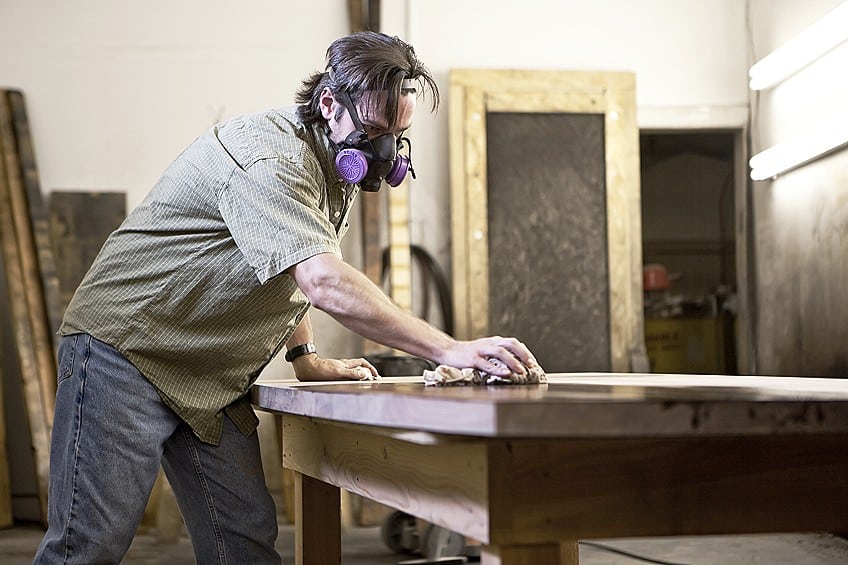
Wipe-On Technique
This method asks for a few more layers of polyurethane in order to obtain a smoother result. It is mostly suited for surfaces with shapes or curves. Dribbles of polyurethane are not so easy to clear up here, however, so you must be cautious when working with this method.
- First, you will need a square-shaped cloth or material. This can be achieved by folding the cloth to the desired size, which is about the same as one’s palm
- Use confident strokes that are even and smooth.
- Make sure that you leave no spaces unpainted.
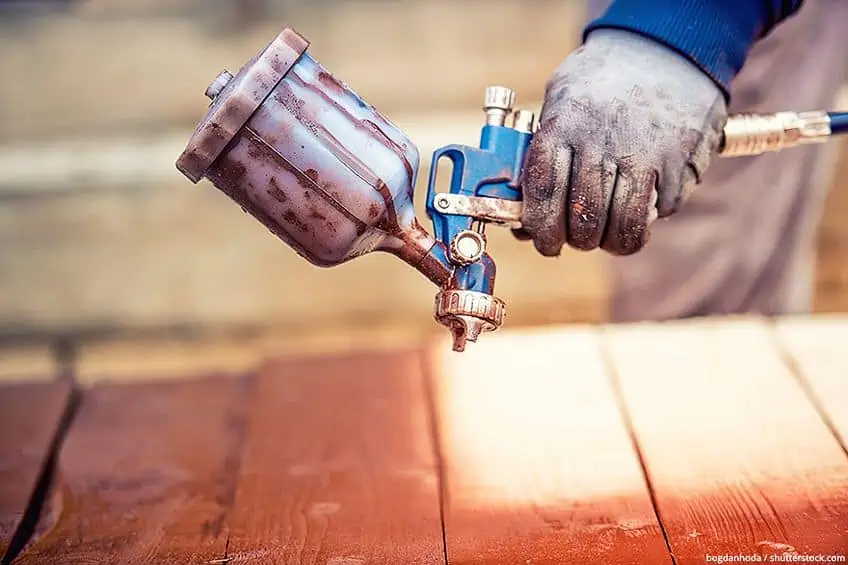
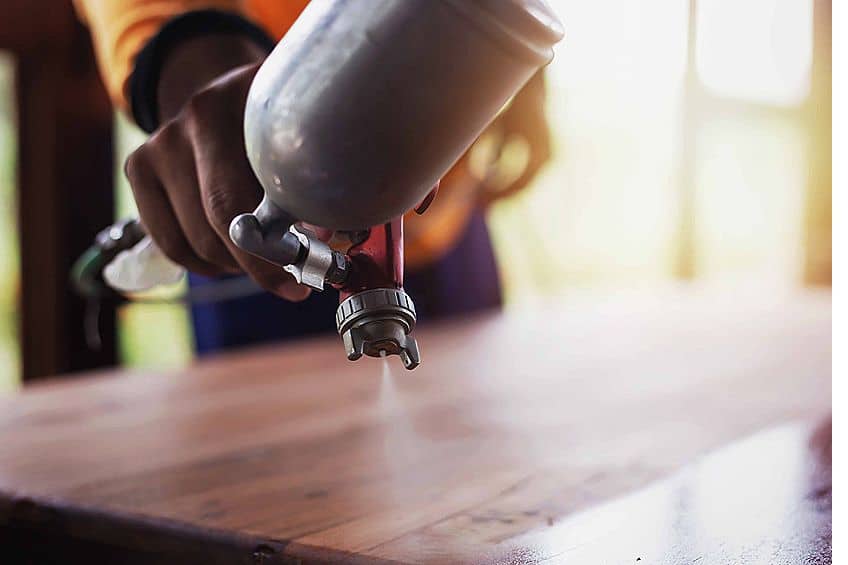
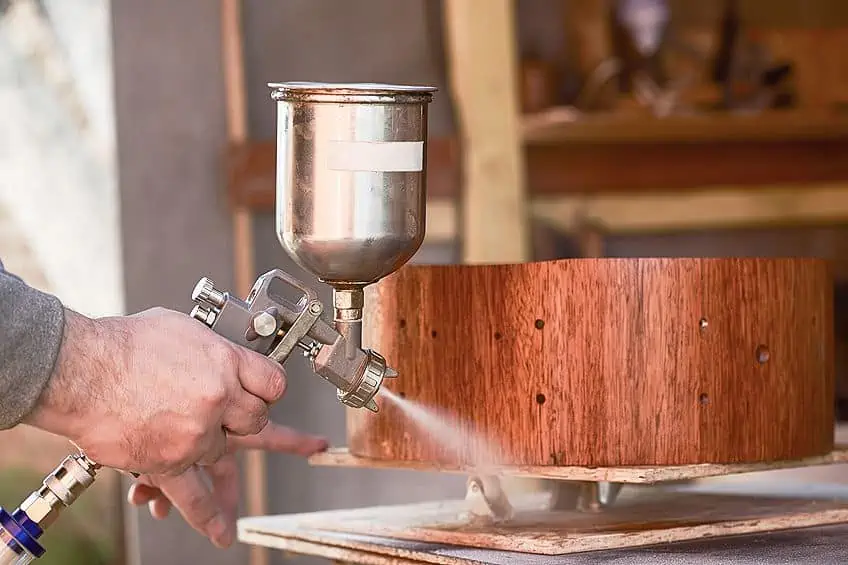
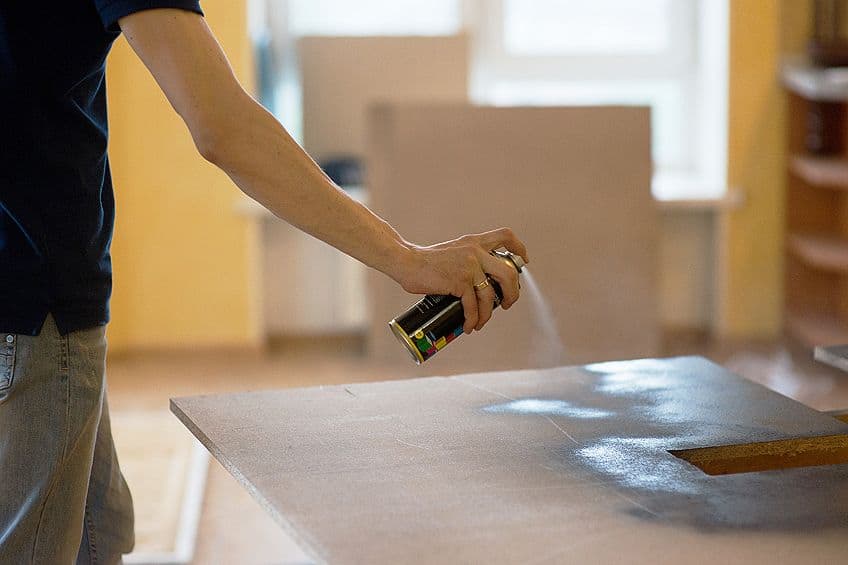
Spray-On Technique
At some point in your project, depending on the job at hand, you might find it hard to get into a certain area. This is where a spray canister of polyurethane comes in handy. When you are spraying, make sure that you do not hold the nozzle down too long, and use quick motions to avoid the build-up of polyurethane, which causes drops.
- Extra layers will be needed for this method, as the sprayed-on layers are much thinner.
- Get used to the feel of the spray canister method by practicing first on a scrap piece of wood.
Tips on Using Polyurethane
- Wait for the appropriate drying time. Read the instructions on the label for this information.
- Once the sealer has been applied, make sure that it has fully dried before you sand it down again for a smoother finish. If you wish, mineral spirits or water (depending on whether the polyurethane has an oil or water base) can be used to make the sealer thinner.
- Mix well before you start, as polyurethane tends to separate while not in use.
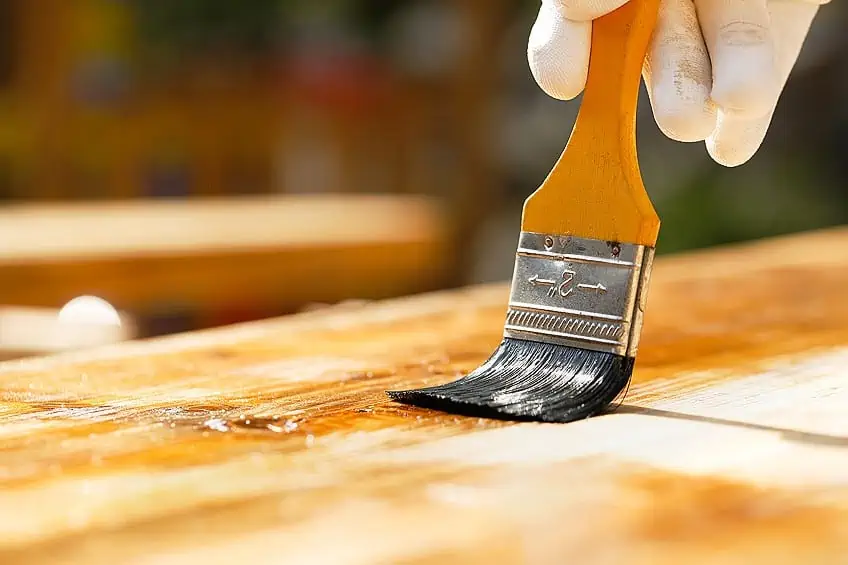
Applying Oil-Based Polyurethane
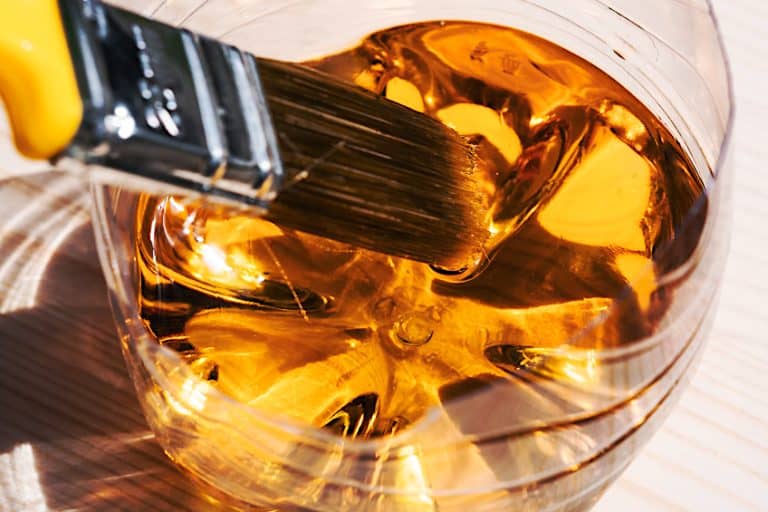
Any artist will back us up when we say that the cheaper your brush is, the less effective it will be. As you are applying an oil-based polyurethane, you will need to use a natural bristle brush. However, if your surface is smooth and flat, then the option of a brush made of foam might be also good for you as they are not too pricey.
Always be sure to work with Mother Nature, so going in the direction of the wood’s grain for the best results is optimal.
The thinner each layer is, the better. This means that if you keep dipping the brush into the polyurethane, it will then become uneven and blotchy. As you stroke, try to use the brush to collect any drops that are left behind from your smooth, continuous motion. Wait up to 24 hours before applying the next layer.
Bear in mind that some products will need a longer drying time, especially if you are living in a humid environment. As soon as your first coat has fully dried, a sanding mission may commence. This is to make sure that the end results are super smooth and soft to the touch, although you need to be careful not to take too much of the bottom layer off. So, do not be too rigorous with the sanding. Naturally, you must clean all the residue from the sanding away for your second coat.
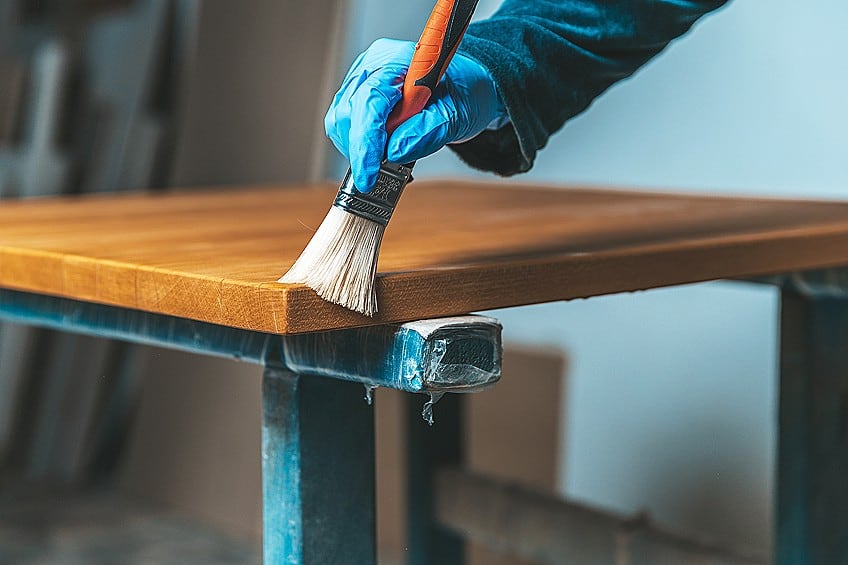
Applying Water-Based Polyurethane
When applying a water-based polyurethane varnish, you might have your work cut out for you if the piece of furniture has an oil-based finishing layer. If this is the case, you will need to roughen up the surface area you are going to be painting with the polyurethane to make it stick well.
The effect you will be left with if you avoid doing this will be devastating. Think of water trying to mix with oil – it does not work.
Both water- and oil-based polyurethanes follow the same methods of application. Basically, you must always paint in the same direction as the grain, and less is more, so always add a thin layer. The one benefit that a water-based polyurethane varnish has over an oil-based one is that there is a considerably shorter waiting period for the layers to dry before you can add the next one. You will need to apply three to four layers for optimal protection, but you only need to sand it down after the first layer.
Polishing the Finished Surface
After waiting for about 48 hours for the layers to dry fully, you can start to think about a polish if you so wish. The polish, also known as an automotive rubbing compound, can be applied and rubbed in circular motions with a damp cloth. A benefit of taking this extra step is the exceptional smoothing out of the surface, as giving it a final rub down will remove any small scratches made during the polyurethane application. Repeat this circular motion until the appearance of the polyurethane goes from slightly murky to a transparent and bright look. Alternatively, you can use the automotive polishing compound for a shiny result.
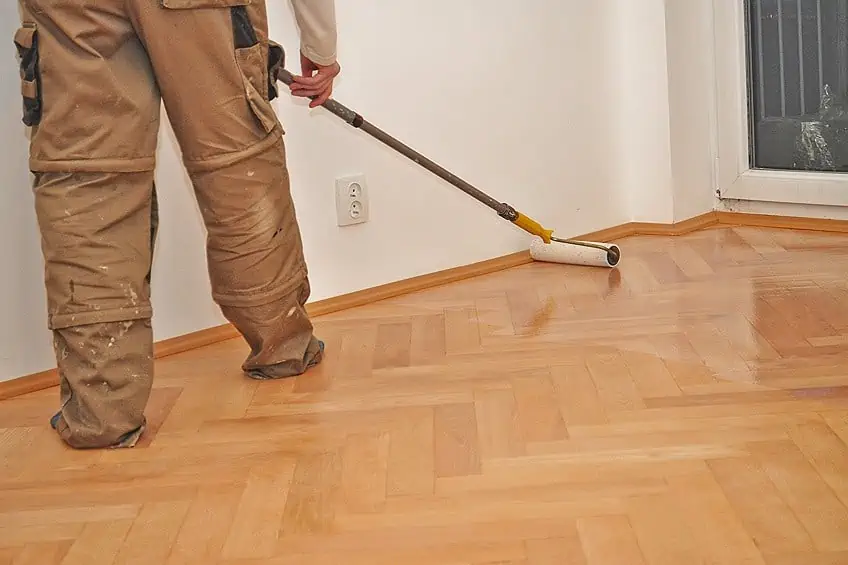
How to Apply Polyurethane to Wood Floors
If the job you are needing to complete is on a wooden floor, then you might be in for some intensive work. With the choice of different finishes, a polyurethane finish will provide a protective layer that will prevent any scratches from dragging furniture or dropping heavy items accidentally, not to mention making the grain of the wood shine in brilliance. There are two options for you when it comes to using polyurethane on a wooden floor – read further to learn more about both.
Tools and Materials
- Natural bristle brush for oil-based polyurethane, or a synthetic/nylon bristle brush for water-based polyurethane
- Protective gear, namely gloves and a respirator mask
- 36-, 60-, 120-, and 220-grit sandpaper
- Machine sander
- Masking tape
- Mineral spirits
- Vacuum cleaner
Time to Prepare
When you begin sanding your surface down, you must take care not to score the wood by sanding too rigorously or too hard. As with most projects, tidying up is the next thing in order. Use your vacuum or hoover instead of a broom to ensure you leave no dust behind. Once that is done, you can then use a cloth soaked in mineral spirits to clean away any residual dust particles, ensuring a completely clean surface.
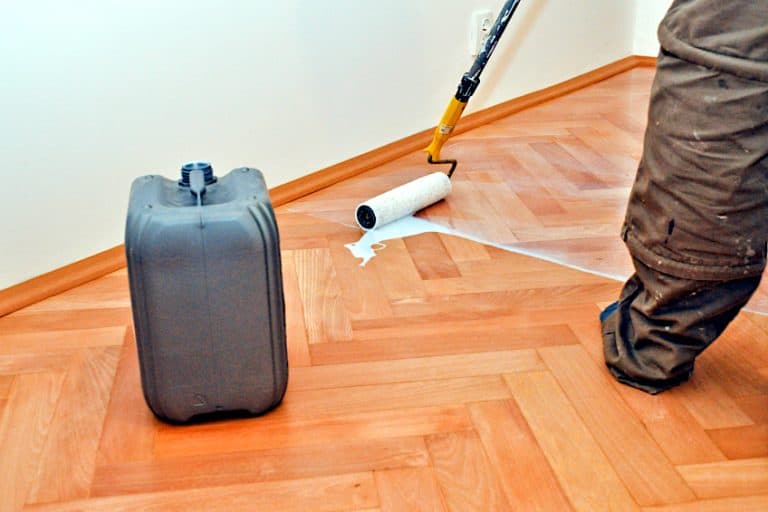
Polyurethane Application
Start by stirring the polyurethane, being careful not to create any air bubbles. Load your brush or your applicator with polyurethane. Start in a corner and work in the direction of the grain, about one foot at a time, using long strokes and overlapping as you go to provide an even coat.
Using your sandpaper, sand down the surface, making sure that you remove any drips, runs, or blemishes. Allow the first coat to dry completely before you apply the second coat, and be sure that you read the manufacturer’s instructions regarding the drying time and the recommended number of coats.
Can You Apply Polyurethane to All Surfaces?
No matter what project or surface you wish to paint with polyurethane, it will give it a finish like no other. Polyurethane is a highly versatile product and is designed to suit many types of jobs, both indoors and out. The only requirement is the appropriate preparation and clearing of dust as well as smoothing out the uneven surface.
Concrete Surfaces
If the surface you wish to paint is made of cement or concrete, then a layer of polyurethane will provide a more durable protective exterior than that of acrylic paint. It is also much thicker. Damages will be easily avoided and you will have the choice of using this varnish for both indoor and outdoor jobs. You will not have to worry about applying another layer for up to ten years, nor will it change in color to that undesired yellowish tinge.
Plastic Surfaces
These modern days are filled with plastic objects that ought to be protected from scratches, bumps, or environmental factors like the weather – especially in modern cars. Polyurethane will provide such protection, provided you treat the plastic to a primer first so as to ensure it sticks.
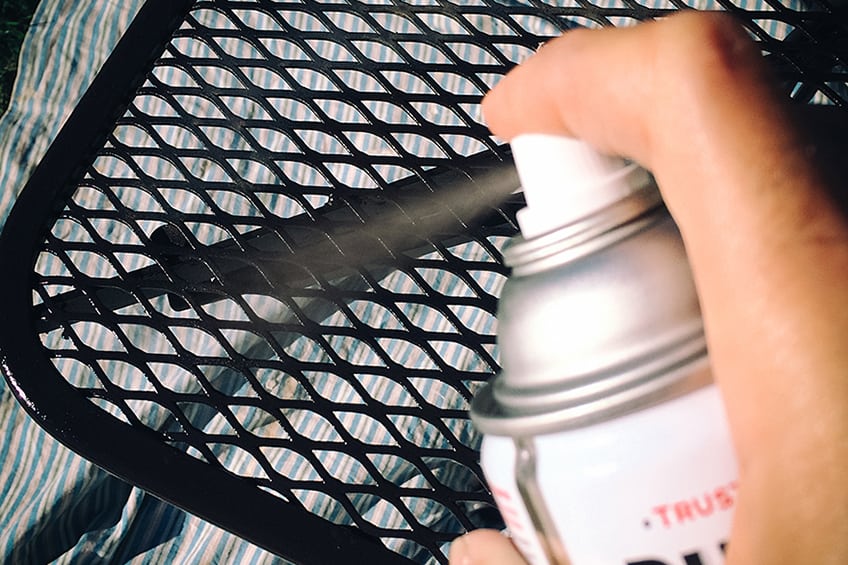
Metal Surfaces
Much like on plastic surfaces, metal surfaces require a primer to ensure that the polyurethane adheres. A polyurethane varnish is especially recommended for sealing metals like copper, aluminum, galvanized, and stainless steel.
Safety Considerations for Using Polyurethane
There are some strong chemicals in many of the polyurethane products, which emit fumes that can be harmful to your health. Safety should be your main priority, as it is ours, so we have laid out some ground laws for your consideration.
- Protective gear is a necessity. This includes safety goggles for any splatters that might catch your eye, safety gloves to protect your fingers from the chemicals, as well as a respiratory mask so that you do not breathe in the fumes.
- Make sure there is airflow. This prevents the fumes from becoming stagnant by bringing fresh air into your workspace.
- No smoking near the workspace. Polyurethane can easily catch fire so keep all flame-making objects far away. If possible, keep a fire extinguisher nearby.
- Store your polyurethane in a sealed tin, as well as at a cool temperature.
- Be aware of any toxic fumes. Oil- and water-based polyurethanes give off vapors that are harmful to our health. You can avoid inhaling these fumes by wearing a respiratory mask.
- Clean up after you work. It is never advisable to leave your polyurethane lying about when you are finished for your pets or young children to find. Clean up everything properly before you put your feet up for the night.
Frequently Asked Questions
Do I Need to Sand Before Applying Another Coat of Polyurethane?
Each layer needs to be able to stick easily to the previous one. If you sand each layer down slightly, then it will provide more grip.
Why Is My Polyurethane Yellowing?
This will only happen with oil-based polyurethanes. The UV rays from sunlight may cause this to happen, where over time, your polyurethane finish will develop a yellow-orange hue.
Can I Still Add Polyurethane to a Surface That Was Previously Painted?
If the paint is fully dried, it will not make a difference to the paint if you add polyurethane, apart from providing protection and enhancing the appearance of the surface.
How Many Layers of Polyurethane Do I Need to Apply?
Simply adding a single layer is not going to protect your wooden surface from much at all. You need at least four layers with water-based polyurethane, which is thinner, and a minimum of two layers with an oil-based polyurethane, as it is of a thicker consistency.
How Long Between Coats of Polyurethane?
With water-based polyurethane, the next coat can be added in 12 hours, more or less. With Oil-based polyurethane, the next coat can be added in about 24 to 48 hours.
How Do I Get Rid of Bubbles in My Polyurethane?
If you have time on your hands, you can wait for it to fully dry and then use some sandpaper or a sanding machine to sand away the bubbles. Another method is to take a mineral spirits-soaked cloth and rub the surface in circular motions over the bubbles until they are gone.
Can You Remove Brush Marks From Polyurethane?
You can remove brush marks by using fine sandpaper to sand away brush marks, ensuring that you do so evenly. To avoid brush marks, you can apply a thinner coat, as thicker coats tend to produce brush marks. If your work left behind some undesired marks from the brush, you can also get rid of them by lightly sanding them over the surface. Alternatively, you can try to apply the polyurethane in thinner layers as brush marks are left more easily with thick layers. Patience is key with this.
Can Polyurethane Be Thinned?
Polyurethane can be thinned, if you so wish, simply by adding either some water for water-based polyurethane or some mineral spirits for thinning your oil-based polyurethane products.

I have been into woodworking since 2005 and woodturning since 2011. Because of my love for wood and woodworking, I started woodhappen.com to teach other enthusiasts about how to finish and seal wood, the best woodworking tools, the different types of wood, and everything else related to woodworking! Read more about me here.