How to Make Wood Countertops – Easy Tips and Tricks for Building
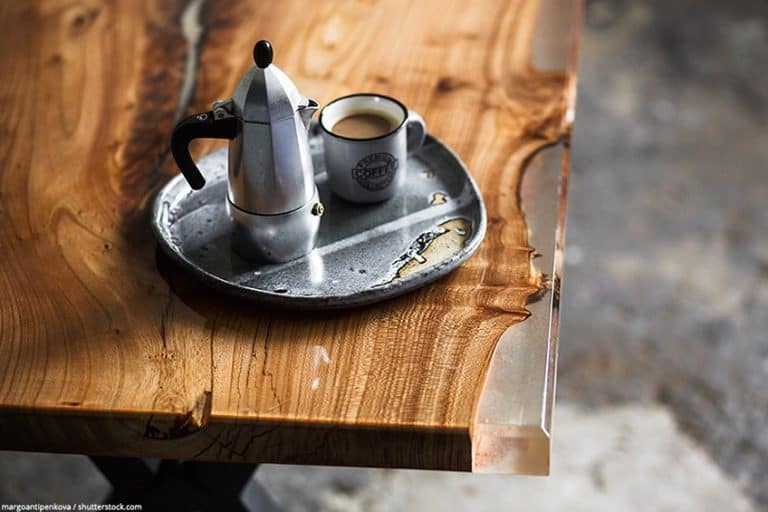
Marble countertops seem to be all the rage right now, but there’s something about the simplicity and elegance of a wooden countertop that remains timeless, despite the advent of materials like engineered wood and resin composites. Wooden countertops have a way of making a space feel cozy and rustic, so let’s have a look at how to make wood countertops including what you will need, which wood species are the best to use, and how to ensure your DIY countertop lasts for many evening meals, and presumably a few birthday celebrations too!
What Do You Need to Build a Wood Countertop?
Before we get into how to make wood countertops, we thought we’d show you some of the instruments and power tools you’ll need to ensure you are able to cut, treat, and install your countertop correctly.
Before you begin, double-check that all of your tools and materials have been assembled and are ready for use when needed.
Wood Board
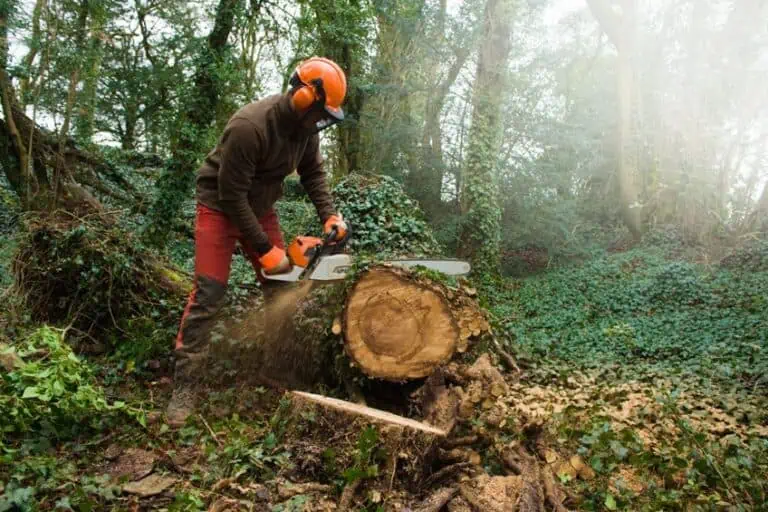
While it might seem quite obvious, it’s surprisingly easy to forget that among the plethora of tools needed to create a wooden countertop, you also need some high-quality wood. There are a number of wood species that have made a name for themselves as top-shelf countertop boards over the years, so you’ll have a variety of species to choose from ranging in price, durability, and scarcity.
Maple, teak, oak, walnut, cherry, and hickory are some of the favorites when it comes to wood countertop boards. These range in price and availability by region, but you’ll have a decent-quality countertop regardless of which one you choose. We recommend considering the price, ease of use, the size of boards available, aesthetics, and their treatability when considering which wood you want to use.
A Power Sander
Can you get away with sanding your countertops by hand? Sure. Will you probably be out of breath and miserable by the time you’re done? Probably. Wooden countertops are made of long and wide boards, so unless you have unlimited time and want to savor the experience, we recommend you get your hands on a decent orbital sander to make the process quick and easy. The best type of power sander to use when finishing wood boards are orbital sanders. The oscillating motion of the sanding pad provides an even, smooth finish that will allow you to stain and seal the surface of your countertop quite easily.
A belt sander can also be used, but unless you have experience using one for refinishing, you could find them to be a bit difficult to control.
A Table Saw
If you will be purchasing your wood board uncut you will need a means to trim and otherwise resize your board before the pieces can be joined, sanded, treated, and installed. One of the best tools for resizing boards of this size is a rip saw or table saw. If you don’t have one yourself, it can often be rented through various companies.

If renting a board or using someone else’s isn’t really an option for you, you could simply have your board cut at a lumber yard, hardware store, or creator space. Some establishments only offer wood-cutting services if you have purchased the wood from them, so if you find yourself in this position it’s always best to call ahead and make sure to avoid disappointment.
A Reciprocating Saw (Optional)
While this tool isn’t necessary, it can help you out a bunch. How? Reciprocating saws can be used to cut edges and holes into wooden surfaces. If you have a custom design in mind or need to alter your countertop to suit an unconventional space, having one of these around can save you a lot of time, effort, and frustration. Pretty simple stuff, right? Well, reciprocating saws aren’t all that cheap; they might not be worth purchasing if you’re only going to be using them once.
However, if you’re able to borrow or rent one for a day, you’ll be able to create holes for a sink, trim edges in a heartbeat, and even create holes for things like wiring.
A Hand Saw and Chisel
Hand saws are extremely useful and versatile tools for everyday applications. When installing a wood countertop, these can be indispensable as they allow you to make small alterations to the wood board without needing to go through a lot of preparation. They are great tools for altering the edges of wood board, cutting at odd angles, and even cutting trim pieces.
Chisels are also extremely useful wood crafting tools. How? Well, if you are going to use wood joints to join your boards together, you will need a means to mark and carve these joints. They are especially useful if you’re going to make use of biscuit joints and/or dowels as they allow for precision chipping at various angles.
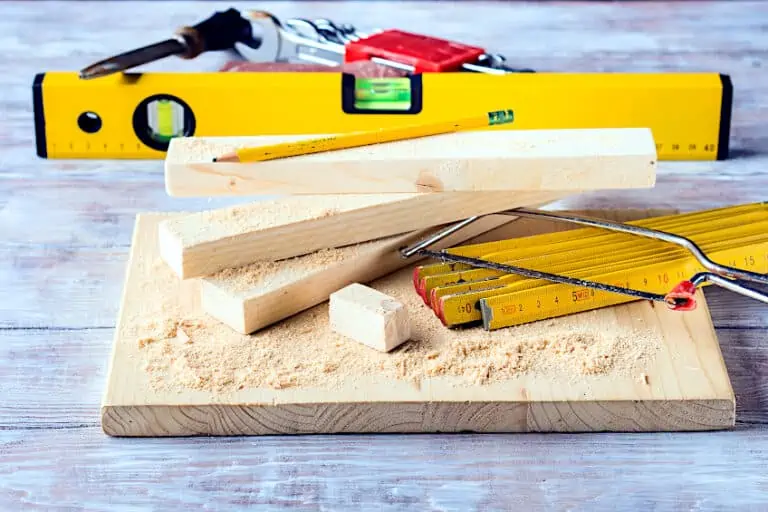
A Measuring Tape and Pencil
While you will need tools to cut and trim your workpiece you will also need to measure and mark areas that need to be altered. This is especially true if you have not had your board cut to size and shape when it was purchased. A good old pencil and measuring tape are the perfect tools for marking and measuring the surfaces and dimensions of your countertop boards. If you don’t have a measuring tape, there’s no need to panic. Measuring tapes are usually reasonably priced and can be found for sale at most home improvement stores and supermarkets.
If you don’t have access to these facilities, smartphones have pretty accurate measuring apps available too, even allowing you to save and convert recorded measurements.
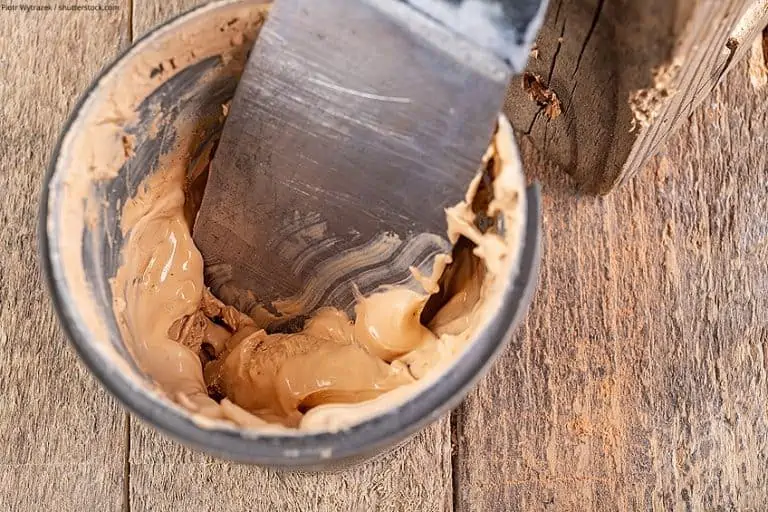
A Strong Wood Adhesive
While you will need tools to cut and trim your workpiece you will also need to measure and mark areas that need to be altered. This is especially true if you have not had your board cut to size and shape when it was purchased. A good old pencil and measuring tape are the perfect tools for marking and measuring the surfaces and dimensions of your countertop boards.
If you don’t have a measuring tape, there’s no need to panic. Measuring tapes are usually reasonably priced and can be found for sale at most home improvement stores and supermarkets. If you don’t have access to these facilities, smartphones have pretty accurate measuring apps available too, even allowing you to save and convert recorded measurements.
A Wood Sealer
A decent wood sealer is a great way to ensure that your workpiece is protected from external forces for the foreseeable future. Wood sealers are available in a variety of forms, but some of the most commonly used ones today are resin sealers. Epoxy resin makes for a durable and easy-to-use sealer, and you can still see your wood grain and color underneath it! Wood sealer can be found at virtually any home improvement store, and there are usually various types and brands to choose from.
Wood sealer is also really easy to use, all that you need to do is open up the container and apply the sealer to the surface of your wooden workpiece using a brush, roller, or paint sprayer and allow it to solidify and cure.
Wood Clamps
Wood clamps are some of the most useful tools to have when crafting. Wood clamps are essentially clamps attached to a threaded rod that can be tightened and loosened in order to hold two or more pieces of wood together. Wood clamps are super useful, and can be found at most hobby stores and home improvement stores too.
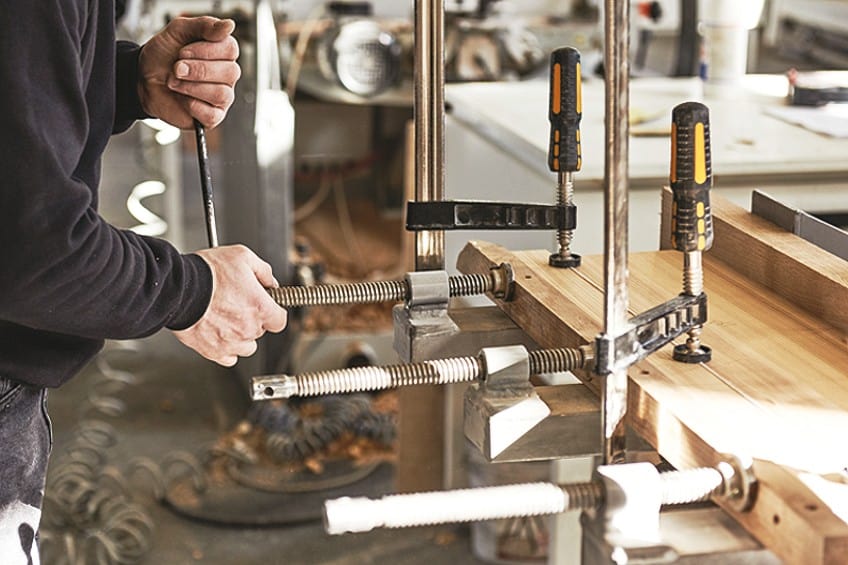
If you are going to make your own countertop, you’re likely going to need to use some clamps, especially if you are going to be using an adhesive to hold your boards together. They’re really easy to use too, but if you aren’t able to get your hands on some wood clamps at a store you can use leverage or weighted objects to hold your boards in place while your adhesive dries and cures.
Gloves and Eye Protection
Building wood countertop units fairly is easy, but just because it’s easy to do doesn’t mean you should disregard safety precautions. Wearing the right gear could potentially save your life and the lives of those around you should an accident occur, and we’re not even referring to a full set of overalls and hardhat. Simple personal protective items like a set of gloves graded for use with lumber, and some eye goggles will allow you to work unimpeded.
You will be well protected from splinters and wood dust entering your eyes and hands, as well as accidents that could occur should you place your hand too close to a blade or an unseen nail.
Choosing the Right Wood for Your Countertop
Building wood countertops can be challenging for a beginner, but even more challenging can be selecting the right wood for the job. We mentioned previously that there are many options to consider in terms of wood species, but there are other factors like color, tone, texture, grain pattern, and durability to consider too. For this reason, we have put together a list of the best wood species you can use for building wood countertop units.

Maple Wood
If you are looking for a strong and durable wood species, then maple might be just what you are looking for. Known for its rich color and impressive durability, maple is one of the most commonly used wood species when making wooden countertops. Maple tends to draw your attention through the use of its straight grain and largely uniform color pallet. Maple is therefore a solid choice when it comes to wood countertop materials. However, if you intend on staining your maple wood countertop you should know that the wood grain of maple board is tightly packed.
This can result in blotchy stains and paint jobs unless the wood is adequately prepared beforehand.
Oak Wood
If you enjoy a hearty wood that’s sure to last you a lifetime then we highly recommend you try out some oak wood. Oak can be rather expensive regardless of which genus you find yourself purchasing, so be sure that you really want this look and feel for your countertop before you commit to it. Oak is dense, heavy, extremely hard, straight-grained, and has tightly packed wood pores.
This means that oak can be challenging to both transport and install, but considering that oak has a tightly packed wood grain and high resin content that makes it impervious to insects and moisture, we think it’s well worth the effort. If you’re into the idea of an oak countertop try shopping around for the best deal, or looking for some reclaimed oak.
Walnut Wood
Walnut is a pretty high-end wood species that can be challenging to find at local hardware stores. However, if you’re able to get your hands on enough to make a countertop from (and don’t mind the exorbitant price tag) we think that you’ll be more than happy with the result. Walnut is heavy, dense, irregularly grained, dark in color, and has an interesting grain pattern. Walnut countertops look incredible and both walnut stains and pure walnut board are instantly recognizable by anyone who knows their wood species.
Walnut is also extremely durable, so in addition to paying for its rarity you’re also making something of an investment as your walnut countertop will likely last you a lifetime (and much longer if it is sealed and maintained correctly).
Teak Wood
Teak is another good example of a hard-wearing wood species that’s sure to leave you smiling years after your countertops have been installed. Take wood isn’t quite as expensive as walnut wood but it offers many of the same qualities and characteristics aside from walnut’s dark color scheme. Teak is moderately dense, has a light color to it, has a unique grain pattern, and is full of useful wood oils.
These wood oils make teak inherently resistant to the effects of moisture, and insect infestation. However, these same oils can make teak wood rather challenging to treat with wood stain as the wood has a tendency to reject the stain from entering its pores. With that being said, teak tends to add a lively, unique aesthetic when used as a countertop board and is sure to be a conversation starter.
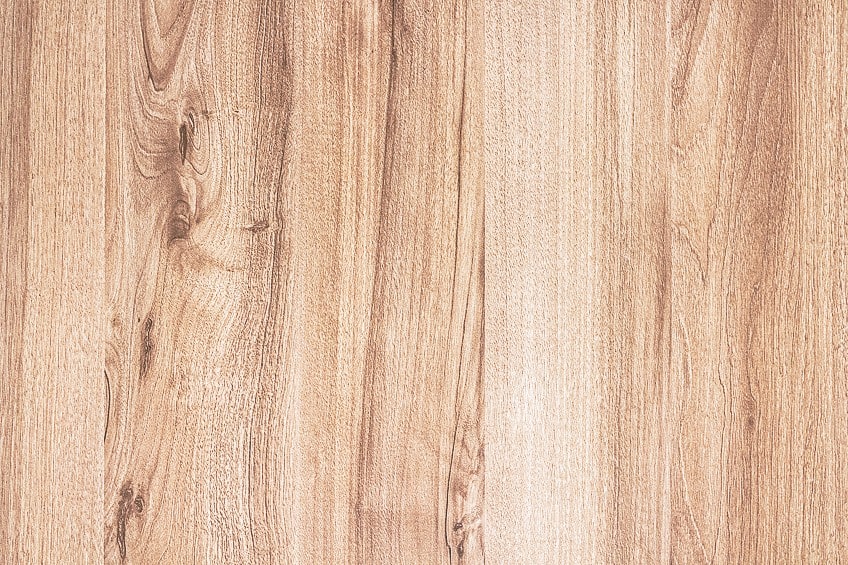
Birch Wood
If you’re looking for a counter that will function as a workhorse (for those who do a lot of cooking) birch wood is an excellent option. Not only is the wood an incredibly strong wood but also looks great and is used in a number of other applications where strength, durability, and longevity are the name of the game. If you would like to use birch wood to create a wooden countertop you should know that its grain pattern is curvy, so you would have the typical parallel lines that are often sought after with countertop wood.
It has a lovely brownish-red color to it that’s sure to breathe some life into your kitchen setting, and since it’s porous, it is easily treated using wood stain.
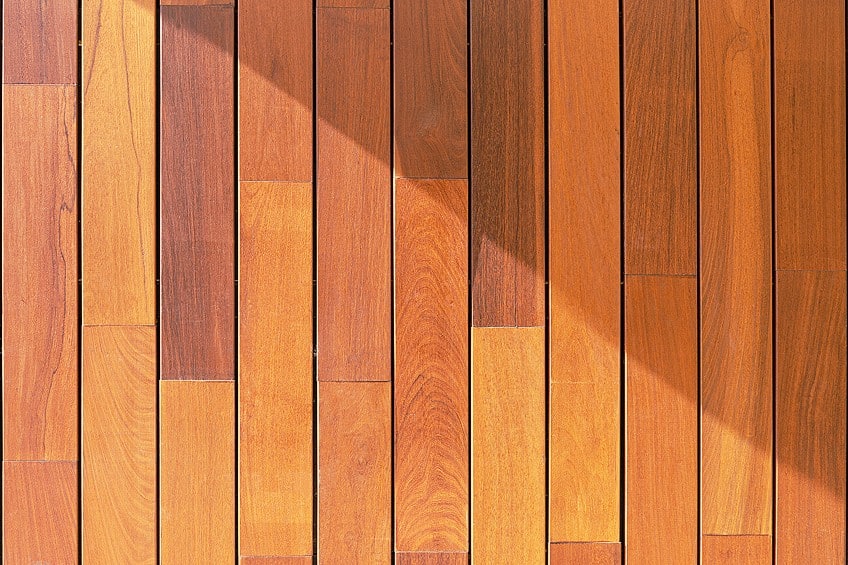
Butcher Block Countertop Wood: What Is It and Is It Worth Getting?
If you do a lot of cooking and/or preparation work for cooking, having a butcher block countertop can make your life much easier. You don’t really need a cutting board, and you have ample surface area to work with. What is butcher block wood though? All of the wood species we have mentioned above (excluding oak) are considered to be butcher block countertop materials.

The term refers to wood species that are incredibly durable and can be used in contact with food products when treated and sealed. These wood species are capable of withstanding impact, abrasion, heat, and cold, and tend to repel moisture quite well. With that being said, if you spend a lot of time in the kitchen, this could be one of the best investments you make.
How to Make Wood Countertops
It’s finally time to learn how to make wood countertops. Having the right wood and all the tools is a good place to start, but they’re pretty useless unless you know what to do with them. That’s why we’ve prepared a little tutorial for you detailing how to make wooden countertops from scratch, as well as some tips and tricks to ensure your countertops look as good as they possibly can.
Prepare Your Wood
Preparing your wood is arguably the most important step in countertop creation. Below are the basic steps you should follow when preparing your board for countertop installation. Keep in mind that some steps may vary depending on the shape of the countertop you are aiming for and the wood species you have chosen to use.

Sand Your Boards
We mentioned previously that you’ll need an orbital sander to pull this off, and it’s finally time to whip it out. Before you do though, give the surface of your board a quick wipe down with a clean cloth, and if it’s particularly dirty, use some water and soap to remove any grime present on the surface of the board. Once your board has been cleaned, allow it to dry completely. Next, use your orbital sander to carefully and evenly sand the surface of your workpiece.
The goal here is to rough up the surface for later treatment while ensuring that it is as flush as possible for use as a countertop later on. Begin sanding one end of the board and work your way to the other.
Sanding the surface of your workpiece is important, so be sure to work carefully and patiently. Remember that it’s super easy to remove material from wood but it can be twice as hard to replace material that you shouldn’t have removed. Once the workpiece has been sanded, remove any stray pieces of wood using compressed air or a clean cloth.
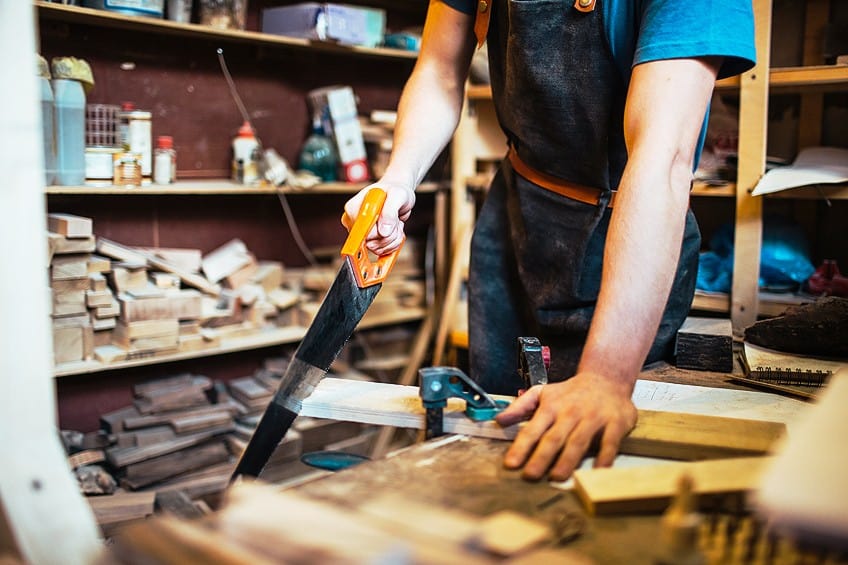
Cut Your Boards
Once your workpiece has been sanded you’ll need to ensure that your boards are the correct length and shape. This step won’t apply to you if you have had your board cut for you by the retailer, in which case you can simply move on to the next step. If your wood is uncut, you’ll need to measure and mark exactly how much material you would like to be removed from the board. One of the most important measurements and markings to make is on the edge of the board that will be in contact with your kitchen wall (if you’re not making a center island).
The best way to measure how much you need to take off is to physically position the wood against said wall, whip out your measuring tape, and mark where and by how much and where the board needs to be cut.
You can do the same with your center boards and the board that will function as your front-facing edge. Position the boards nicely and mark how much overhang you would like (if any) and where the boards might intersect with the rest of your countertops. Finally, if you intend on installing a sink inside your countertop, position the basin on the wood and using your measuring tape mark the outline and positioning of your sink. Now that your wood board has been marked it’s time for you to start cutting.
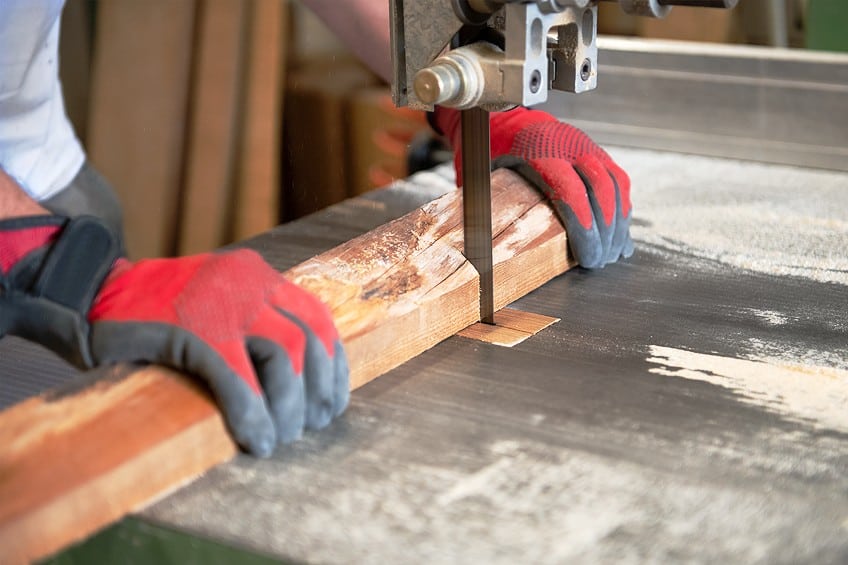
When altering the length of your board it’s best to use a rip saw, especially if you are cutting along the length of your wood. When cutting edges and shaping, switch over to your reciprocating saw and hand saw to save time and ensure you have an ample range of motion.
Ensure you wear your hand and eye protection during the operation.
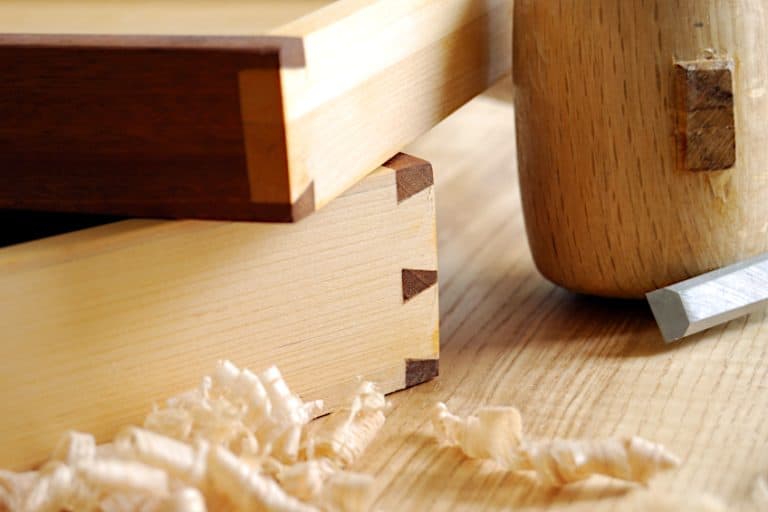
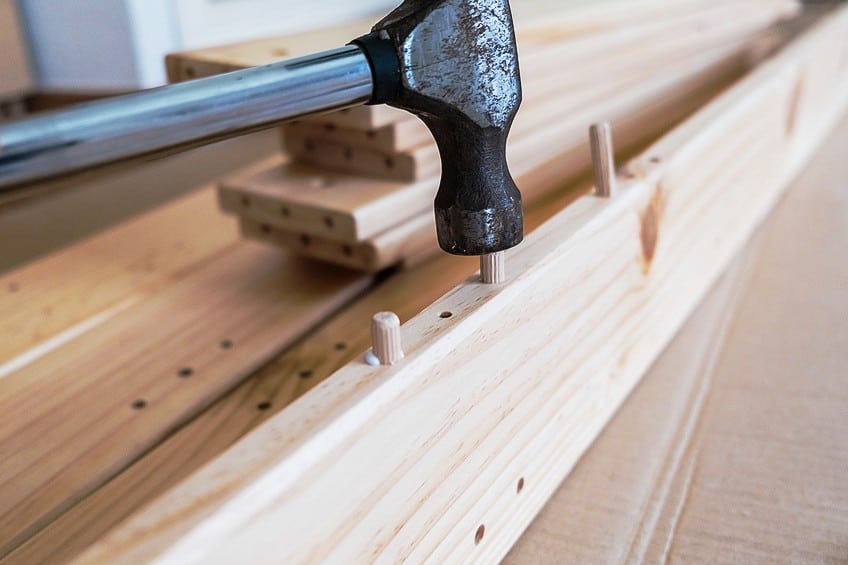
Join Your Boards
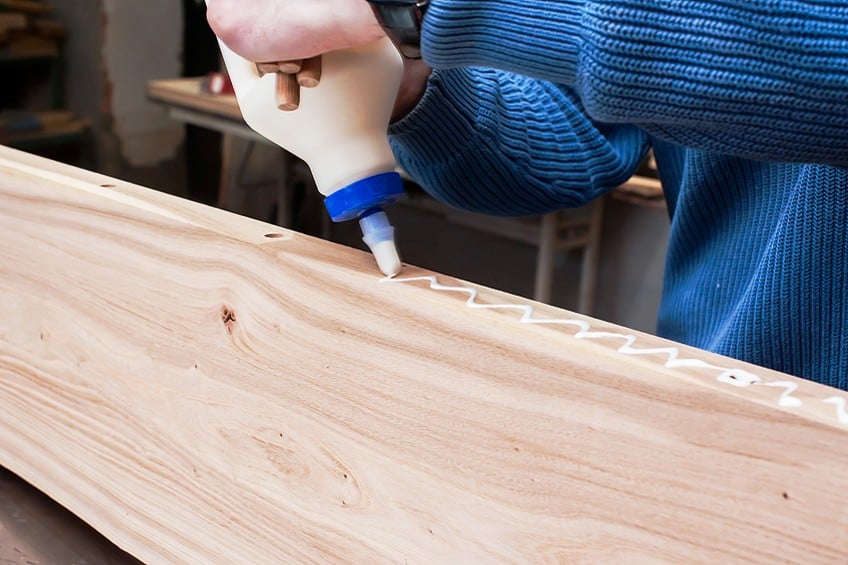
When it comes to joining wood board there are many options to choose from. After all, there are fasteners, joints, and adhesives. Using adhesives is arguably the easiest option considering that there are multiple boards you need to join and all you need to do is apply your adhesive and then join them. You also might want to invest in some clamps to hold your boards together while the adhesive cures. The first step you should take in joining your boards together using an adhesive is to clean off all the edges that will be receiving the adhesive compound. You can use a clean cloth with some water and soap to ensure that the edges are free of any foreign particles that might prevent the adhesive from bonding with the surface.
Once the board is clean give it time to dry completely.
Now apply your adhesive. There are many adhesive products to choose from these days, but you’ll primarily be choosing between one-part and two-part epoxy products. These are waterproof and are capable of withstanding a number of external forces like heat, moisture, impact, abrasion, torsion, and even corrosive chemicals. If you are using a two-part adhesive all you need to do is mix the two parts together (usually in a 1:1 ratio but it’s best to follow the manufacturer’s instructions) and apply it to the edges of your boards. Next, join the boards together and use your clamps to secure them in place until the adhesive has had a chance to dry and eventually cure completely. Be sure to abide by the instructions on the product’s packaging.
Applying a single-part adhesive works much in the same way, with the only difference being that you don’t have to mix two parts together in a separate container before it is applied. Drying time for adhesives of this nature is usually between 12 to 24 hours, so it’s best to leave your boards to ready themselves for a day or so before moving on to the next step in the process.
Install Your Wood Countertop
Now that you know how to make your own countertop surface, we thought we’d show you how to install it. Compared to creating your countertop surface, installing it is actually quite easy. Here is a short tutorial detailing how to ensure that the installation of your countertop goes off without a hitch, as well as something to avoid while you’re at it.
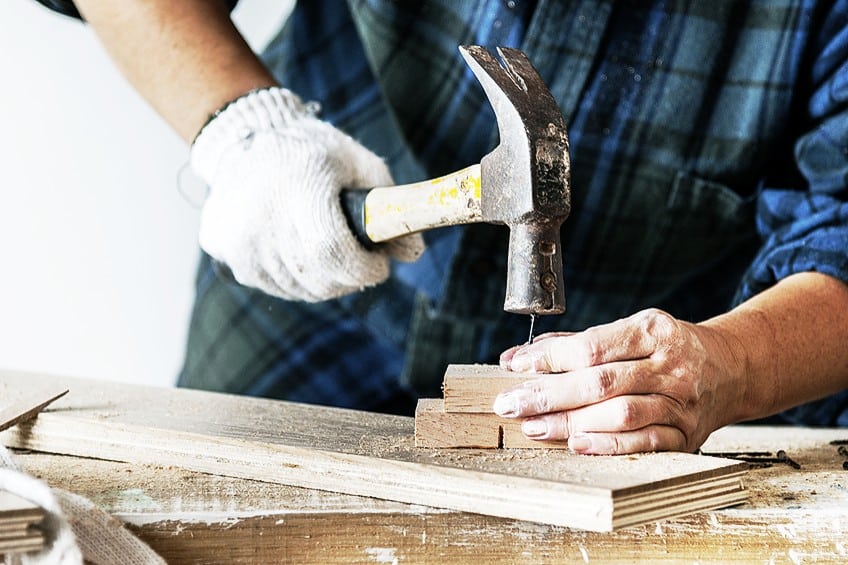
Using Nails (Optional)
One of the most common ways to install your newly made countertop to your existing cabinet support structure is to use some nails. Nails are excellent fasteners that are both easy to use and really cheap. Your nails can be installed with a hammer and some elbow grease, or you could get your hands on a nail gun and make quick work of your installation. Place your freshly made countertop on the structure , being sure to line up the edges and any other parts that you intend to secure up with the corresponding surface of your frame.
Next, simply mark the spots you intend to place your nails using your measuring tape, pencil, and chisel, and then get your nails ready.
Drive your nails into the surface of your countertop along the spots you have marked off, ensuring that the nails drive slightly below the surface of the board. Once you’re done, you can use some wood spackle to fill the little indents where the nails have been driven in. Allow the spackle to solidify according to the time specified by the manufacturer, after which the areas can be sanded flush with the rest of the surface.
Wood spackle and wood filler are available in a variety of colors in case you’re a bit concerned about the look of your countertop. If this still doesn’t quite fulfill your need for uniformity, you can rest assured that wood filler and spackle can be stained and colored to match the color of your countertop, which can be done before the surface is sealed.
Using Epoxy Adhesive (Recommended)
Epoxy is once again the easiest means of ensuring that your countertop adheres to your frame. All that you need to do is mix your epoxy together (if you have chosen not to go with a one-part adhesive) and apply it to the edges of the surface of your workpiece that will be in contact with your frame surface. Use a brush to carefully apply the epoxy to the underneath edges of your countertop.
Next, flip your countertop into position being careful not to touch the epoxy, and place it into contact with the surface of your frame. If any epoxy squeezes out between the two surfaces, use a clean cloth to remove the excess.
Place sufficiently heavy items on your countertop along the edges to ensure that the epoxy cures while both surfaces have maximum contact with one another. Follow the manufacturer’s guidelines regarding the curing time for the epoxy and only move on to the next step once this period of time has completely elapsed.
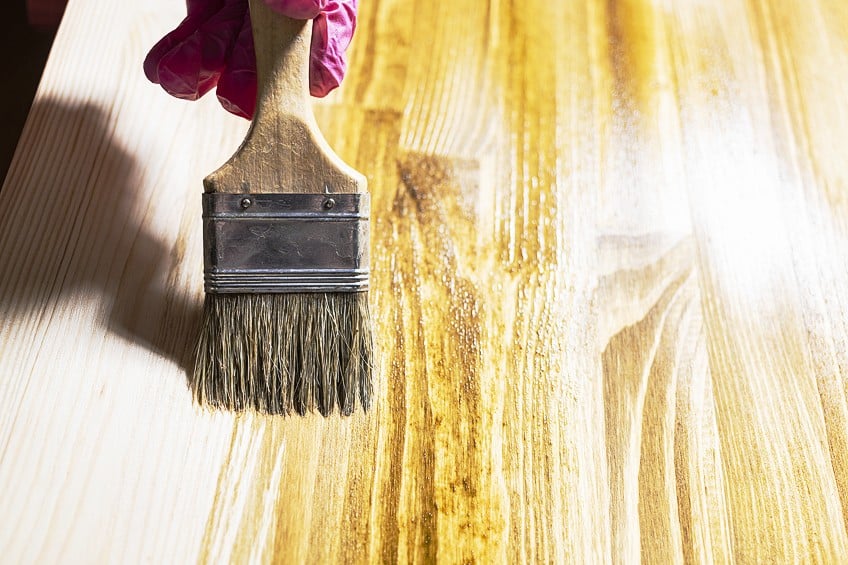
Seal Your Surface (Optional)
Sealing the surface of your countertop will ensure that it lasts for a really long time. It’s pretty easy too, since all you need is a brush and some epoxy resin sealer to get the job done. First off, cover the surface of your wall in contact with the countertop (and any other surface) with some painter’s tape. All that you need to do is give your sealer a good shake and pop it open.cYou can then pour some of it out into a separate container, or you can dip your brush right in. Start applying your sealer at one end of the countertop’s surface and then work your way to the other, making sure to apply it even while you work.
Should your countertop be especially long, try painting on your sealer in sections, being careful to lightly blend each section as you go along.
Repeat this application method until the entire surface of your countertop has been sealed. When you are happy with your work, simply allow the sealer to harden and eventually cure for a while as indicated either on the packaging or by the manufacturer’s instruction. Once this period has elapsed, you can finally make use of your countertop!
Epoxy, wood treatment oil, and even varnish can be applied using this application method. These sealers make maintaining the surface of your workpiece rather easy and will protect it from the effects of sunlight, water, food products, open flames, and even dents and scratches.
With that being said, although it is an option, sealing your workpiece is almost always a good idea.
Maintaining Your Countertop
Sealed countertops very rarely require maintenance. They tend to last for the lifetime of the workpiece, especially if you have applied a decent layer of epoxy. You can buff and polish the surface of an epoxy-sealed workpiece to remove scratches and stains, and if the surface has been badly damaged it can simply be sanded off and replaced.

Now you know exactly how to make a wooden countertop! Ensure that you select your wood wisely, that you wear all of the appropriate protective clothing, and that your workspace is well-ventilated when working with both epoxy sealer and epoxy adhesive. Be sure to allow all epoxy products to dry completely before attempting to make use of your new countertop.
Frequently Asked Questions
How Do You Seal Wood Countertops?
If you are attempting to seal wood countertops, you have a number of options. You can choose to use an epoxy sealer, some wood treatment oils, or some varnish. All of these sealers have their respective pros and cons.
What Are Popular Wood Countertops Finishes?
While wood stain, wood treatment oils, and varnish are all popular wood countertop finishes, epoxy is arguably the most effective. If you want to increase the lifespan of your countertop while ensuring that the surface is food-safe and impact-resistant, epoxy is objectively the best option to use.
Can You Make a Plywood Countertop?
If you’re wondering whether a plywood countertop is possible, it is! Plywood countertops are an affordable, highly-durable, and good-looking alternative to solid wood countertops. They can be a bit more challenging to install, but this is often well worth it considering the low cost and low maintenance that engineered woods like plywood offer.

I have been into woodworking since 2005 and woodturning since 2011. Because of my love for wood and woodworking, I started woodhappen.com to teach other enthusiasts about how to finish and seal wood, the best woodworking tools, the different types of wood, and everything else related to woodworking! Read more about me here.