How to Build a Wood Fence – A Guide to Privacy Fence Construction
Fences are a great way to ensure that you and your family are safe, to mark property lines, and make sure your dog doesn’t go about doing its business on your neighbor’s lawn. They can be made out of plenty of different materials too, and depending on what your budget, preference, and needs are you can slap together a fence in next to no time as long as you have the right tools, prepare yourself adequately, and are reasonable about the capabilities and application of said fence. This being said, let’s have a look at how to build a wood fence, what you will need, what the best way to go about it is, and some things that you can avoid in order to make the experience as smooth as possible once you get started.
When Is the Best Time for Fence Building?
Well, it would be quite impressive for you to undertake fence building in those cold winter months, the best weather (objectively speaking) for fence building is in the warmer season. Why? Well, the most obvious reason is that your extremities respond better in warmer weather which should minimize the probability of injury and/or incorrectly securing something.
Other than this, the ground is going to be frozen, and while it is possible to install a fence in front of bitten earth it is also significantly more challenging as our tools won’t work as effectively as they would in ordinary weather conditions. This being said, it’s best for you to get all of your fence building done in the warmer seasons.
Keep in mind that if you do decide to undertake to build a fence in the colder seasons, you’re going to need extra tools, not to mention that the cement won’t set in the manufacturer’s recommended drying time. Also, wood tends to absorb moisture quite easily so unless you’re using pressure-treated wood or pre-painted board, you’re going to run into some problems along the way. But, there are surprising benefits to building your fence in winter, provided your local climate allows for it.
What Type of Wood Should You Use in the Construction of Your Fence?
This really does depend on a number of factors. There are loads of durable wood types on the market and even wood that has been specially designed to resist damage and exposure to the elements. Even if you’ve chosen to use conventional wood and cut your pickets and frame on your own there are steps you can take to ensure your wood is protected.

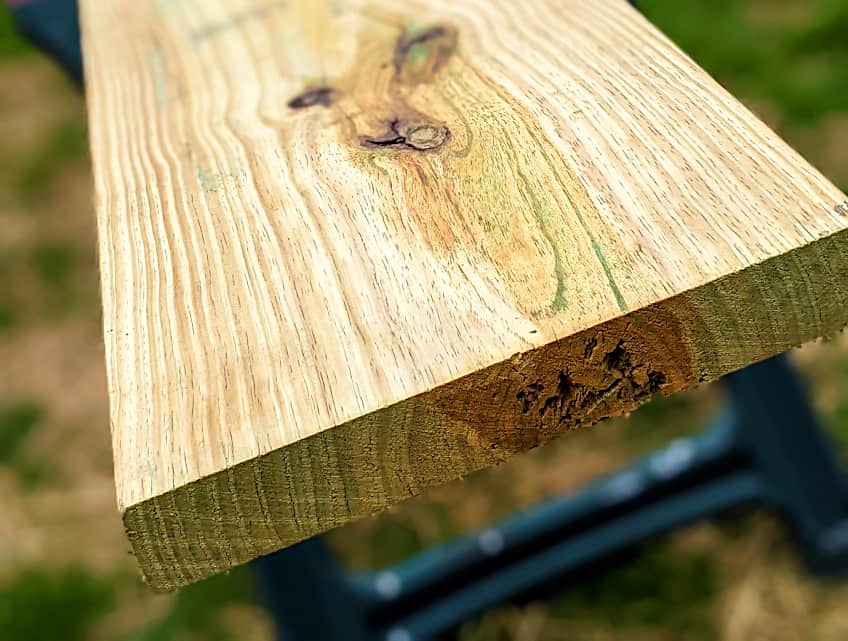
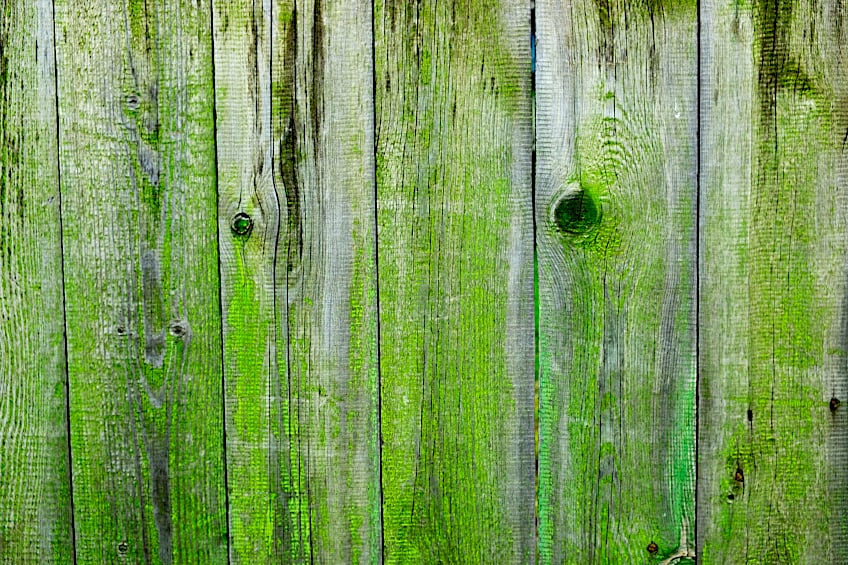
First off, the best wood you can use for wooden fences is hardwood such as Cedar or hardwood species that have been pressure treated and dried to ensure that they are highly resilient to things like insect infestation, mold, splitting, swelling, moisture, and prolonged exposure to heat. Pressure-treated wood lasts for a really long time and although it can be a bit costly, it is well worth the buy.

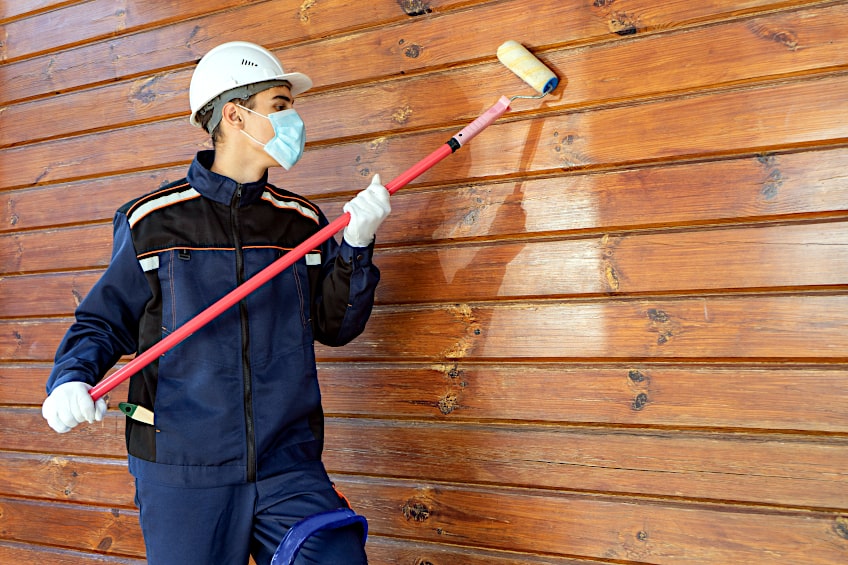
The other options available to you are wood coatings or wood treatments. Wood coatings are quite simply, wood paints and varnishes. Specifically, you can use oil-based paint or varnish to protect the interior and exterior of your wood while adding a vibrant color to your fence, or show off the wood grain. Oil-based coatings seep deep into the fibers of wood to ensure that they aren’t affected by external forces.
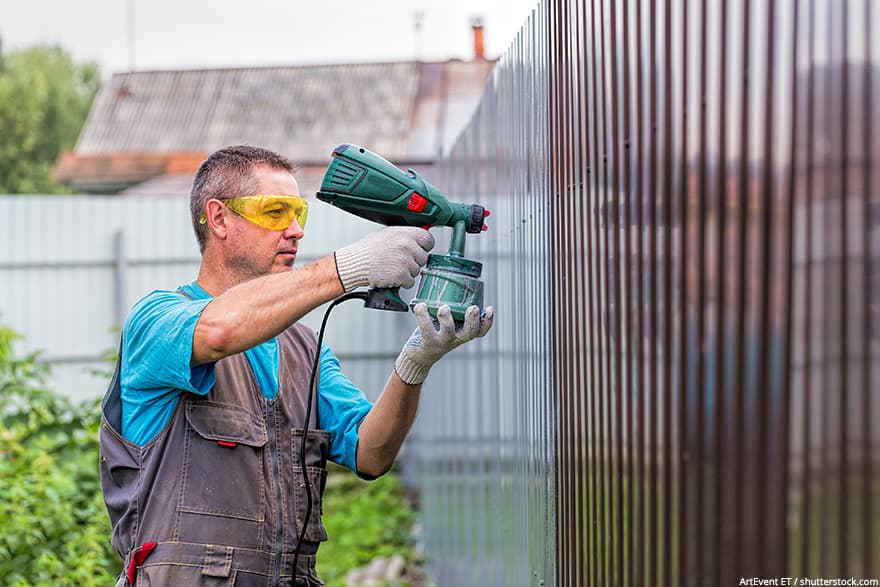
Alternatively, if you don’t like the idea of paint or simply want to enhance or deepen the color and grain of the wood you have carefully selected for your fence, you also have the option of staining your pickets and frame beforehand. This will take some forethought, but the result is well worth it considering that not only will your wood look great, but it will be protected on the surface and internally.
How to Build a Wood Fence
Building a fence can sound like a monumental undertaking if you’ve never done it before and while it can be labor intensive, isn’t really that much work. In fact, if you have a friend to help you out and the right tools for the job it can actually be lots of fun. This being said, let’s get into how to build a wooden fence starting with how to prepare your property and boundary lines.
What Do You Need to Build Wood Fences?
DIY wood fences can seem pretty simple but in reality, they can take a lot of time and effort to plan, not to mention the number of tools you’ll need if you’re going to be doing it on your own. Here are some of the tools you’ll need if you intend on tackling DIY wood fences on your own or with a buddy in the future.
- Hammer
- Spirit level
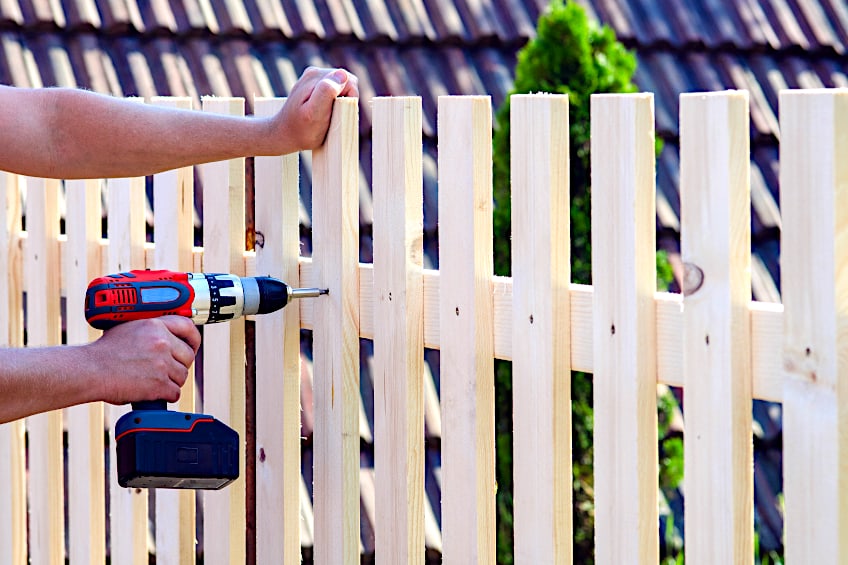
- A drill
- Epoxy resin
- A tape measure
- Post digger
- A shovel
- A marker/pensile
- Gloves
- Eye protection
- Wood steaks
- Post holders
- Fence posts (of your choosing)
- Pickets
- Cement mix (preferably quick-set)
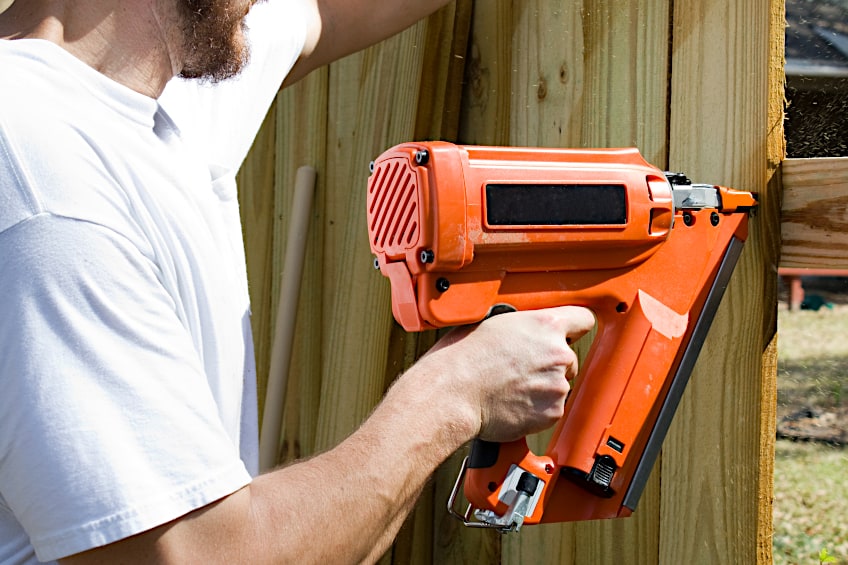
- Deck screws and/or a nail gun
Plan Your Fence Position
Before we get into how to build a fence let’s make sure that you’re within your legal rights to do so. Remember to check with your homeowner’s association, neighbors, and local ordinance guidelines to ensure that you’re clear to do so. It might take a lot of elbow grease to put a fence up but it can take significantly more to take it down in a hurry.
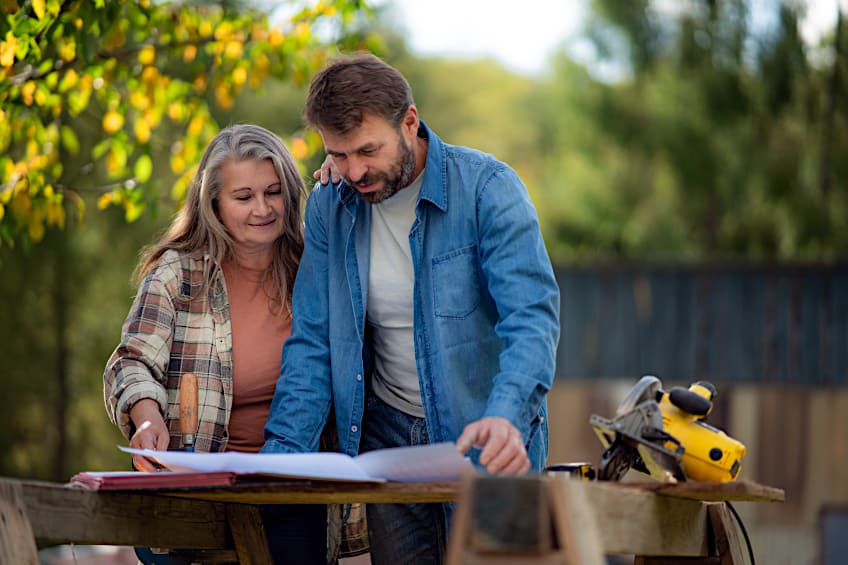
Once you’re sure you’re in the clear for the construction of your fence it’s time to get to planning. Planning out the exact location and space the fence will occupy is a great first step in the construction process. How do you do this? First off plant some posts and masonry lines to establish a visual layout of the size and even height of the fence you’d like to create.
This should give you a pretty good idea of whether the fence you have in mind is feasible, not to mention a rough idea of how much material you’ll be needing going forward. Once you have all of these variables established be sure to double-check that you have the exact length and width of the fence you’ll be making down before you go off buying all of your construction materials.
Mark the Posts of Your Fence
One of the most important steps regarding how to build a fence is to ensure that you have all of the posts marked out correctly. This will set the tone for how smoothly your construction process goes so take your time and be as precise as possible when you’re marking out your posts. How do you go about this, you ask?
For this step, you’re going to need a tape measure. Between each edge and each corner, you’re going to want roughly eight feet of distance. This distance can differ according to your preference and the material you’re using but considering that most wood fences are made of 2×4 boards eight feet should adequately space out your fencing boards without any overlaps.
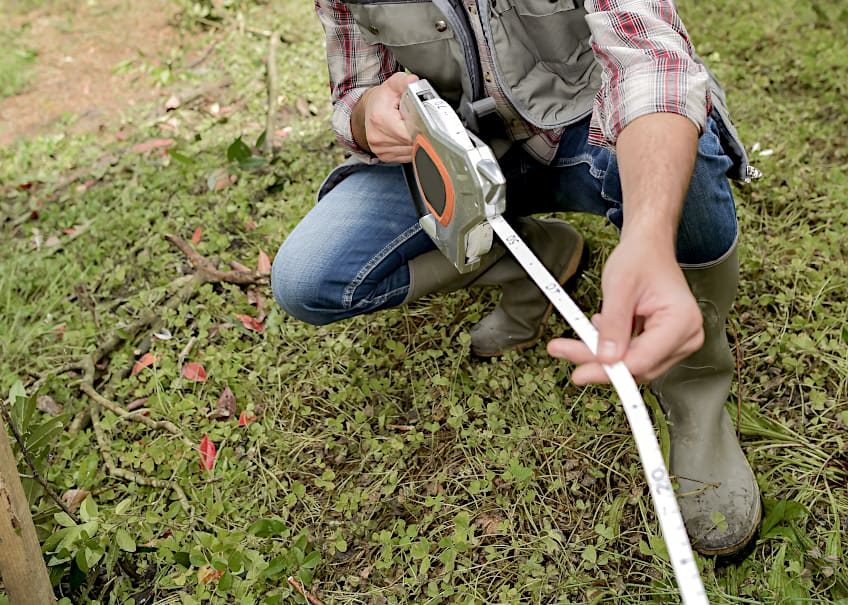
Once all of your post holes have been marked make sure the depth of each hole is adequate for the height of your fence. Some neighborhoods do have height restrictions or minimums on fences so be sure to check that all the intended height of your fence is in line with local regulations before moving on to the next step in the process.
Create Holes for Your Posts
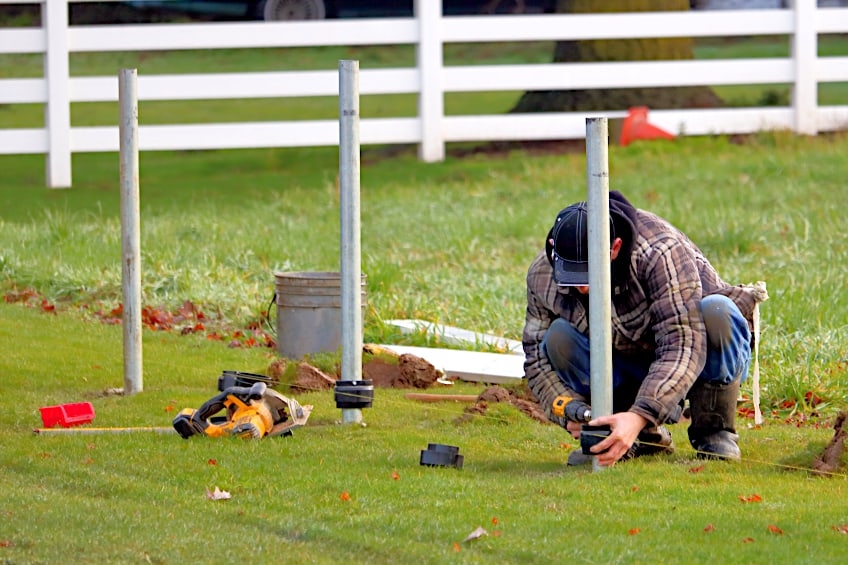
Once you’re marked out where your fence posts will be planted it’s time to get to digging the holes. This is a pretty important step because the post holes will determine how sturdy your fence is and considering that fences aren’t really easy to fix once they’ve been installed, we recommend doing a good job the first time to avoid any unnecessary work in the future.
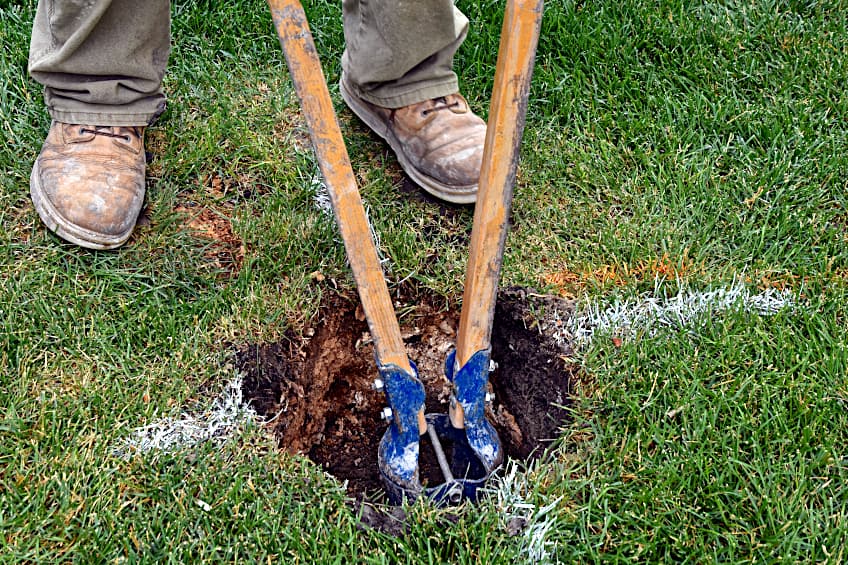
It should go without saying that if you’re going to be building a fence, you’re going to need a post digger. While building a fence without one is possible it’s best to use a post digger as opposed to a shovel to get the correct shape and depth, plus it saves you a lot of time and effort, both of which are valuable resources when constructing a fence.
Typically, you want holes that are around two feet deep and 12 inches in width to achieve the correct height and stability for your fence posts. This is also ideal considering that most fence posts you find in-store are around eight feet in height which means you’ll get that perfect six-foot height. Also, watch out for large objects while digging, and be sure to deposit the excess earth in one spot so it’s easier to relocate later.
Cement Your Fence Posts Well
As we mentioned previously when attempting to build wood fences it’s really important to secure your fence posts in a manner that they won’t be deterred by things like strong gusts of wind or medium weight being leaned against it. This being said, what’s more, sturdy than cement? Mix some cement together (rather too much than too little) and get a buddy for this next step.

The idea here is for one of you to hold the post in place and the other to pour the cement into the holes the post is in. Alternatively, you could pour the dry cement mixture into the hole and add water while mixing the two together with a shovel, but this means that your buddy will be holding the post up for longer, and you won’t be able to manage the consistency of the mixture as well.
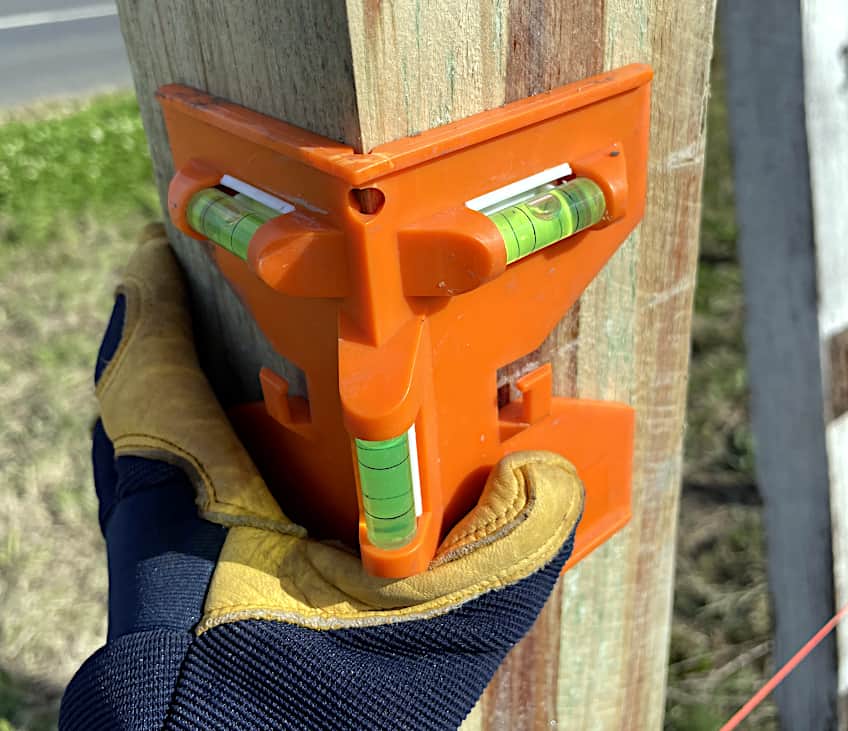
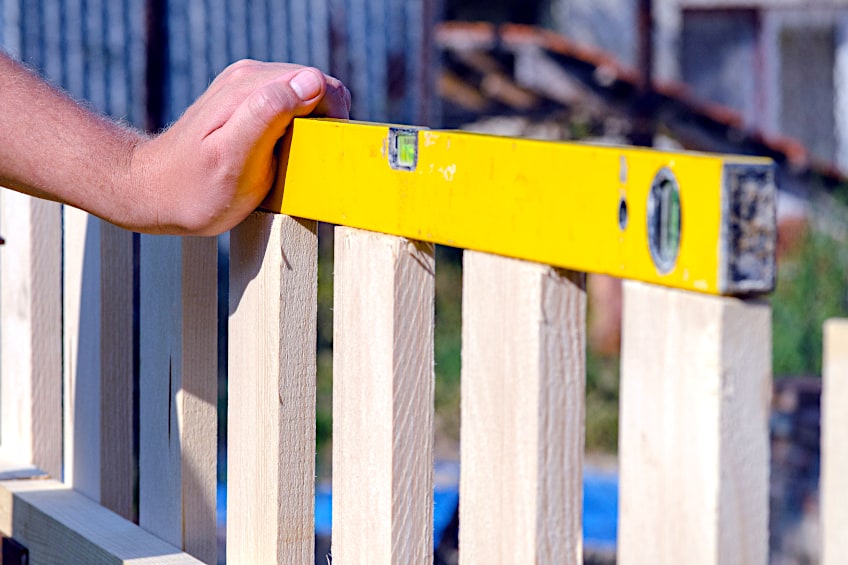
Once the hole has been filled you should get your hands on a spirit level while your buddy holds the post upright. Why? You need to ensure the post is as level as possible while the cement solidifies. Be sure to get it as level as possible as this will affect the overall look and stability of your fence. Be sure to use stakes to keep your posts upright while the cement dries and repeat this process until all of your posts have been set.
What Happens if You Have a Rock Base?
It’s easy to forget that although it might be our property, the earth really doesn’t care, and as a result, you may run into some rocks or an entire builder beneath the surface you’re digging into. This being said, how do you go about posting your fence? Well, unfortunately, you’re going to have to get rid of them either by means of using a pickaxe to break them up first or if you’re dealing with a reasonably sized rock, dig it out of there with a shovel.
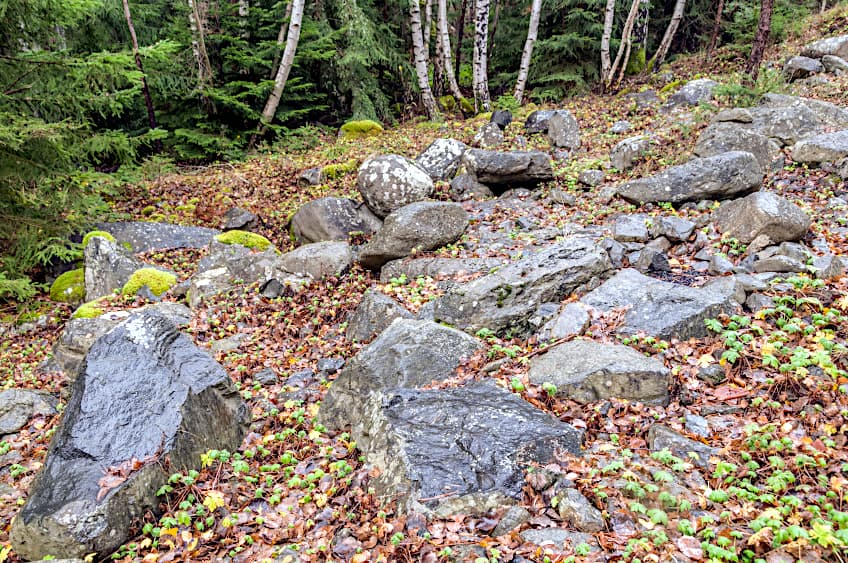
Alternatively, if you run into a solid rock base, you’re going to need to take things a step further. Drill a hole into the rock base and clean out the recess with some compressed air. Once the hole has been cleaned out pour some epoxy adhesive into the hole and allow it to cure. Place a post anchor into the hole, ensuring that you position it correctly, and then place your post into the post anchor and fill it with cement, not forgetting to add struts to ensure the post remains upright while the cement dries.
This can be a bit tricky especially since you’ll have to purchase/ rent all of the extra equipment in order to get the job done, which can really ruin your day if the project is time-sensitive. This being said, survey your soil beforehand to determine if you’ll need to take these steps. This can save you loads of time, money, and frustration down the line, plus you’ll get to know your property a bit better along the way.
Connect Your Fence Posts
Once you’ve allowed the cement to dry for the manufacturer’s recommended time period, check the stability of your fence posts to ensure that they’re ready for the next step in the process. Remember that things like humidity and low temperatures can affect the drying time of your cement so be patient and make the environment as conducive as possible to the drying process.
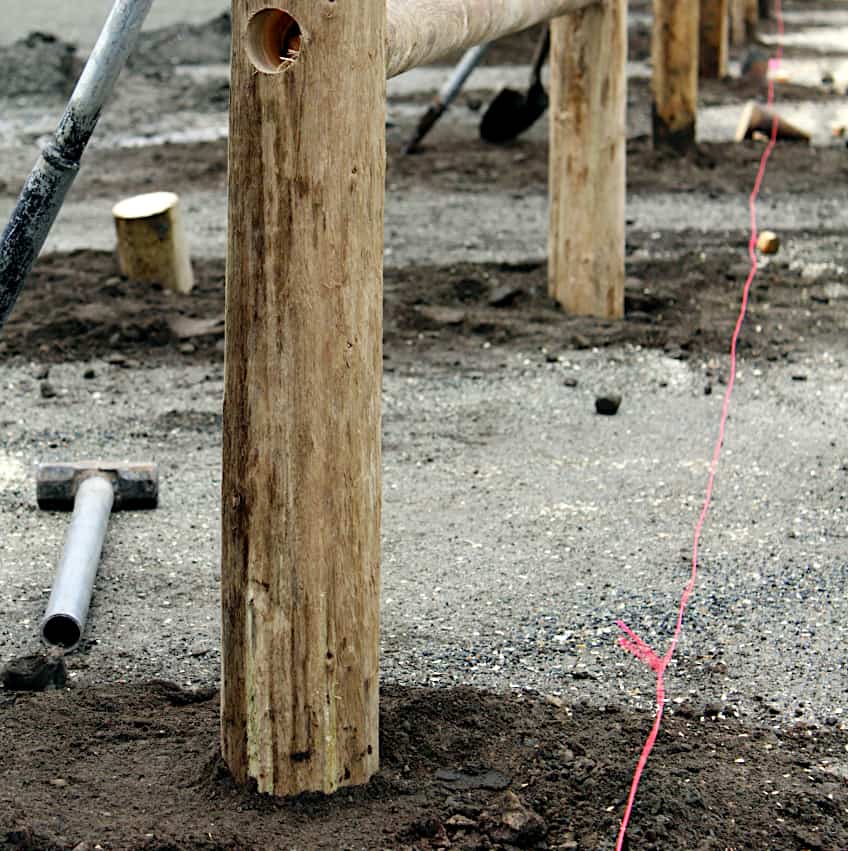
Once you’re convinced that your posts are ready it’s time to connect them. Privacy fences usually start about eight inches off the ground so that is where you’re going to mark the location of your first holder on each post, measuring up from the cement base of the post. For the top rail, you’re going to measure eight inches from the top of the post downward and mark each post accordingly.
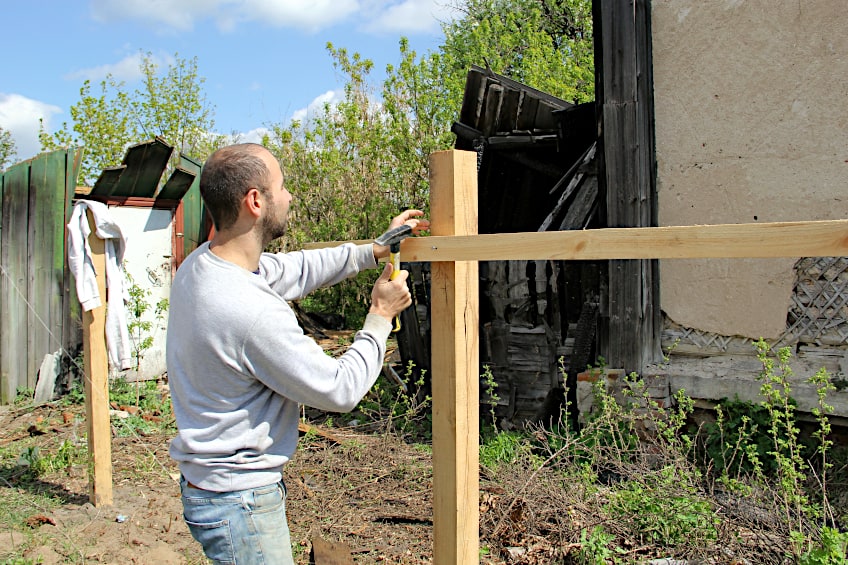
As for the middle post, you can mark at roughly two feet between the existing two markings. Once all of your positions have been marked on the post it’s time to install your rail brackets. These should be pretty sturdy to ensure that your boards don’t bend or twist over their lifetime, so we recommend using ones with more than one mounting point.
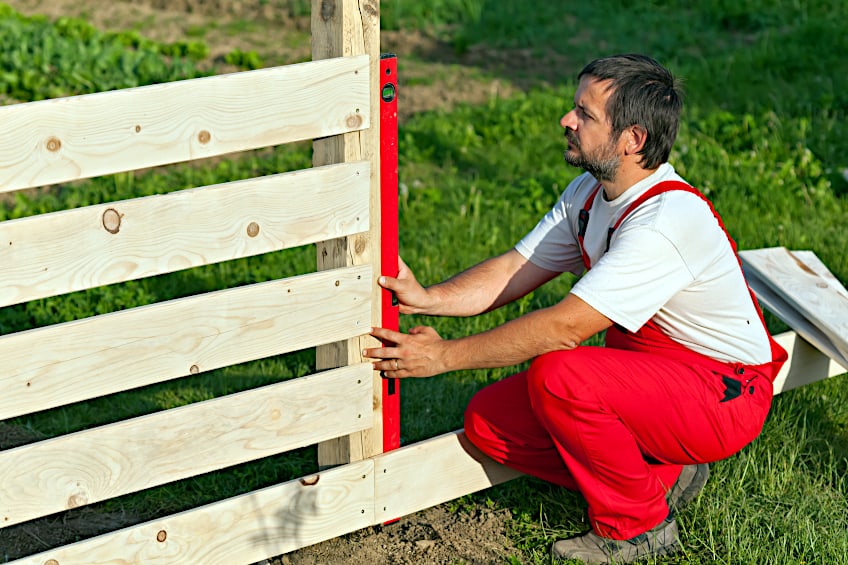
Once your rail brackets have been mounted you should ensure that they are all level to ensure symmetry throughout your fence. You can do this by using a tape measure and spirit level. Next, place your 2×4 boards into the rail brackets ensuring that they sit nice and flush with the metal of the bracket. Once you’re satisfied, fasten the board to the brackets.
Repeat this process until all of your posts have the connectors between them. This can take a while so do your best to remain patient. The last thing you want is for your connecting boards to be off-center and ruin the look of your fence, so take a deep breath and work diligently when installing these.
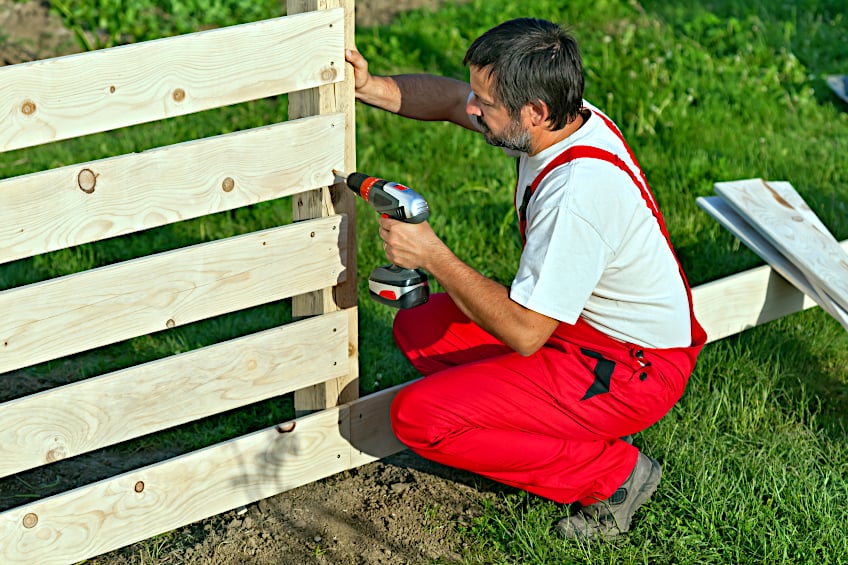
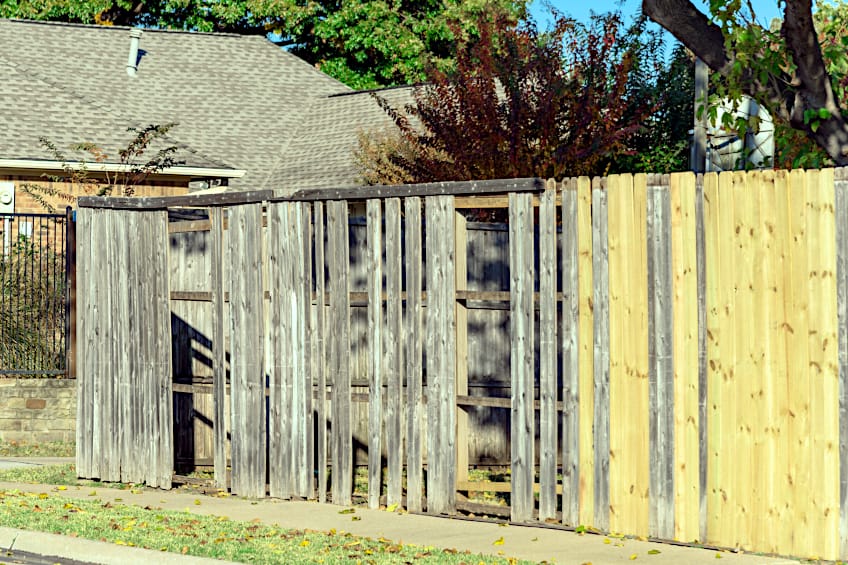
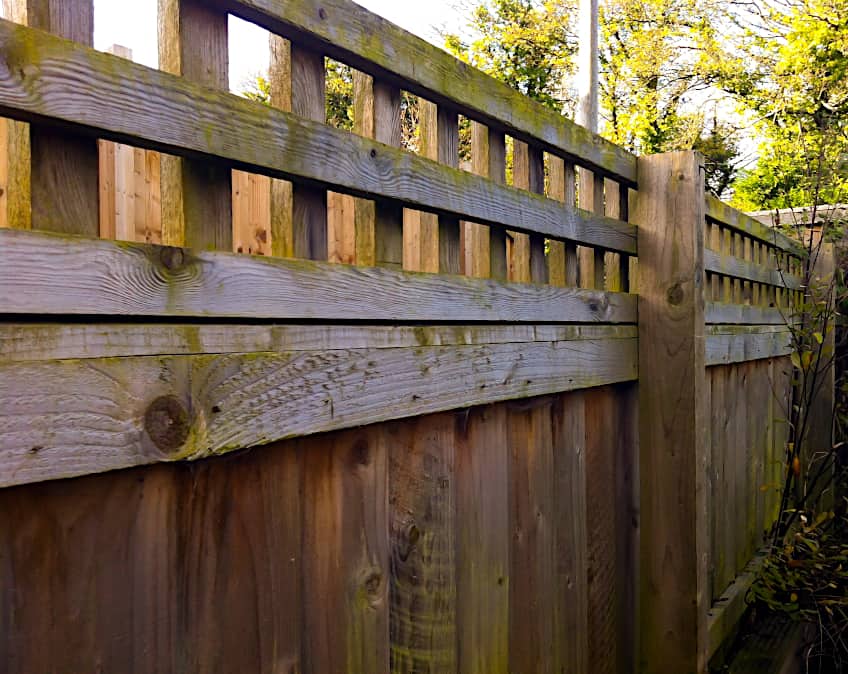
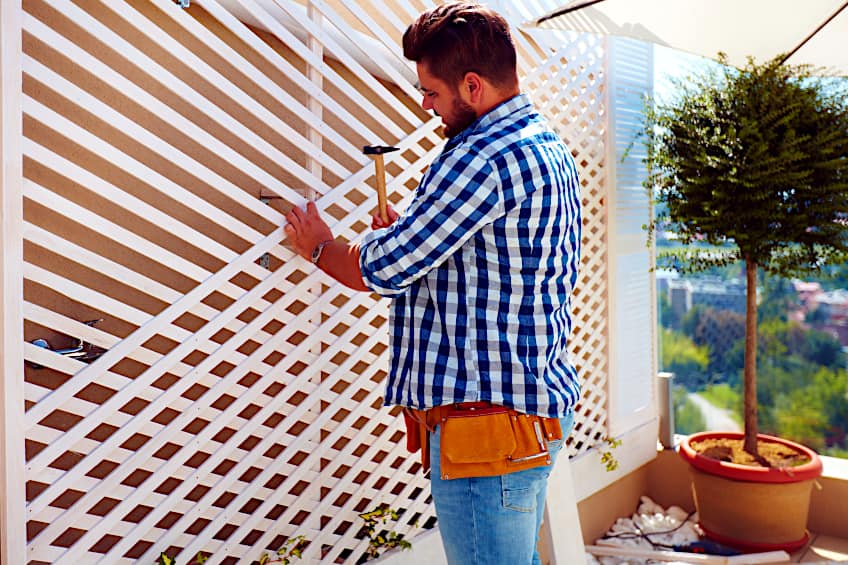
Install Your Fence Pickets
Now that you have all of the frameworks out of the way, it’s time to get to work on installing the pickets on your fence. Selecting the right type of wood for your pickets and/or a means of preserving them over their lifetime can be tough, so make sure you know what type of wood you’ll be using for these well in advance. After all, moisture, insects, and general exposure to the elements can take a toll on your pickets.
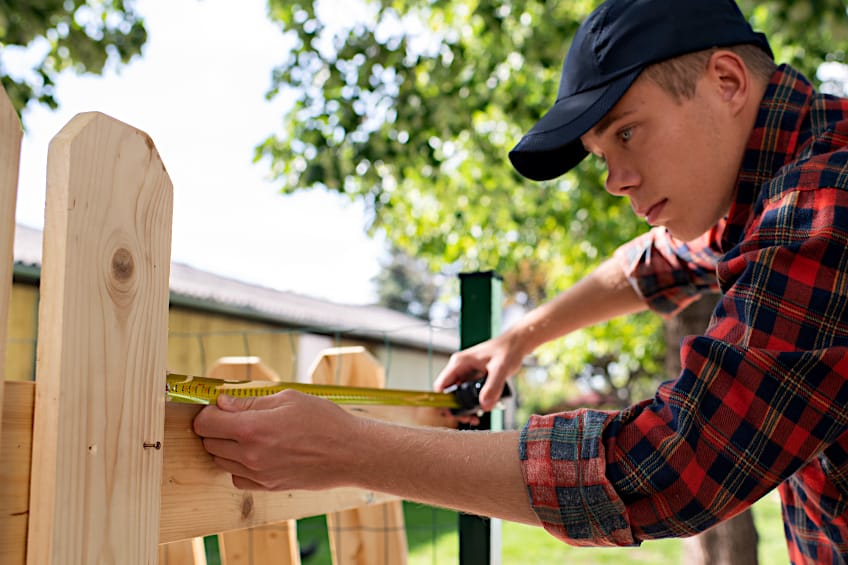
Installing pickets is labor-intensive but pretty straightforward. Line the pickets you have chosen up against your freshly constructed frame to get an idea of how many you will need for the job, as well as which ones need to be cut and how many nails you’ll be needing for the process. While having a nail gun in this scenario can save you a lot of time and effort, using a good old-fashioned hammer can be rewarding and gives you that extra sense of accomplishment. You do of course, also have the option of screwing your boards to your rails.
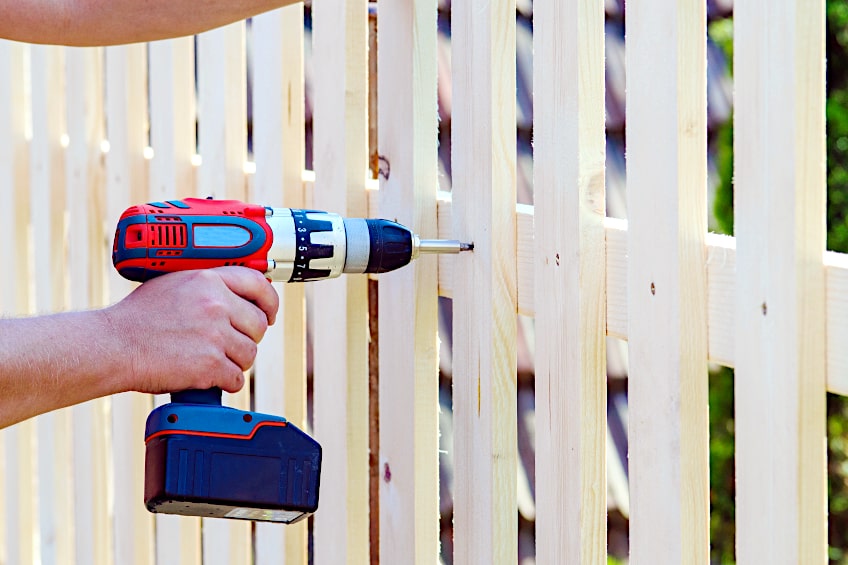
If you’re using deck screws it should only take you about two deck screws per rail, and since you have three rails running across your frame, you’ll need roughly six screws per picket. Star at one post and work your way down to the next, ensuring that there is little to no gap between them for maximum privacy. Repeat this process until you have completed your fence.
Is Building a Fence Dangerous?
While any activity has an inherent degree of danger attached to it, building a fence has some unique hazards that you should be wary of before you get into it. Remember that the size of the wood boards you’ll be working with aren’t exactly small, and besides their weight, if you’re working on a windy day they can be thrown about with relative ease if you aren’t careful.
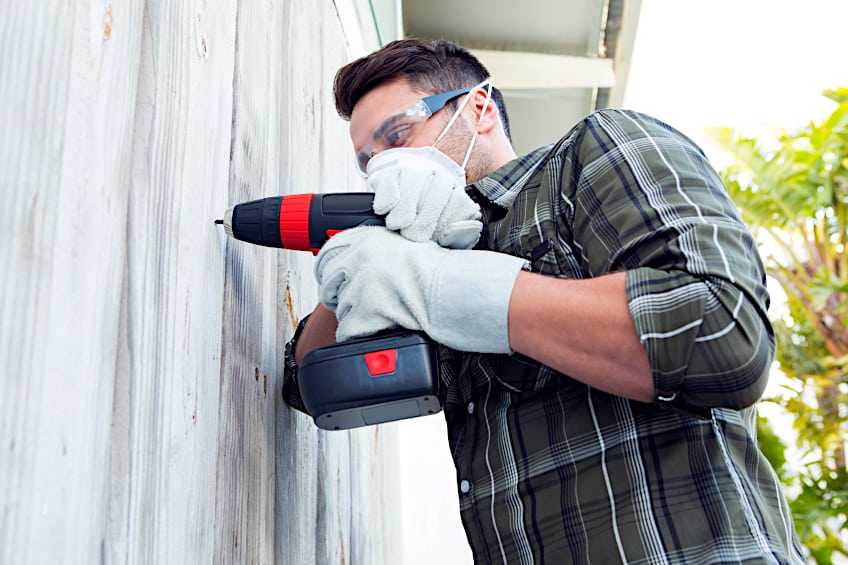
Besides the wood itself, you should always wear the appropriate personal protective gear when working with tools or any materials that debris could cause you bodily harm. This includes s set of gloves graded for use with lumber and some eye protection to ensure any wood shaving stays as far away from your precious eyeballs as possible.
Finally, if you’re not up for using deck screws and instead opt for using the nail gun then be extra careful. This is essentially a projective weapon so be sure that the safety is turned on or that the device is powered off completely when it isn’t in use. Finally, ensure that you use your legs and arms to live and install the boards to avoid any stress injuries.
How Should You Maintain a Wooden Fence?
Wood is not the most durable material on earth, but it tends to last a reasonable amount of time if you maintain it correctly. How does one go about this though? Maintaining a fence has a lot to do with being vigilant. Checking the fence once a year to see if any boards have become loose and investigating points where rot may have begun to enter the wood grain is the best way to ensure that your fence doesn’t fall apart.
You should also do your best to ensure that plant life doesn’t take root on or around your fence posts. As beautiful as crawling ivy is, these plants can cause a fence to start to bend and eventually break under their weight, so if you do have any trees and/or shrubbery near your fence ensure that they are pruned to prevent any degradation to your fence pickets.

Wood also tends to split and crack over time thanks to changing temperatures and its tendency to expand and contract. If you see any splits or cracks during your yearly inspection, use a waterproof wood filler to fill in those recesses as this will prevent any further damage to your fence, and prevent potential rot from spreading to the rest of it. Then apply a good quality preservative sealer.
We mentioned pressure-treated wood previously, and although it is very resistant to moisture-related issues it’s not completely moisture-proof. This being said, ensure that your fence isn’t exposed to unnecessary moisture such as the spray of sprinkler systems. This will ensure that the life of your fence is extended significantly.
Finally, once a year be sure to check your fence for things like moss or nearby nests. Removing moss is pretty easy and there are even products out there to ensure that it doesn’t return to your fence posts, but if you have a nest of birds or other critters you should consult your local municipality regarding the right way to deal with and/or relocate said wildlife.
Finally, every five years or so do a full overhaul of your fence as is necessary. How do you do this? Well, all you need to do is remove any moss and dirt as you usually would and then apply a sealer to repeal any moisture. If there are any planks that have been corroded and are no longer suitable for use, be sure to replace them as soon as possible while not forgetting to treat the new boards as you have the existing ones.
Are There Different Types of Wood Fences?
While you might know how to build a privacy fence, there are many other options besides this relatively basic one. Let’s have a look at some wooden fences you could come across and even build should the mood take you, as well as where they’re best suited around your property.
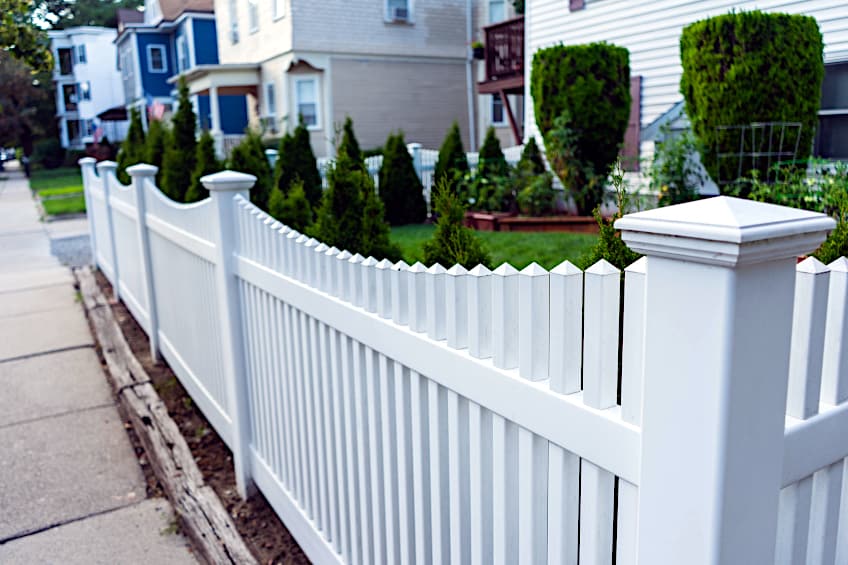
The Wood Picket Fence
These are the fences you’ll find on magazines covered depicting the American dream. They’re usually around four feet in height and are there to display property lines as well as to discourage people from simply climbing over them (which is what the sharp pickets are for). They’re usually found in front yards, gardens, and even pool enclosures.
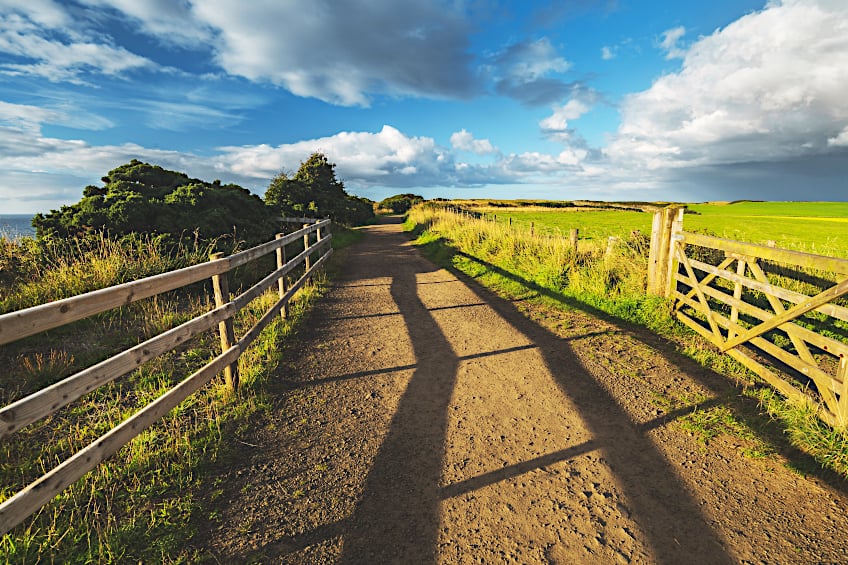
The Post and Rail Fence
The post and rail fence are the most basic ones you can construct on your own and can be found in most rural areas. They are easy to construct and pretty cheap too. These are used to display lines between properties and to enclose fields holding livestock and/or crops. All they really consist of are posts and three to four rails.
The Lattice Fence
If you’re looking for a fence with loads of aesthetic appeal that provides some privacy too, why not consider a lattice fence they have cross-crossing lath strips that create the illusion of intricacy while allowing maximum airflow and ensuring that you and your loved ones are out of sight. They also make a great base for climbing plant life. They’re suitable for patios, gardens, decks, and even pool barriers.
The Louver Fence
Sometimes the most aesthetically appealing designs are the simplest. The louver fence is just that, louvers placed vertically as poses with staggered boards running horizontally to obscure line of sight. This means that you have all the privacy you and your loved ones could ever need without compromising on airflow or looks. These are best suited for decks and patios.
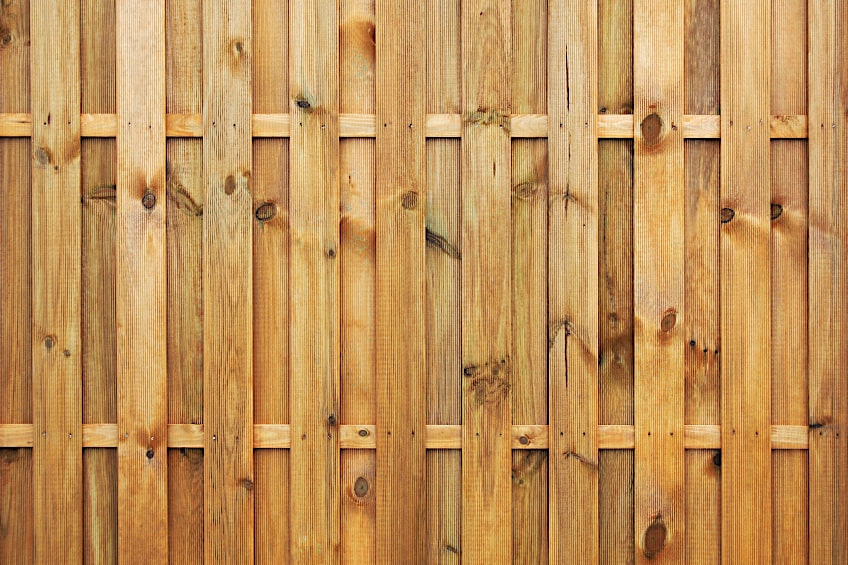
The Vertical Board Fence
If you’re looking for a way to ensure that you have a way to block out the wind and get some privacy without having to construct a solid fence, then why not give the vertical board fence a try? Essentially this is a basic frame with vertical boards on each side, which overlap one another. These are usually found on property boundaries as the deter peeping toms and provide great insulation from wind and sound.
The Composite Wood Fence
If you’re environmentally conscious (which we hope you are) then a composite wood fence might be the perfect choice for you! This wood fence has the same design format as the vertical wood fence, but the boards are made of a combination of wood and plastic. They usually come with a minimum 20-year warranty and are available in loads of colors. They’re usually used as boundaries or front-facing property fencing.
Now that you know how to build a privacy fence, what tools you will need for the job, how to maintain a fence, which wood treatments you can use to protect your slats, and what wood types work best for fencing, it’s time for you to get out there and put your new-found knowledge to the test. Remember to inspect your soil beforehand and to always wear the appropriate personal protective gear when installing a fence.
Frequently Asked Questions
How Far Apart Should My Fence Posts Be?
While this is entirely subjective based on the size of your property and the type of fence you’re looking to put up, generally speaking, your fence posts should be roughly eight feet apart. This is because most standard fence beams are pre-sold in this length.
What Type of Wood Lasts Longest for Fencing?
While there are loads of wood species for fencing both redwood and cedar wood seem to last the longest when used for fence construction. If you’re looking for longevity, why not consider a composite wood fence instead of a solid wood one. They last for over 20 years!
Is a Vinyl Fence Cheaper Than a Wood One?
This isn’t really a fair comparison considering that there’s only a certain type of vinyl graded for use in fence construction, but there are various wood species that vary considerably in price which can be used to construct a fence. It intends entirely on the application, and your budget, of course.

I have been into woodworking since 2005 and woodturning since 2011. Because of my love for wood and woodworking, I started woodhappen.com to teach other enthusiasts about how to finish and seal wood, the best woodworking tools, the different types of wood, and everything else related to woodworking! Read more about me here.