How to Use Wood Filler – Tipps and Tricks for Best Results
Wood is often exposed to decay, rot, divots, cracks, and holes – whether through an accident or general wear and tear. If you want to enjoy a long lifespan from your wood, then you will probably need to apply a wood filler at some stage. The best wood filler can be used to fix and restore furniture, flooring, shelves, doors, windowsills, beams and more. Maybe the wood has started to crack, or you might want to fill up an old screw hole – this is easy to fix with wood filler. We have put together the most comprehensive guide on the best wood repair products below to help you understand which type of wood filler to choose for your project, and how to use it to achieve perfect results.
When to Use a Wood Filler
The best wood fillers can be put to use on any sort of wood and surfaces. This is an easy way to maintain and restore damaged wood of all types. There are many different kinds of wood fillers available to be used, depending on your project.
Wood will need to be replaced if 50% or more of it is rotted. If you have already used wood filler over the entire wood surface three times, or if the wood is supporting a very heavy load, then you may need to replace it. You should also replace wood if a very large portion of it has been taken out. For any other cracks, holes, and decay, wood filler can be used to restore the wood.
This is a great way to avoid replacing expensive or specially crafted pieces of wood. Using wood filler is easy, and can be done without any issues by yourself at home.
You can use wood filler to mold lost areas of wood (such as chipped out furniture), to fill wood with internal issues (such as insect damage), or to cover up holes, cracks, and scratches. The best wood filler will cure to resemble the same properties as wood, and can be sawed, drilled, screwed, and painted just as though it were the wood itself.
Different Types of Wood Filler
There are many different products available here. The type that you choose should depend on the wood that you are working with as well as the kind of damage that you are attempting to fill. While there are loads of different wood filler products out there, we have outlined a few of the main types below. Understanding this is necessary for knowing how to choose the best wood filler for your application.
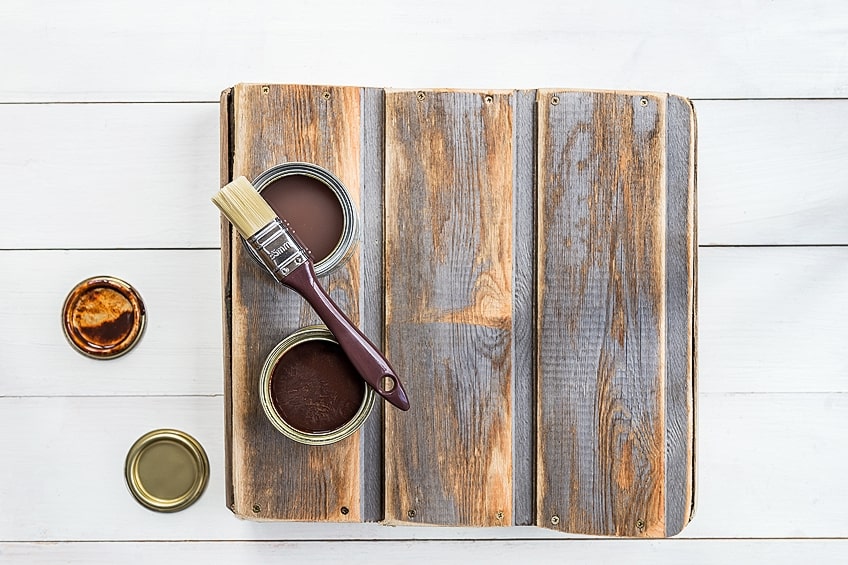
Solvent- and Water-Based Fillers
The first thing to know is that wood filler can either be water-based or solvent-based. Both of them can be used for all sorts of wood repair applications, but there are a number of differences between the two different types.
Water-Based Wood Fillers
Water-based wood fillers are safer to use, emit less or no odor, and contain minimum volatile organic compounds (VOCs). These wood fillers are made up of either wood fiber, cellulose, or gypsum. Some benefits of water-based wood fillers include them being much faster to dry, easier to clean up, and you can thin them out with water. This makes water-based fillers a versatile option. The downside to this type of filler is that they are not necessarily as durable as the solvent-based versions.
Solvent-Based Wood Fillers
Unlike water-based versions, solvent wood fillers have a stronger odor and a higher VOC content. They are also more difficult to clean up or thin, as chemicals are required for this. They take much longer to cure, and require more care when handling them. Solvent-based wood fillers are also more expensive. However, these products are far more durable and weather-resistant. Solvent products are the best exterior wood filler choice, as they can better resist fluctuating temperatures, rot, water, moisture, humidity, and more.
Epoxy Wood Filler
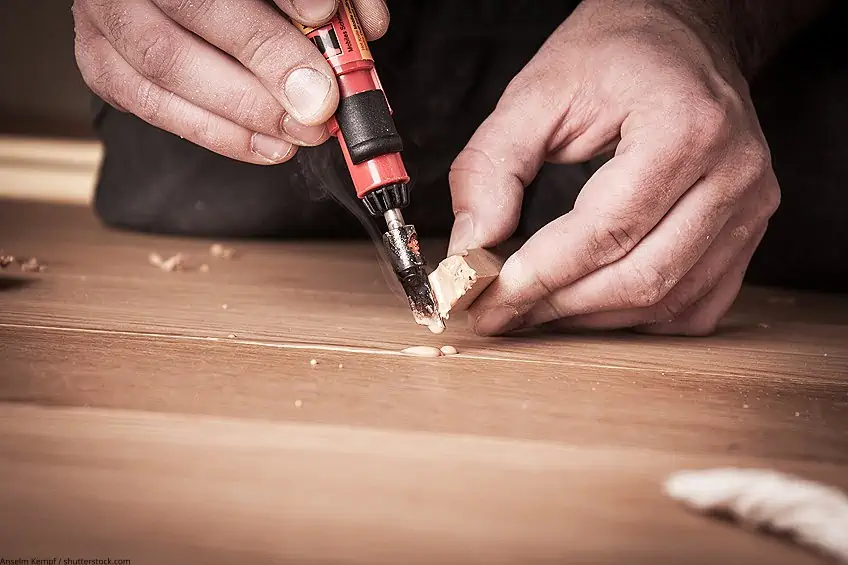
Epoxy is a substance that can be put to all kinds of uses in DIY projects. An epoxy wood filler is a special type of product that offers a high level of strength and durability to fixing wood. Epoxy wood filler consists of two parts, being the epoxy and a hardener. They need to be mixed together in order to create a wood filler that can cure into a strong material.
Epoxy wood filler can come as either a putty or a liquid wood filler. The liquid wood filler is really useful for pouring over wood with lots of internal damage or rot. This type of wood filler will seep into the pores, cracks, and holes in the wood in order to regain internal strength and structure.
Epoxy wood filler also includes some of the best wood putty. When the two parts are mixed together, this putty will start to dry pretty quickly. It can be molded and shaped to fit into all kinds of holes, cracks, and chips. If you are fixing damaged furniture or filling small gaps in wood, then epoxy makes for some of the best wood putty available. This type of filler is particularly durable and resistant for heavy use.
Interior or Exterior Wood Filler
Every type of wood filler is labelled for either interior use, exterior use, or both. This is an important consideration when choosing the wood filler. The best exterior wood filler should be strong and weather-resistant. This is often solvent-based, and can be used for various applications, such as an outdoor wood filler for decks.
Interior wood filler is often more gentle and less toxic or harmful. It is not as durable though, and will not last very long if used outdoors. It is important to know exactly what type of wood filler application you will be doing before choosing the best wood filler for your project.
Wood Filler Tutorial: How to Apply Wood Filler
Applying the wood filler depends on the type of filler you are using, the surface that you are applying it to, and any other unique conditions of the job. There are a few universal steps to take when applying the best wood filler to your project, which we have outlined below. The following tutorial assumes you are using a thicker consistency wood filler for holes, cracks, scratches, gouges, or gaps in wood.
Preparing the Wood Surface
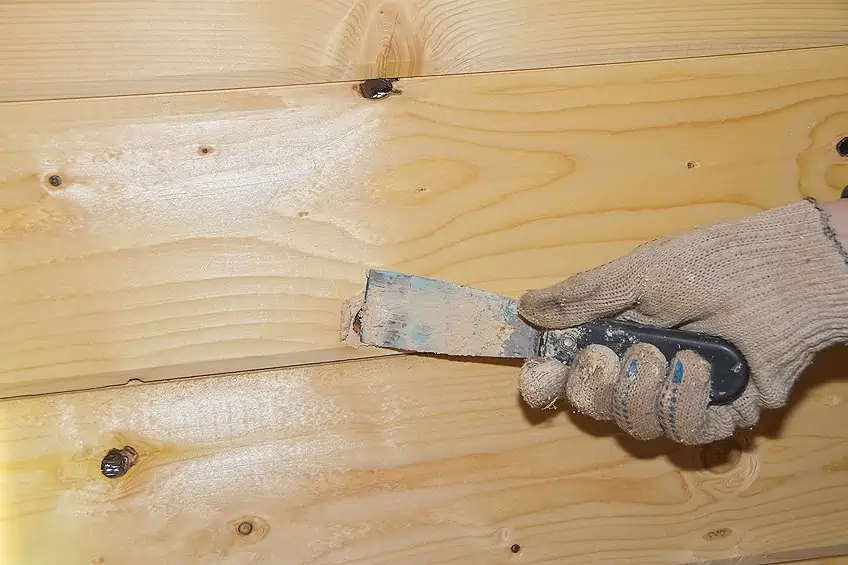
The first step is to get the wood surface ready for the filler. Firstly, take out any loose pieces of rotted or decayed wood. Wood that is soft and crumbling cannot be fixed with wood filler, so remove these bits of wood until you have a solid wooden surface to fill. This should also include removing flaking paint or any other obstacles.
Then, you should also sand down the wood surface to make sure that you have a smooth area to work with. Sand away any rough edges to provide an easier area to fill. Before moving onto the next step, make sure that the wood is cleaned of any sanding dust or residue. The wood needs to be clean and dry for strong adhesion with the filler.
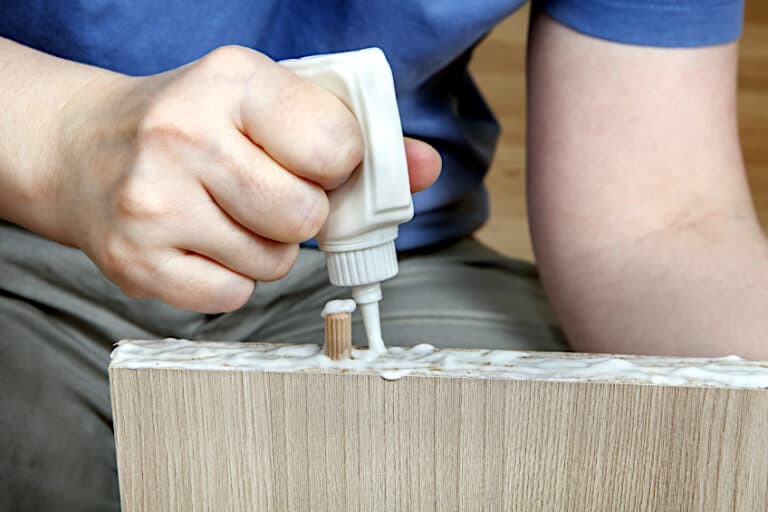
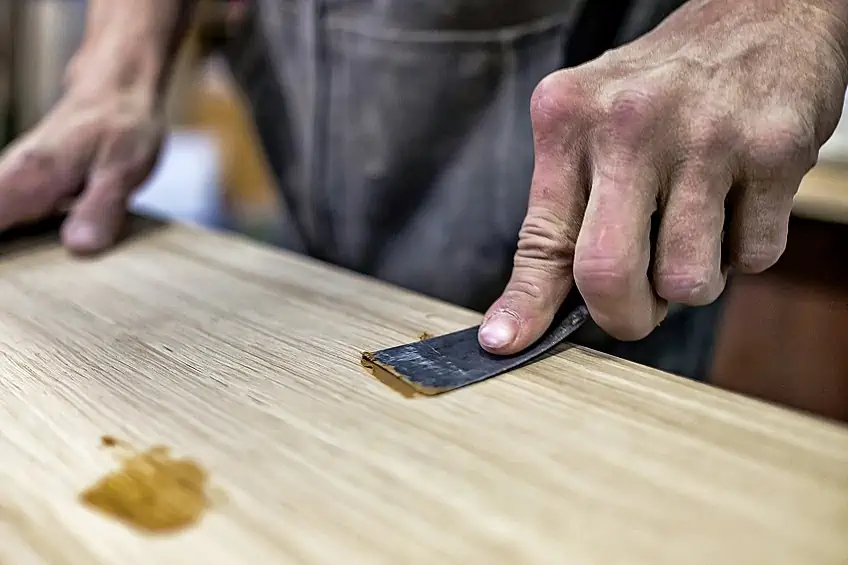
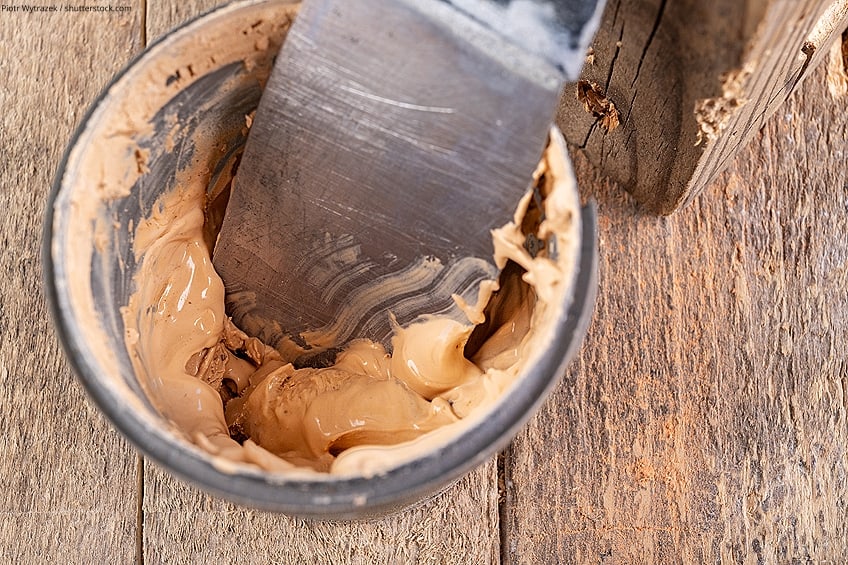
Applying the Wood Filler
Start to take the filler and apply it to your prepared area. This is best done with a putty knife. This should be done by applying the wood filler on the edges first, and pressing it down into the hole or crack. Keep applying the filler and compacting it down until the area has been completely filled in.
Always press down on the filler when applying it to make sure that there are no gaps or open areas left unfilled.
You can smooth the surface over with the knife, but it is usually best to overfill the hole a little. This is because wood filler tends to shrink a bit when curing. You can then sand down the filler once it has cured in order to achieve a smooth finish.
If you messed any wood filler on areas of the wood that do not need it, try to clean this up before the filler dries. This is pretty easy to do, depending on the type of filler used. You could simply wipe it off with water for water-based products, or use acetone or paint thinners for oil-based products.

Leave the Wood Filler to Dry
Now, leave the filler to dry completely before moving on to the next step. Make sure that you do not touch, paint, or sand the filler until it is completely dry. The drying time will vary based on the specific product you used and external influences like temperature and humidity. Be sure to check the manufacturer’s guideline on this, as the drying time can vary quite a lot.
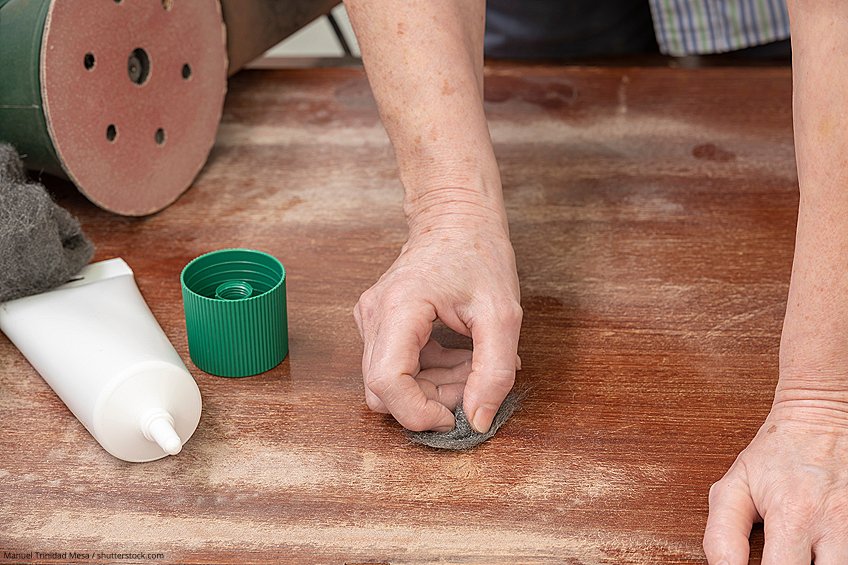
Sanding Down the Dried Wood Filler
Once the wood filler has dried completely, you can sand it down to achieve a smooth, even finish. This should be done so that the wood filler matches the rest of the wooden surface. There should not be a clear difference between the wood and the filler when you wipe the surface.
Finishing the Wood
Once the area has been sanded down to match the surface of the wood, it is time to finish it so that the filled-in area blends in. This is an important step, because you don’t want the filler to stand out as an ugly mark on the wood.
You can either paint or stain the wood filler. Of course, you will need to make sure that the product you use is suitable for this. If you are working with exposed wood, then choose a wood filler that is already the right color to match the wood. Some fillers can also be dyed before they set. White wood filler can be used for wooden surfaces that are already painted or sealed in a white coat.
Staining wood filler is usually quite a difficult process. Even with wood fillers that are well suited for taking stains, you may often notice a difference between the wood and the filler. A good technique is to apply more layers of stain over the filler than over the wood until the two match.
Wood Filler Tips and Tricks
Applying wood filler is a pretty easy and straightforward process. There are often unique scenarios though, and you may need a few extra tricks to get the perfect finish. Here are our most helpful tips to help you achieve a long-lasting and attractive wood filler finish.
- Always try to mix the wood filler before applying it. This helps to make sure that the filler is an even consistency and goes on smoothly. Of course, this is not necessary for wood filler in a tube.
- Wood filler is not a replacement for wood glue, nails, or screws. Filler should be used to cover up gaps, cracks, or holes, but it is not suitable for bonding two pieces of wood together. When wood filler is dried, it does act like wood and can still be used with wood glue or mechanical fasteners.
- Wipe down the sanded surface carefully with a tack cloth. This is the best tool for making sure that all of the fine dust particles produced during sanding are cleared away. This is essential for achieving a perfect finish.
- Pre-coloring the wood filler before applying it one of the best ways to achieve the right color shade. You can mix a wet stain with filler before applying it. This allows you to get a fuller color, and it is often easier than staining the filler after it has been applied. A good tip is to apply the stain slightly darker, as it will lighten a bit when it dries with the filler.
- If you use a water-based wood filler, it is best to apply a water-based stain. If using a solvent-based filler, try to match it with a solvent-based stain. Some types of stainable wood filler work with both, but getting the same base does lead to a better result.
- Applying slightly more wood filler than what is necessary is usually a good idea. This is because wood filler tends to shrink a bit when it dries. Excess filler can always be sanded away once cured.
- If using epoxy wood filler, you have a very limited working time before the epoxy starts to cure. For this reason, it is important to have everything fully prepared and ready to go before mixing the epoxy.
- If you are dealing with a very large crack or structural issue in the wood, be sure to do a thorough inspection before using wood filler. Wood filler is usually only suitable for smaller damages on wood that do not play an important structural role.
How to Choose the Best Wood Filler for Your Project
We have covered the best wood fillers above, and clearly there are many different types available. So, how do you choose the right wood repair product for your application? We have outlined the most important considerations below.
The Application
While you do get good all-purpose wood fillers, these products are generally created for individual tasks or applications. The first thing to consider when choosing the best wood filler is what type of application you are using it for. You may require the best wood putty for filling nail holes or gouges in your furniture. Maybe you need an outdoor wood filler for decks, or a liquid wood filler to restore internally decaying wood. Some fillers are made for filling the pores in wood, and some are made for filling voids.
It is always best to buy a wood filler only when you know exactly what it will be used to fill.
Coloring
The color of the wood filler is one of the most important considerations. Often, wood filler can cause ugly marks or patches over the wood. Ideally, you want a filler that naturally blends into the wood without taking away from the wood’s natural beauty. Wood fillers are available in shades that are meant to resemble different types of wood, white, or are clear.
Either buy a wood filler that matches the shade of the wood you are applying it to, or otherwise you will need a wood filler that can be stained or painted without any issues. Applying a filler that is the wrong color over exposed wood can look terrible in many cases.
Wood Filler Consistency
Wood fillers come in different consistencies. You can get thick putty wood fillers, or thin liquid wood fillers. Both of these are best used for specific applications. The best wood putty will be able to mold into difficult shapes, holes, or missing pieces of wood. This can be used for filling up cracks, divots, scratches, and so on. Wood putty can be applied to wood at all angles.
Liquid wood filler is absorbed by the wood to fill its pores or provide structure to internal damage. This is usually an epoxy wood filler. Very thin wood filler is not a good option for filling holes or cracks in wood. It can also only be poured over the wood, and cannot be applied vertically or to unique shapes in the wood.
Format
Different wood fillers are packaged differently, and this can actually make a serious difference to how you use the product. You can get wood fillers in tubes, tubs, putty sticks, mixable epoxy forms, and so on. Products in tubs are easier to use as they do not need any mixing. Tube fillers are squeezed out directly onto the wood, and are good for small surface issues and cracks. Two-part wood fillers require mixing and kneading before applying. You should also consider the quantity of wood filler here, depending on your project. Fillers in tubs generally offer better value for money, and come in larger formats.
Strength
Of course the strength of the wood filler is one of the most important aspects. If you are working with a very strong wood, you will need a hard wood filler to match it. Some fillers are quite powdery when dry, and do not hold up as well as others. These can be suitable for small interior jobs and filling holes or cracks that are not under too much pressure. If you are using the filler for exterior use, or on heavily-used surfaces like decks or furniture, you will need a very strong wood filler.
And there you have it – our complete guide to the best wood filler! Finding the best wood filler for your project can make a huge difference, so it is really important that you get the right product. Be sure to try out our product recommendations in our wood filler reviews above, as these are the top options in each of their categories. We hope your woodworking project is a great success!
Frequently Asked Questions
How Long Does Wood Filler Take to Cure?
This depends on the type of filler used and how deep the crack is. It is best to consult the manufacturer’s guidelines on this, as the drying time can vary anywhere from 20 minutes to 24 hours.
Does Wood Filler Need Priming if You Are Painting it?
While wood filler can be painted over directly, priming it is always recommended. This is because wood filler and wood can hold the paint slightly differently, and there may be a visible difference in the finished painted surface.
Can You Keep Unused Wood Filler?
Most types of wood filler can be stored and will remain suitable for use for some time. It is vital that the wood filler is stored properly though, and that it is completely airtight. Wrapping the sealed wood filler container in plastic wrap will help to make sure the filler is completely sealed.
How Long Should You Wait Before Sanding Wood Filler?
Usually, the wood filler should be dry enough to sand after 30 minutes, However, this varies depending on the product used. It is important that the wood filler is completely dry before sanding in order to achieve a good result.

I have been into woodworking since 2005 and woodturning since 2011. Because of my love for wood and woodworking, I started woodhappen.com to teach other enthusiasts about how to finish and seal wood, the best woodworking tools, the different types of wood, and everything else related to woodworking! Read more about me here.