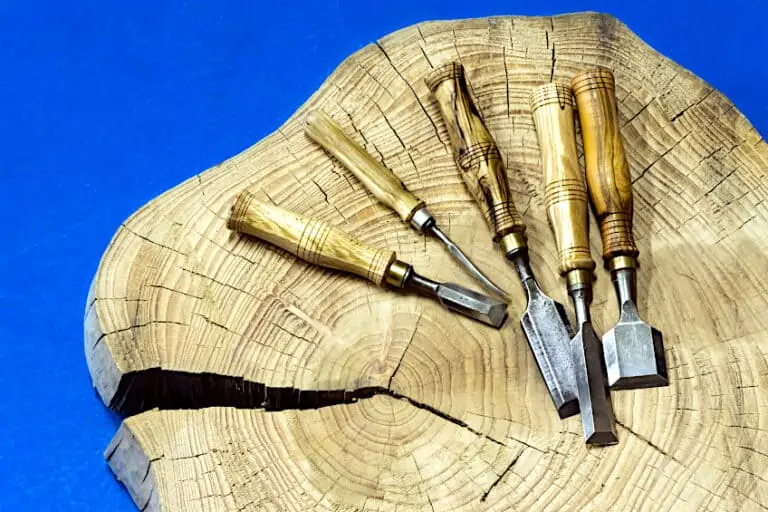
How to Stabilize Wood – A Guide on Wood Stabilizing Resin
Wood is a widely versatile material from which art objects and furniture that you use on a daily basis are made. Aside from being the best product, wood has its own disadvantages. Wood ages and can rot when exposed to moisture. There are quite a number of ways in which you can stabilize your wood to make it more durable and long-lasting. If you are worried about your wood rotting away or aging, then this article will put your mind at rest.
What Is Stabilizing Wood?
If you have any pieces of soft wood that are rotting away, then continue reading this article on how to solve this problem. You can stabilize your wood by injecting a wood hardener or resin into the rotting piece of wood. This will cause the soft and rotting wood piece to harden. You can also use a vacuum cleaner, resin epoxy, and others to stabilize your wood.
The now hardened wood will then be used to make furniture and will not be damaged during the manufacturing process. This is because flaky or soft wood is difficult to use and work with. Most soft woods break very easily when you use some tools on them. So consider stabilizing your wood so that you can manage it well.
Why Must Wood Be stabilized?
Wood must be stabilized because hard wood is the best when it comes to doing projects. When you work with hard wood, you are guaranteed to create amazing and incredible objects very easily. Objects made from softwood only look good at the initial stage, but they tend to lose shape and value in the long run. This is why resin is injected so as to stop the softwood from aging and withering away.
Before injecting the wood with resin or epoxy, you should first use a vacuum chamber to remove any moisture from the wood. You can then add the stabilizing resin, after which you can also insert plexiglass as a coloring agent to the wood.
The vacuum chamber has the ability of extracting air, thus creating space in the wood pores. The point is to extract all the moisture from within the wood, after which you can allow the stabilizing agent to penetrate throughout the wood piece.
You should make sure that there is no moisture left or retained in the wood, or else the stabilization process will not work. Hardwood is highly durable and quite resistant when it comes to damages. The sun’s UV rays, weather, and chemicals will not have any effect on the stabilized wood.
You can do the stabilization process on your own because the process is safe to do whether indoors or outdoors. You must take precautionary measures during the stabilization process, however, so that you do not impose any harm on yourself.
Which Wood Types Can Be Stabilized?
Some wood types do not stabilize well and some cannot be stabilized at all. Wood with large pores and a low density is perfect for the stabilization process. Large pores enable the wood to absorb more of the stabilizing medium, thus making the wood much more solid. Beech, polar, and birch are the types of wood that look great after being stabilized.
Dye can be added to the above wood types so that it can look exceptionally attractive when transformed into the finished product. You can use a coloring agent like plexiglass (MMA) to color your wood, but make sure that you buy the coloring agent and resin from one manufacturer to ensure compatibility.
The stabilization process does not work completely on some wood types. This is because certain wood types have small pores and are very oily. Stabilization will not work on these wood types because the stabilizing agent will not be able to penetrate the wood very well. At the end of the process, the wood will not be saturated entirely. Those small pores do not work well with resin.
Woods containing tanning agents also cannot be stabilized. These types of wood include ebony, olive, softwood, and so on.
Stabilization Process
There are different stabilizing agents that can be used to stabilize wood properly. You can even stabilize your wood blanks at home, thus avoiding the expensive option of buying commercial blanks. Once you have stabilized your own blanks at home, you can enhance them with different dyes and scents that are available on the market.
Materials Required
- Wood: This should be on top of your list because it is very important. Stabilizing does not work on all wood types, so you need to look out for compatible woods. Consider the type of wood you are using and see if it fits with the stabilizing agent.
- Stabilizing Resin: All of the magic happens in the resin! Get a resin that is easy to use so that you can get your expected results at the end of the process. Before you opt for a specific resin, consider customer reviews on that product, without forgetting your wood type. Whatever choice you make, remember that you need to fill up your vacuum chamber completely.
- Vacuum Chamber: You can either build your own vacuum chamber or buy one. The prices of vacuum chambers can seem to be very high at first glance, but you will get an extremely amazing quality which will offer great value for your money.
- Oven Toaster: This is very important because you will use it to dry your wood before stabilizing it. It also works in curing the resin after being infused into the wood.
Using a Thermal Hardening Resin to Stabilize Softwood
One method of stabilizing softwood is by using a thermosetting resin. A stabilizing agent like resin has the capability of completely penetrating the wood. Thermosetting resin can penetrate the wood both on the surface and by soaking the inside of the wood as well. You have to use your oven during the process of thermosetting to stabilize the wood using heat.
However, thermosetting does not suck out all the moisture from the wood; after thermosetting, the moisture in the wood will be at the very lowest level. You can also opt for cactus juice as a thermosetting resin type to stabilize wood. You have to bake the cactus juice in the oven first to make it hard. This is because the stabilization process is done to prevent humidity from getting inside the wood.
Dry your wood in the oven at 219 degrees Fahrenheit (104 degrees Celsius) for the whole day to prevent humidity. You should not store your cactus juice in a humid place either, because a temperature of about 84 degrees Fahrenheit (29 degrees Celsius) or more can affect the resin properties.
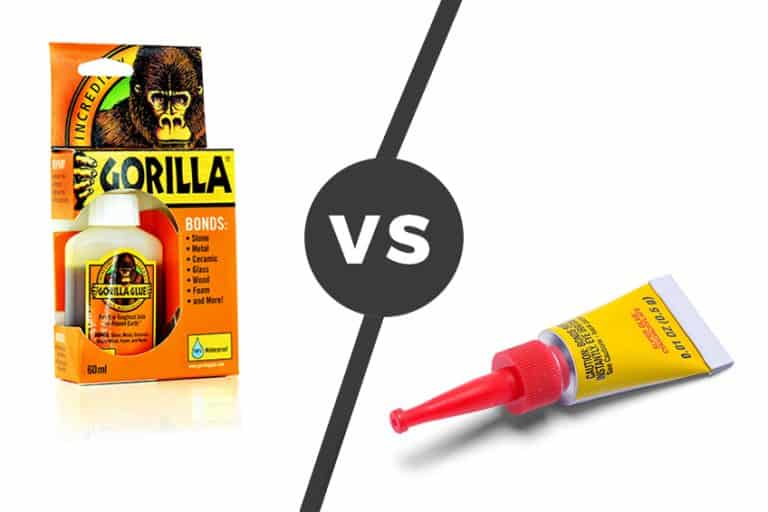
STICK FAST Stabilizing Resin and Catalyst
This resin is the best when it comes to stabilizing your own wood. The wood that is stabilized from this resin can be used for a variety of purposes, ranging from wooden knives to pens. Woods that are prone to cracking can be made solid by adding this resin. You can also add a dye to the stabilizing resin if you prefer a more colorful effect.
Pros
- Easy to clean with soap and water
- Environmental friendly
- Penetrates very deeply
- Can be reused
- Low odor
Cons
- May discolor the wood
Using Epoxy Resin to Stabilize Softwood
Epoxy resin is another resin type that can be used for the process of stabilizing wood. You must process this type of resin at 59 to 77 degrees Fahrenheit (15 to 25 degrees Celsius) so that it can perform at its best. Epoxy resin may stabilize the wood surface, but it does not really seep deeply into the wood to completely harden it.
You can use epoxy resin to stabilize wood on your own. Remove any broken pieces of wood first and do not allow any dirt to enter into the wood during the stabilization process. You can add a thinner to enhance the penetration of epoxy resin into the wood. Do not forget to put on your gloves when working with this resin and ensure that you are working in a well-ventilated area. However, you might need to check in with a knowledgeable engineer to check if the wood has been fully stabilized.
INCREDIBLE SOLUTIONS Deep Pore Clear Casting Resin
This product is top-rated because of its crystal-clear finish and UV-resistant features. The crystal-clear finish makes it suitable for your tables, jewelry, and figurines. However, do not use this product on stains or oil-based paint. This epoxy will not yellow over time as compared to other products because of its resistance to the sun’s harmful UV rays.
It takes at least 36 to 48 hours to completely cure depending on the temperature. The product comes in a container that has been clearly labeled with instructions, thus making it easy to use the product. It does not heat up too quickly, thus allowing for a longer working time. The appropriate temperature rate for curing is 70 degrees Fahrenheit (21 degrees Celsius). It can take a very long time to cure, but the results are much more amazing than what you would expect.
Pros
- Very easy to use
- Long working time
- High level of sheerness
- Great value for money
- Very durable
- Minimal shrinkage
Cons
- Long curing time
Using a Wood Hardener to Stabilize Wood
A wood hardener can also be used to stabilize damaged wood. The color of the wood will not change since the wood hardener is translucent. The process of using a wood hardener is very easy; you should not face any complications or challenges. A wood hardener is very easy to use and is suitable for all solo woodwork jobs. The only disadvantage is that the wood hardener cannot penetrate deeply into the wood.
MINWAX High Performance Wood Hardener
If you are looking for the best option when it comes to using a wood hardener in stabilizing wood, then this product is your best fit. This hardener has the ability of penetrating deeper into the wood, causing its resins to bind the rotten wood fibers together. It has the ability of sealing the wood from further moisture. It is suitable for woodwork, floors, furniture, and so on. The product dries very quickly and can be used very easily without any problems. You can use it for sealing the end grains on wood boards and also to waterproof areas if water drips on a deck.
Pros
- Very easy to apply
- Suitable for lightweight jobs
- Great value for money
- Helps to make and keep beautiful wood
Cons
- Acetone needed to clean the brushes
- Can soften and ruin latex paint
How to Use a Wood Hardener
Now that you have purchased your wood hardener, it is time to get to work! Follow these basic steps in order to use your wood hardener in stabilizing wood.
- Begin the process by sanding your wood surface to remove most of the decayed wood. Make sure that there is no oil or paint on the area, because this might hinder the absorption process.
- If your surface is not dry enough, make sure you leave it to dry first before commencing any work on the wood.
- Get your protective clothing. Wear gloves, a ventilation mask and some safety glasses.
- Shake the bottle of the wood hardener very well before using the product. Pour the product on a bristle brush, making sure that it reaches all the sides of the wood that needs to be stabilized.
- Apply more coats of the product so as to guarantee the strength of your wood.
- Leave it to dry for at least 2 to 4 hours, and then your process is complete.
Using a Vacuum Chamber to Stabilize Rotten Wood
You may have to invest into a vacuum chamber if you do not have one already, since this method of stabilizing wood requires one. You should really consider the type of vacuum chamber you want in relation to your project before purchasing one.
Steps to Follow When Stabilizing Wood
Stabilization is an important process of reviving your aged and rotten wood. This is why the proper steps must be taken with extra caution. You can follow the steps below in order to ensure a smooth wood stabilization process.

Preparation
- This is the first step of the stabilization process. Make sure you have all the materials that you will need.
- Assess and check the equipment for any damages, dirt, and so on. This is because dirt can hinder the stabilization process.
- If you opt to use a vacuum chamber, make sure that you check it for damages first. A damaged vacuum chamber is not suitable for carrying out the stabilization process effectively.
- Wear protective clothing anytime you work with substances like resin. If you accidentally come into contact with the resin, stop working and wash it off immediately.
- Keep all your equipment close and on hand. This will allow you to reach everything with ease.
The Vacuum Chamber
- Put all wood blanks into the vacuum chamber so that you can begin the process.
- Make sure that the wood blanks do not float away. You can use an anti-float mat to avoid this problem and keep the wood blanks down.
- Make sure that the blanks are completely covered in the resin. The resin in the vacuum chamber should be about 15 mm high, although you can even fill it up to 30 mm, thus ensuring that your wood blanks are deep enough in the resin.
The deeper the blanks are in the resin, the more durable the wood will become.
- When the chamber is closed, the air extraction will begin to take place. All of the air from the wood blanks will be extracted and taken out.
- The resin or the medium stabilizer will start to boil. Make sure that it does not foam too much during this process. It is better to extract air from the wood at a very slow rate so that you will not trigger the foam. The whole process should take more or less an hour to complete.
- Leave the wood in the vacuum chamber for a while after the whole process has been completed. Always be cautious with the vacuum chamber and never open it hastily.
Baking/Curing
- After you have removed the wood blanks from the vacuum chamber, put them on a paper towel and leave them to dry completely.
- You can store the remaining resin in an airtight container and then clean your vacuum chamber. The stored resin can be kept for a very long time to be used in the future.
- Wrap your wood pieces in aluminum foil, making sure that they are very close to the shiny side. The matte side of the aluminum foil should be on the outside.
- Preheat your oven to about 160 degrees Fahrenheit (71 degrees Celsius) and bake the wood. Check and make sure that it is at least this temperature, as this is a very important step.
- Leave the foiled wooden blanks in the oven for at least an hour or more. If too much resin disappears from the wooden pieces, then the wood did not dry properly.
- Wear protective gloves when taking out the wood from the oven. You can use any sharp object that comes in handy to remove the foil from the wood blanks, because at times it can stick a lot.
- Once you are done with the baking process, then you are done with the process of stabilizing rotten wood. This baked wood from the oven is quite a bit harder than the wood you initially put in the oven.
Note: After completing the process, assess and consider how hard the wood is. You should always consider the hardness of the wood, as not every level of hardness is suitable for every item. For example, a pen made from a very hard wood would be too heavy to use comfortably.
Tips and Tricks for Stabilizing Wood
Keep the following trips and tricks in mind whenever you are stabilizing your wood. This will ensure that you have a smooth and quick process.
- The first step is to evacuate all of the air from the pores of the wood at 30 mmHg (millimeter of mercury). Make sure you that perform your evacuation process very well so that the resin can deeply penetrate into the wood. Some of the resin can seep out during baking, but most of it will be retained by the wood.
- Build your own storage for the left-over resin from the vacuum chamber. Storing is a good alternative because it saves you from wasting the leftover resin.
- Stabilization is the best process for getting harder wood. However, too much solid hardwood can be quite daunting, especially if it does not suit the object of your choice.
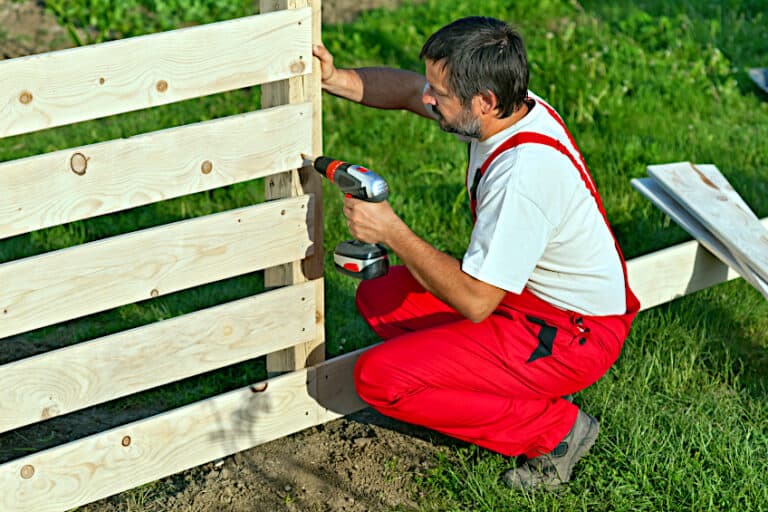
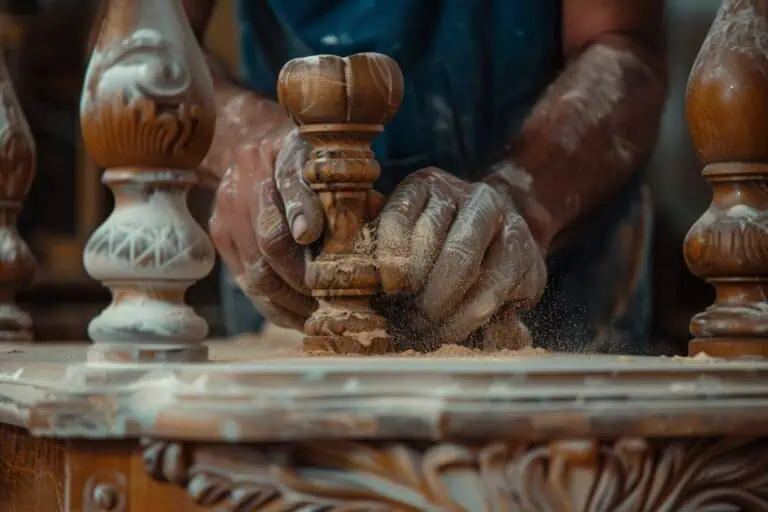
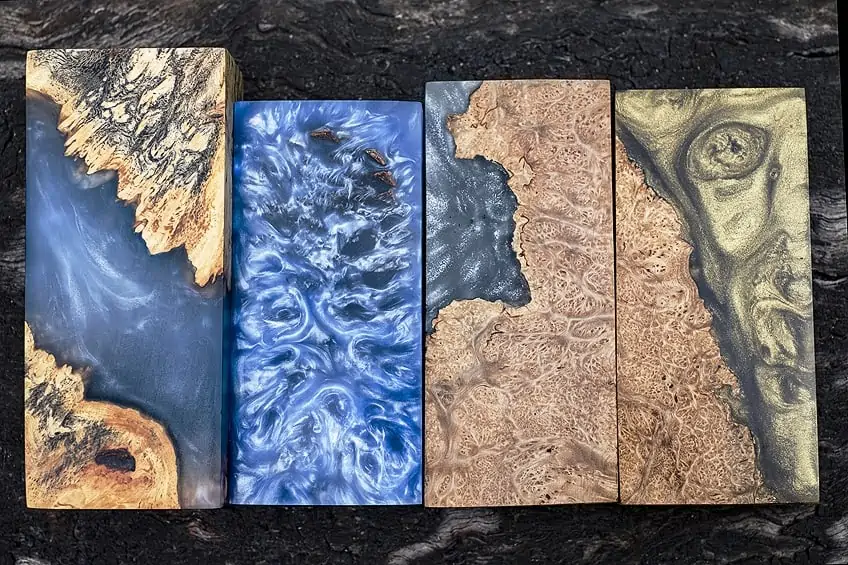
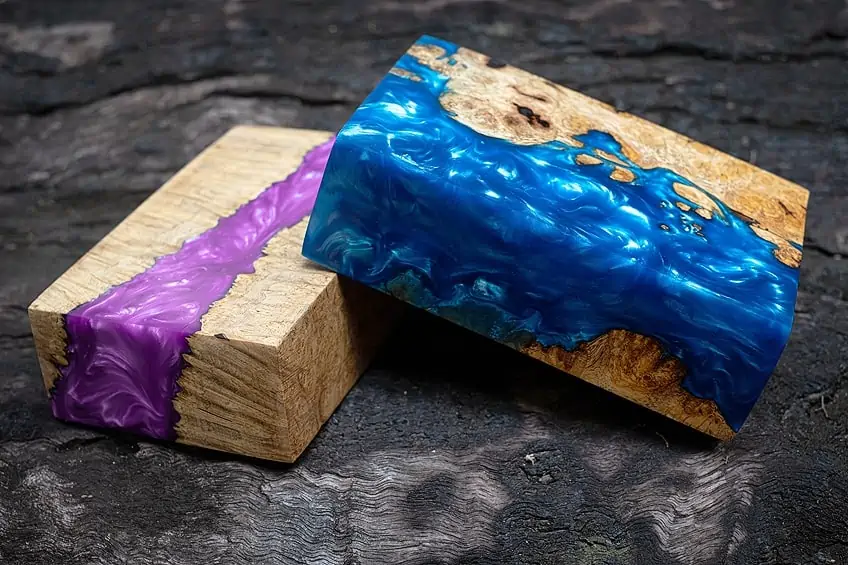
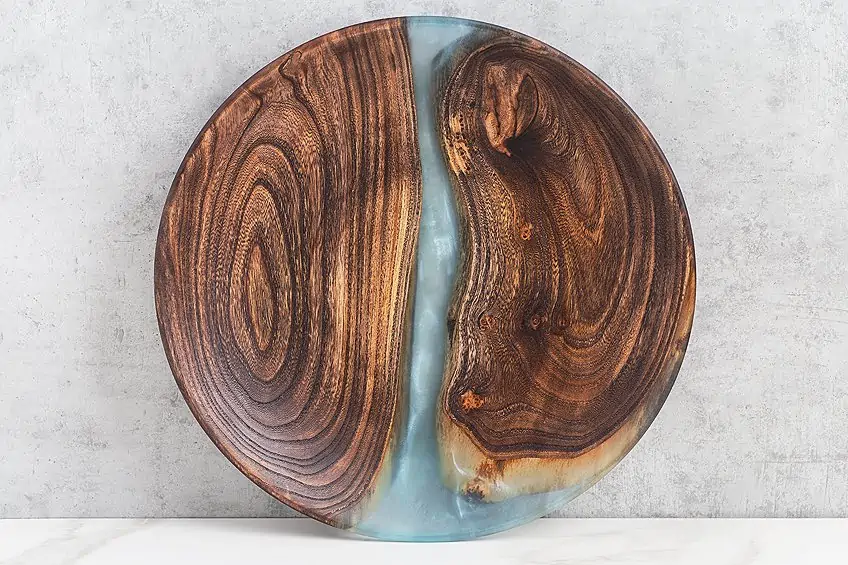
What Can You Create From Stabilized Wood?
Why would you go through the entire wood stabilization process? Stabilized wood creates better products and you can use it to make beautiful crafts of your choice. Stabilized wood is known to be good quality wood and can be used to make wooden necessities like knives, dishes, bowls, and so on.
Stabilized wood is very attractive and has a strong grain. This means that objects made from stabilized wood are very expensive. The expensive price is due to the long process that one has to go through during the stabilization process.
View our Stabilizing Wood web story here.
Frequently Asked Questions
Is There Any Other Substance That Can Stabilize Softer Wood?
Yes, thinned out PVA is a perfect choice for stabilizing wood. You can add water to thin it and leave the wood to soak overnight.
Is Stabilized Wood Waterproof?
Stabilized wood is not waterproof, because it can swell when it is soaked in water via capillary action.
How Long Is the Process of Wood Stabilization?
The time range for the process of wood stabilization depends on the type of wood you will be working on. The process can take anywhere from 4 to 24 hours. High-end wood takes up to 24 hours because all of the air must completely evacuate the wood. This will make the process of stabilization much more successful.

I have been into woodworking since 2005 and woodturning since 2011. Because of my love for wood and woodworking, I started woodhappen.com to teach other enthusiasts about how to finish and seal wood, the best woodworking tools, the different types of wood, and everything else related to woodworking! Read more about me here.