How to Paint Wood Paneling – Easy Paneling Painting Guide
One design feature that can work in any style of interior ranging from Minimalist to Rustic, Industrial, Scandi-style, Classic-Traditional, and even Maximalist is the addition of wood paneling in living spaces. Wood paneling and accents have been reimagined and modernized to suit current trends, but the maintenance and decoration of these pieces have remained relatively the same. That being said, whether you are resurfacing old wood paneling or painting new paneling for the first time, we thought we’d show you how to paint wood paneling correctly, and what you will need to go about it!
What Is Wood Paneling?
Before getting into how to paint wood paneling let’s establish what wood paneling is. Wood paneling can be described as an interior decoration consisting of thin wooden sheets, battens, and moldings attached to walls. Traditionally, wood paneling was a status symbol that also provided insulation against stone or plastered walls. In modern usage, paneling serves an aesthetic purpose, usually to break the mundanity of bare walls.
Wood paneling comes in different styles, colors, and textures, and can consist of a wide variety of materials and wood species. As a traditional decorating method, the popularity of wood paneling rises and wanes with different design trends. While wood paneling was long reserved as a high-end decoration found in the homes of only the most affluent individuals, these days materials like engineered wood and cheaper wood species have made this type of decoration more accessible, which has led to its popularity increasing and the aesthetic possibilities of wood paneling being broadened considerably.
There are many advantages to using wood paneling in your home. The most well-known advantage of wood paneling is its noise insulation. If you are looking for some privacy in a particular room in your home or want to reduce the noise coming from a particular part of your home, wood paneling is a good option aside from dedicated noise insulation materials.
Aside from noise insulation, the presence of wood paneling on interior walls can function as heat insulation too. Wood paneling tends to assist with retaining heat inside a space, which makes it a good interior decorating option should you find yourself living in a particularly cold environment, or simply want your space to retain a bit more heat.
Traditionally, when people installed wood paneling they wanted to show off the color and grain of the wood. These days, the use of cheaper timbers and engineered wood means that paneling is often intended to be painted in a wide variety of colors to match a particular design scheme and aesthetic.
Why Would You Paint Wood Paneling?
You might be wondering why you’d even bother painting wood paneling. There are many benefits to painting wood paneling aside from improving its looks, which is why we have prepared a short list of reasons why painting your wood paneling is a good idea if you are still on the fence about going through the effort.
Choose Your Color
While some might prefer the natural color of wood paneling, it might not be to everyone’s taste. After all, modern aesthetics might not always be conducive to the presence of wood paneling, so changing the color to pastel or beige might be the trick to making your wood cladding fit the space or interior decorating choices of the room.
Longevity
There are a number of long-standing ways to decorate wood. Wood stain and varnish are some of the more traditional approaches, but since paint is a surface coating that also bonds with some of the wood fibers it could end up lasting a lot longer than some of the aforementioned. That being said, it does depend on the type of paint you use and the forces your paneling is subjected to.
Maintenance
Maintenance is something you should consider when working with any wood surface. Even surface coatings and wood treatment oils can degrade over time, but paint tends to last a lot longer and generally requires less frequent maintenance when compared to other options.
Saving you the time that would be spent on maintenance makes paint a good choice for wood paneling, especially for interior spaces.
Protection
As we mentioned previously, wood paneling can be subjected to a number of forces over the course of its life. Paint as surface coating offers a layer of protection to your wood paneling that should protect it from impact, abrasion, moisture, and heat. While it can take some time and effort to paint wood paneling, it is often well worth the effort in the long run.
Repair
While paint can be used to protect the surface of your wood paneling, it can also be used to repair it. There are paint types that are capable of filling in gaps and scratches in wood paneling given that they aren’t too severe. This can ensure that the surface of your workpiece is nice and flush once the paint has dried and cured completely.
How to Paint Wood Paneling
Now that you know what wood paneling is and some of the benefits of painting it, we thought we’d show you how to go about painting it. Painting paneling can seem like a stressful experience but it is actually quite easy. Here is a list of some things you will need and how to both prepare and paint wood paneling on your own.
What You Will Need When Painting Paneling
Before you begin painting your wood paneling you will need to ensure you have everything you need for the task ahead. Ensuring you have everything you need beforehand can save you a ton of time and effort down the line. Here are all the things you will need to get the job done and why they’re crucial to the painting process.
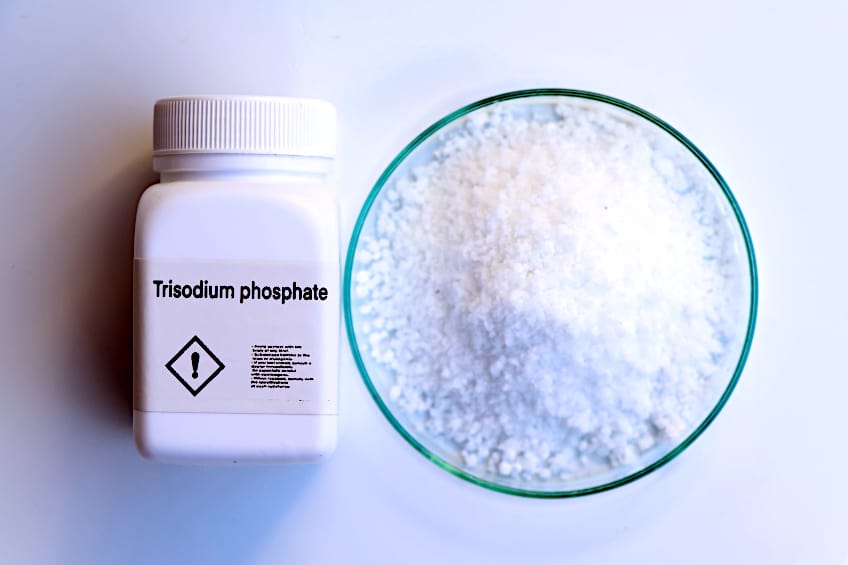
- Trisodium phosphate
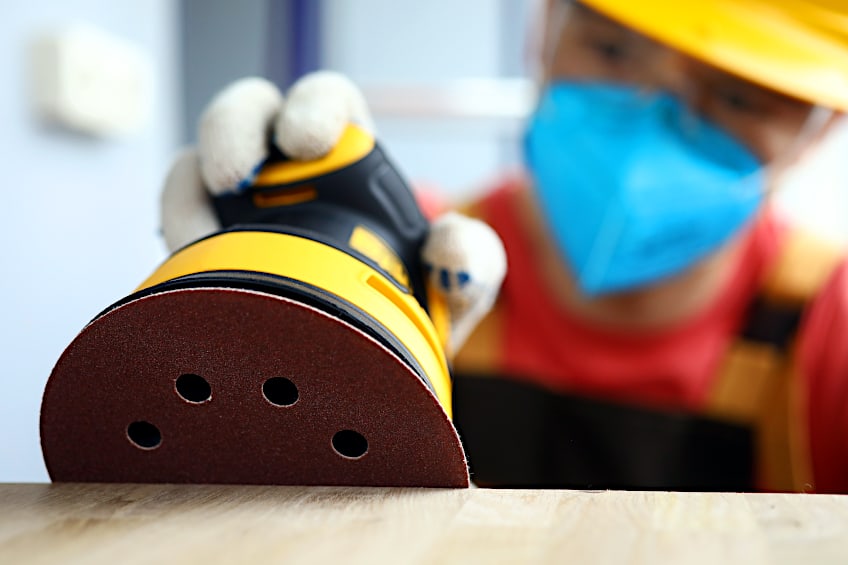
- 220-grit sandpaper
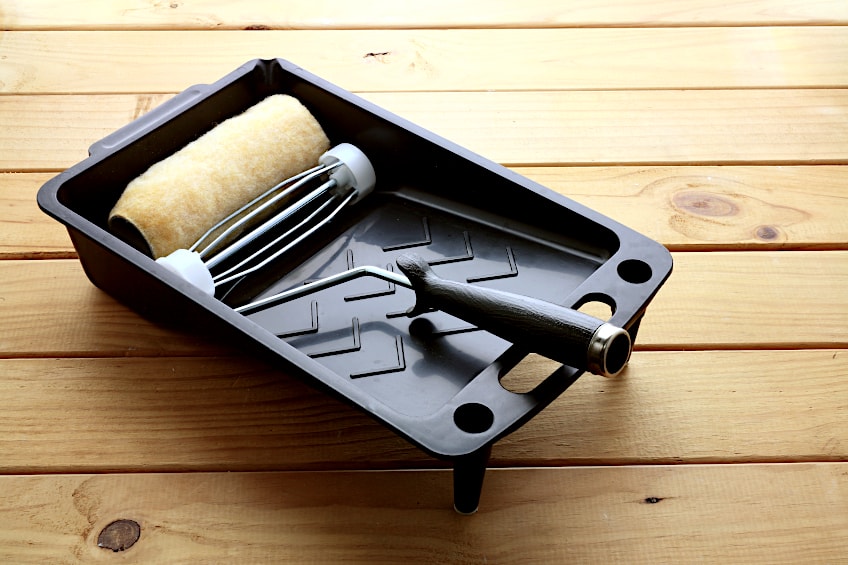
- A foam sponge roller cover (and roller)
- Painter’s tray
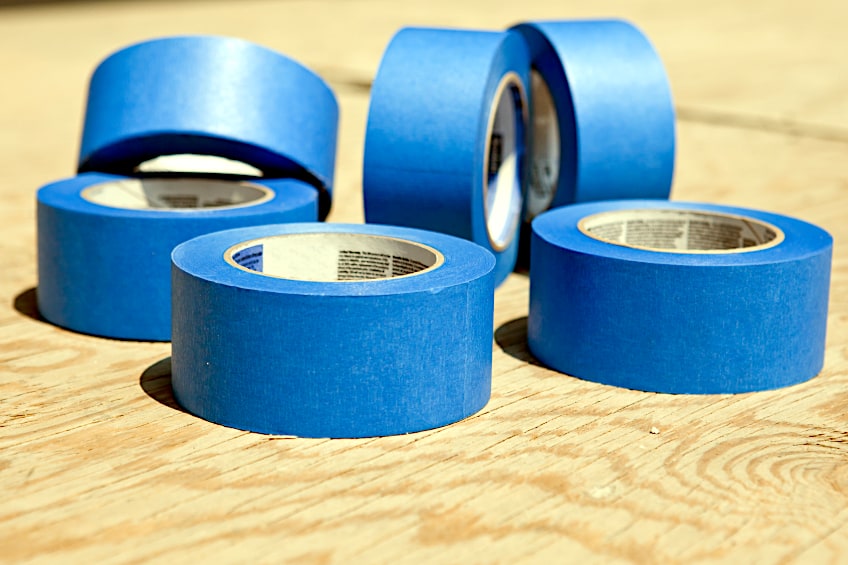
- Painter’s tape
- Drop cloth
- Vacuum cleaner
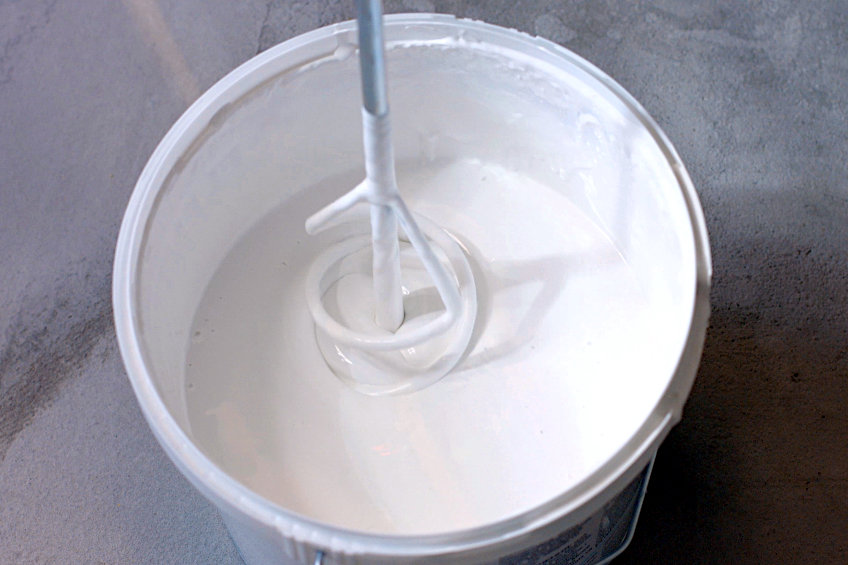
- Primer
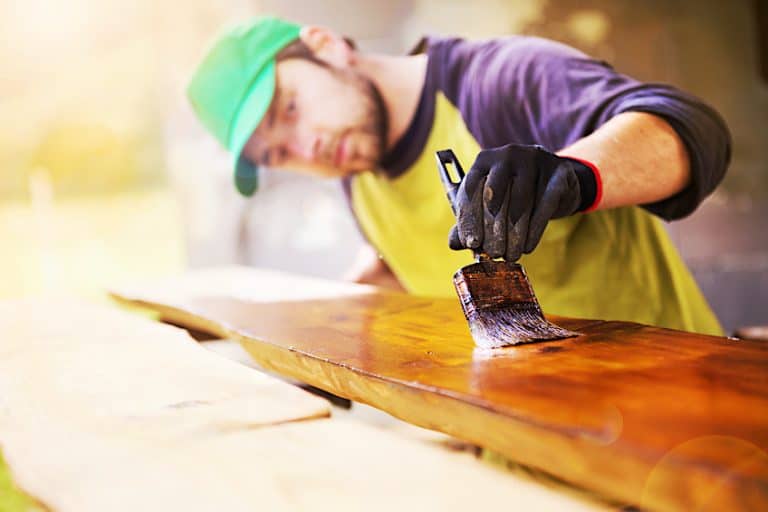
- Paint
- A set of clean cloths
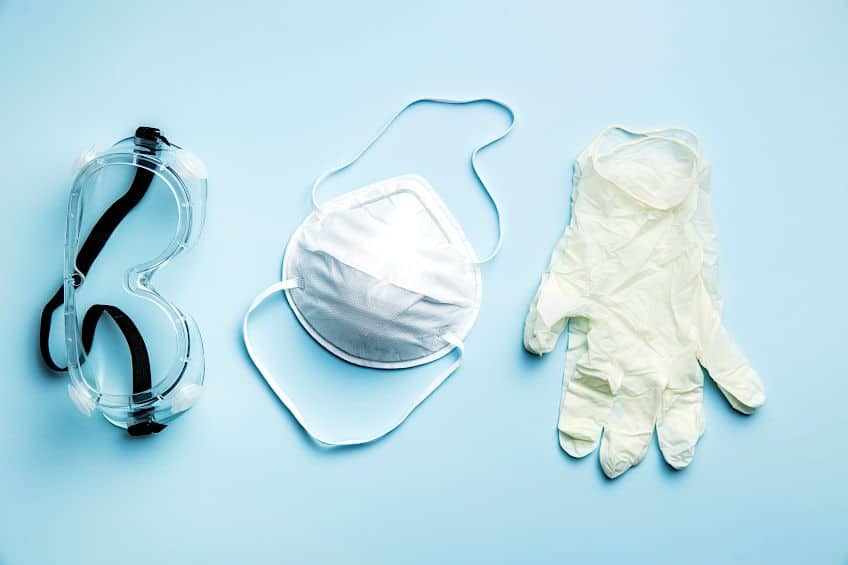
- Personal protective equipment
Trisodium Phosphate
The wood paneling will need to be cleaned, and the best way to clean old wood paneling is to use some trisodium phosphate. This is easy to use and only needs to be diluted with a bit of water to effectively remove any grime that has built up over the years.
Keep in mind that you should always wear protective clothing and eye goggles when working with chemicals like these.
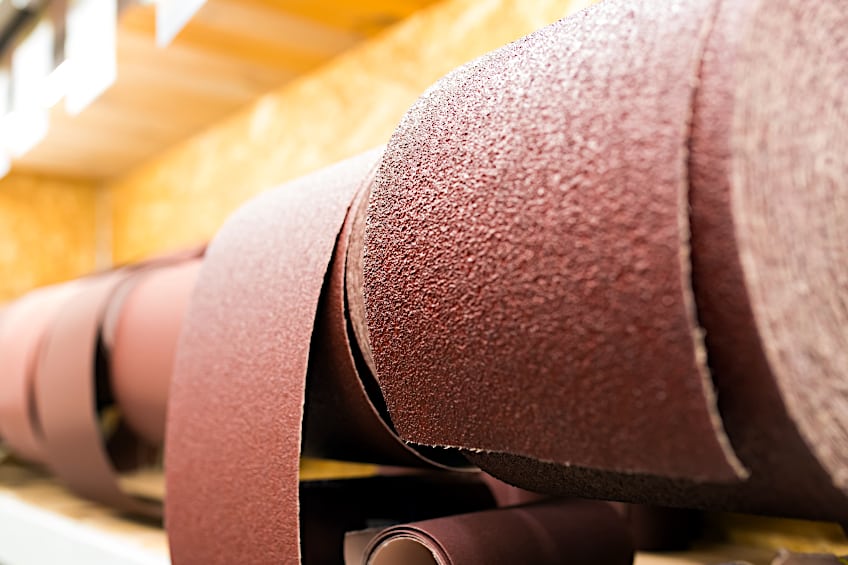
220-Grit Sandpaper
You will also need to ensure that the old paint or existing wood treatment is removed before the new paint can be applied. Since you won’t be completely resurfacing the wood a medium to fine grit sandpaper should do just fine. Always ensure you are wearing a respirator mask to avoid inhaling fine paint particles while sanding.
A Foam Sponge Roller Cover
When painting wood paneling this is arguably the best type of roller cover to use. It ensures even distribution with minimal pressure being placed on the roller as it moves across the surface. It’s also ideal considering that wood paneling walls are usually quite large, and since it retains a lot of paint, you won’t have to reload your roller that often.
Painter’s Tape
You will also need to ensure that things like trim and flooring are protected during the painting process. If you have painted a wooden workpiece before then you know how potentially messy things can get. Using painter’s tape to the section of the area being painted from your trim and/or using it to secure a tarp for your flooring is always a good idea.
A Drop Cloth
Drop cloths are an indispensable part of any painter’s arsenal. They are used to protect flooring and furnishings from stray paint particles and can even be used to seal off the area you are working in.
If you cannot get your hands on a dedicated drop cloth, feel free to use some old newspaper or similar covering and then simply secure it with some painter’s tape.
A Painter’s Tray
A painter’s tray is a must. While some may argue that you can work directly from the paint container, this often results in a messy situation. Paint trays allow you to remove excess paint and comfortably reload your roller before you attempt to apply your paint. Choose a paint tray size that best suits the size of the wood paneling you will be painting.
A Vacuum Cleaner
While a broom and scoop will do just fine when cleaning up a freshly sanded surface, you can save a lot of time and energy using a vacuum cleaner instead. This doesn’t mean that you have to use a full-sized vacuum cleaner, if you have a handheld cleaner, you can use this as well, just be sure not to overfill the collection bag.
Interior Paint Primer
You should never attempt to apply paint to a wooden workpiece before it has been cleaned, sanded, and primed. You should also ensure that you have the correct primer for the paint type you are working with. If you are using acrylic or latex-based paint, you should use an acrylic or latex-based primer to ensure that the paint adheres correctly.
Interior Paint
Choosing the paint type best suited to the type of wood you are painting and the aesthetic you are aiming for can be tricky. Acrylic paint is more durable, but latex paint gets better coverage and it’s cheaper. There are combinations of the two you can purchase as well, but again this depends on the look you are going for and whether your wood is capable of accepting said paint type.
Protective Gear
Protective gear is very important regardless of the paint you are working with. Aside from protecting your clothing from paint stains, it can also ensure that harmful chemicals are not inhaled and that they do not come into contact with your skin or eyes. We highly recommend you wear eye goggles, a set of gloves, and a respirator mask when working with any paint type.
Clean Cloths
Never underestimate the usefulness of a set of clean cloths. They can be used to clear the paneling of particles, wipe excess paint away, and clear paint off your tools. There are specialized painting cloths, tack cloths, microfiber cloths, and regular cloths for you to choose from.
All of these have the same primary function, but some are better than others and which one you choose largely comes down to your budget.
Prepare Your Wood Paneling
Prior to any paint being applied, you need to prepare the surface of the paneling. Not only does this ensure the painted wood paneling is clean but it will allow you to identify any imperfections in the surface of the wood before painting begins. Always ensure that you are protected by donning your gloves, mask, and respirator before beginning this process.
Clean the Surface of the Paneling
Before the surface can be sanded and primed, painted wood paneling needs to be cleaned. One of the best ways to ensure your wood paneling is thoroughly cleaned is to use trisodium phosphate on the surface. Trisodium phosphate needs to be diluted in water, so check the ideal ratio as stated in the packaging by the manufacturer and ready your solution.
Be sure that you are wearing your mask and gloves before you dip a cloth or sponge into the mixture. Once your cleaning device is ready, start cleaning the surface starting at the top and working your way to the bottom. If your workpiece is wider than it is long, you could work from side to side. Be sure to clean your workpiece in sections so as to not miss any spots.
The goal here is to clean off any grime that could have built up over time. This means that if your paneling is made of solid wood, you will have to clean thoroughly between the wood grain. Once you are done cleaning the surface, allow the surface to dry completely before attempting to sand it. For good measure, you can wipe the surface with a damp cloth to neutralize any phosphate lingering on it.
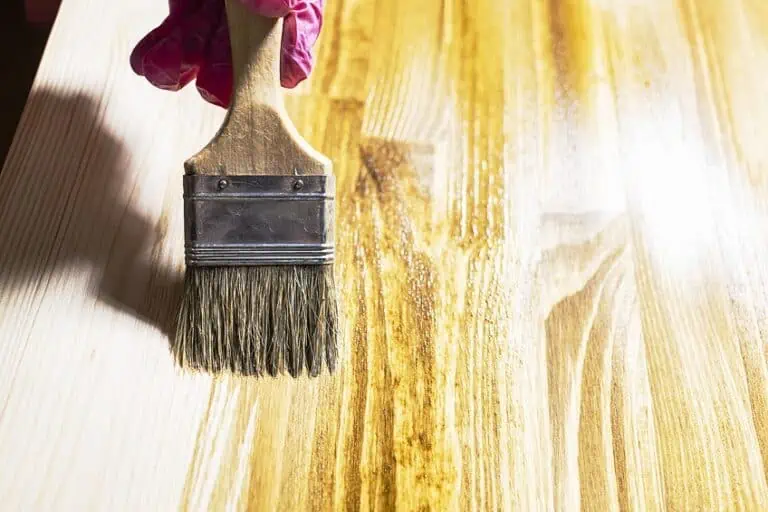
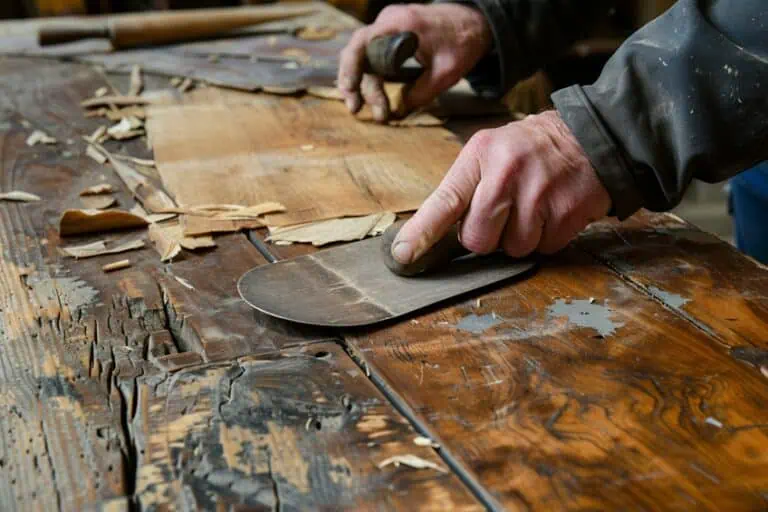
Sand the Surface of Your Paneling
Now that your surface is clean you can begin sanding it. Sanding the surface exposes fresh wood grain that will allow your paint to seep in and bond with some of the wood fibers. Sanding the surface of wood paneling is relatively easy, all you need is a sanding block or paper of around 220-grit to get started.
You can start at the top of the paneling and work your way downward or you could work from side to side. Regardless, sand the workpiece in sections to avoid missing any spots and to ensure that your surface is as evenly sanded as possible. The idea is to expose new grain, remove the existing finish, and produce a level substrate.
This sandpaper grit should ensure a very smooth surface so if some areas are rougher than others simply give that area some extra attention. It’s likely that these areas are denser and/or contain a knot if you are working with solid wood. Don’t forget to sand outward toward the edges to ensure that primer is able to sink in these areas too.
Once the entire surface has been sanded you will need to remove any remaining paint/wood particles from the surface and floor. We recommend using a vacuum cleaner and clean cloth. Wipe down the surface of your paneling using a clean cloth and suck up the debris that lands on the floor using your vacuum.
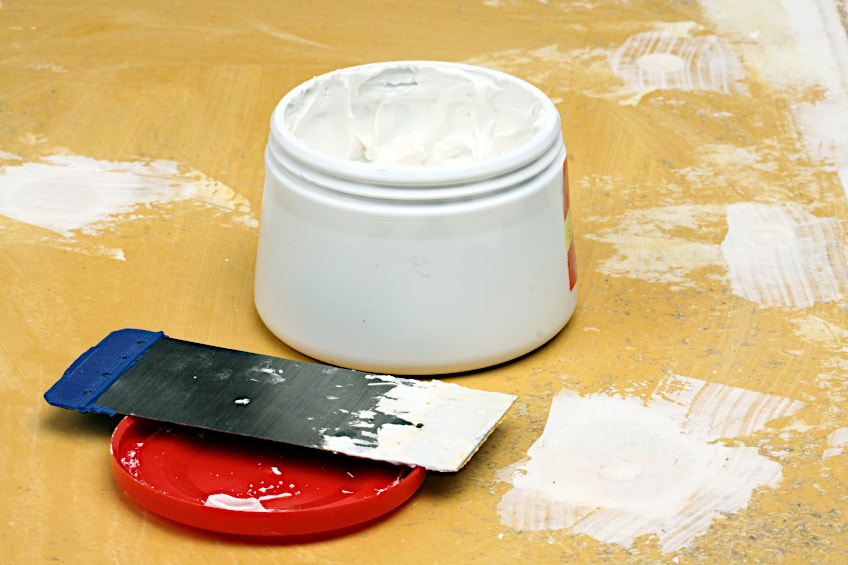
Fill In Any Gaps or Cracks
Depending on the age and location of your paneling it might have acquired some dents and scratches over the years. If it has, you can fill in these areas with some wood filler (for bigger cuts) and wood spackle (for smaller cuts) All you need to do is get some filler or spackle on a putty knife and apply it to the affected area.
Once the filler or spackle has been applied inside the recess, wipe off any excess at a 45-degree angle with your putting knife. You can use a clean cloth to wipe away any stubborn excess from the surrounding area and allow the spackle to dry completely according to the period indicated on the packaging before applying any primer.
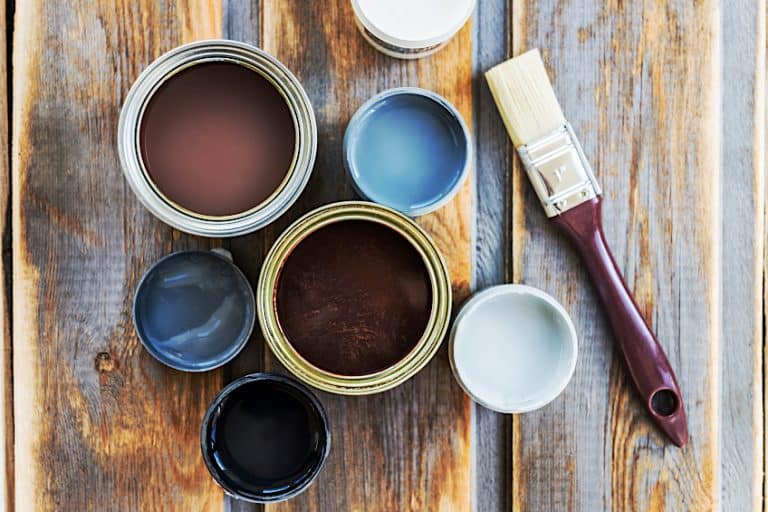
Choose the Correct Paint
Painting wood panel walls usually requires the use of one of two interior paint types. These are usually acrylic-based paint and latex-based paint, each of which has its respective advantages and disadvantages. Below is a short description of each paint type and what their advantages and disadvantages would be for this application.
Latex-Based Paint
Latex-based paint is also known as water-based paint. This paint type is good for the environment as it does not contain VOCs (volatile organic chemicals) and it isn’t that expensive. Latex-based paints get excellent coverage too, but they aren’t very durable and generally shouldn’t be used on surfaces that will receive high traffic or experience a lot of impact and abrasion.
Acrylic-Based Paint
Acrylic-based paints are a good choice for painting wood panel walls. Acrylic-based paints are far more durable than their latex counterparts, but they don’t get quite as good coverage and they contain some VOCs. While they aren’t as good for the environment, they are resistant to impact, abrasion, heat, cold, and mold infestation.
Acrylic paints also cure thicker, but they tend to be more expensive. You should always ensure your workspace is well-ventilated before using this paint type.
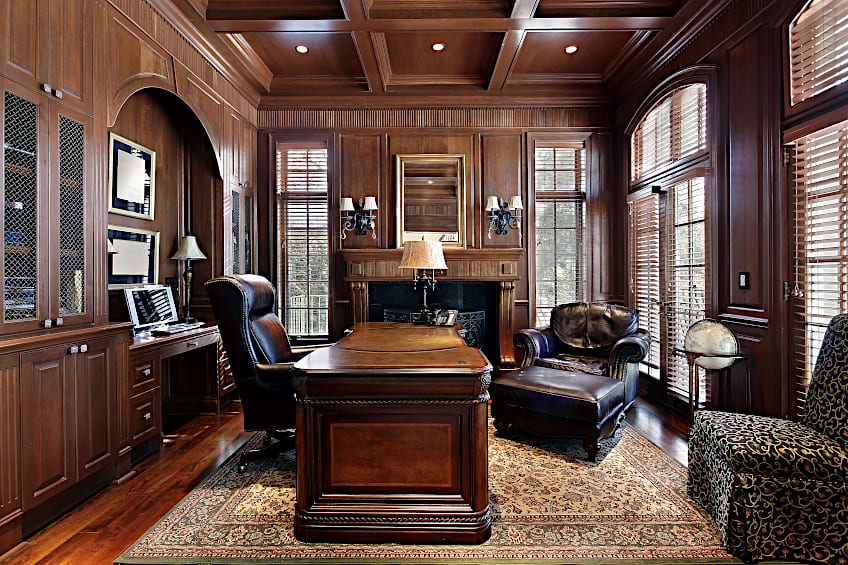
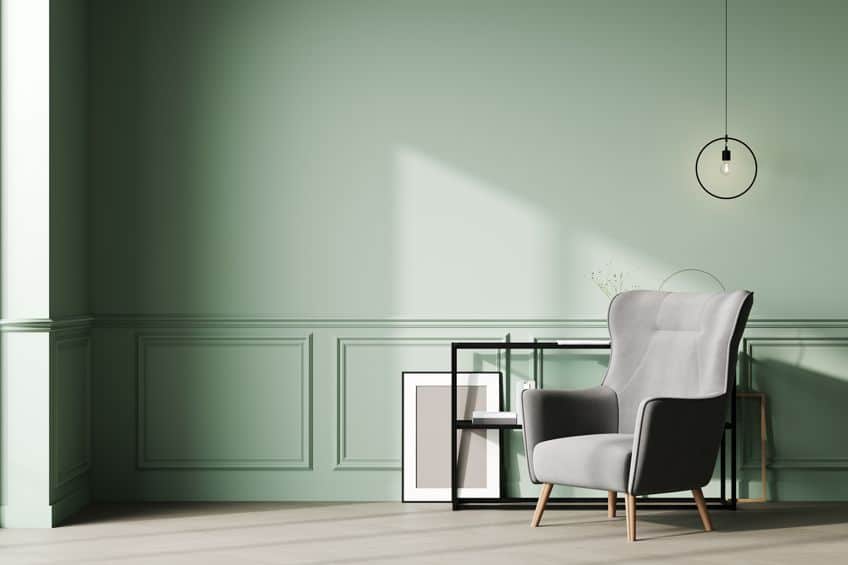
Choosing the Right Color
Wood paneling is an element of interior decoration that isn’t designed to stand out too much. For this reason, most professional painters and even DIY enthusiasts recommend painting paneling in neutral colors. Earthy shades of popular interior colors like wood brown, beige, very light greens, and even very soft blues can work wonders in interior spaces. That said, picking out the patterns created by certain types of wood paneling with different shades of paint can provide a basis for creating a truly unique and eye-catching design.
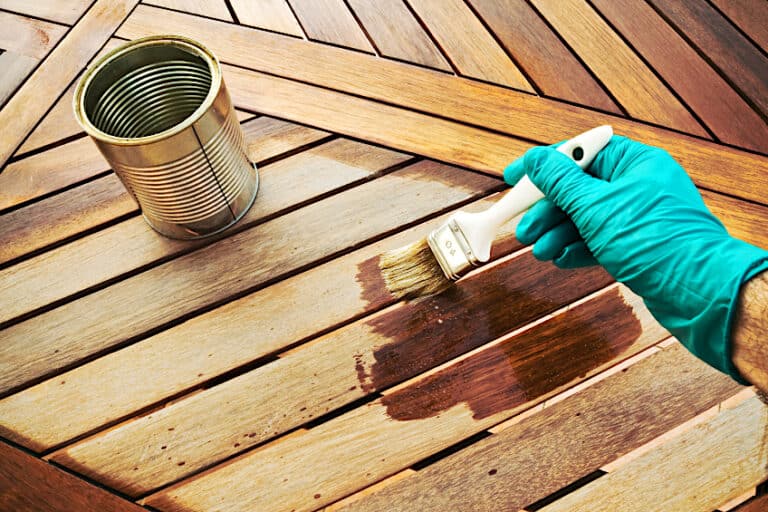
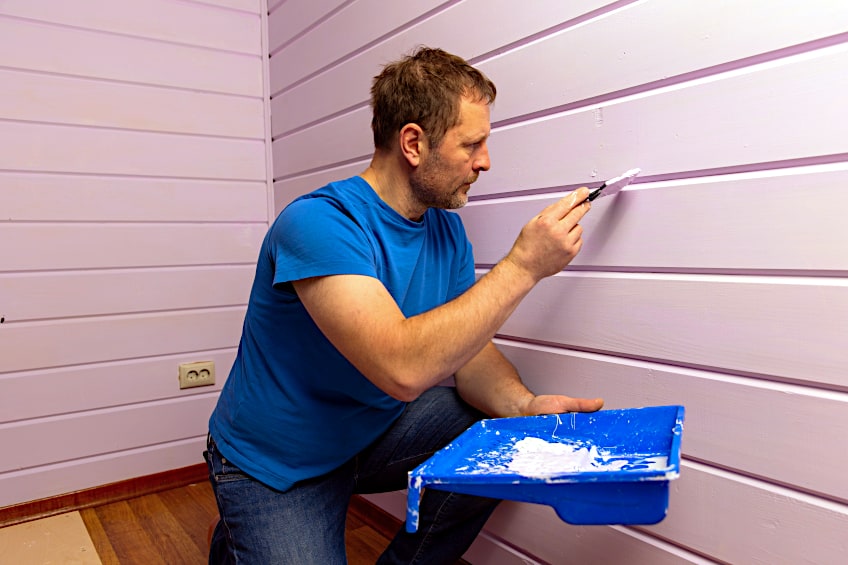
Prime Your Wood Paneling
It’s time to apply primer to your wood panels. Before you begin, protect your wall trim with some painter’s tape, lay down your tarp, and then secure it to the floor and/or wall using some painter’s tape as well. To ready your primer, shake or stir the container housing the liquid and then dispense a moderate amount into a painting tray. Dip your roller into the tray until half of the applicator has been submerged. Rub your roller on the ramp of the tray to spread the primer all around the applicator and remove any excess primer too. When you are ready, begin applying your primer starting at the top of your paneling and working your way to the bottom.
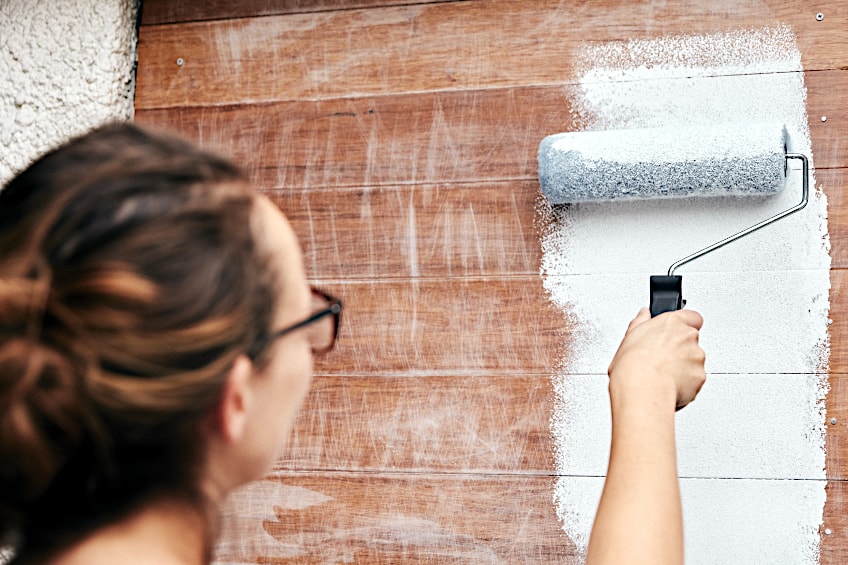
Primer should be applied in long, thick lines following the length of the wall or the paneling board. The goal is to cover any area that will be painted with primer to ensure that the paint not only adheres correctly but also does not become blotchy in certain areas once it’s applied. Repeat this process until all the areas you intend to paint are nicely covered with primer.
Once you are done, inspect the surface of your paneling to ensure that the primer has been evenly applied, and touch up any areas that have not been. Once you are satisfied, check the primer’s container and allow the primer to set for the time period recommended by the manufacturer before attempting to apply your paint.
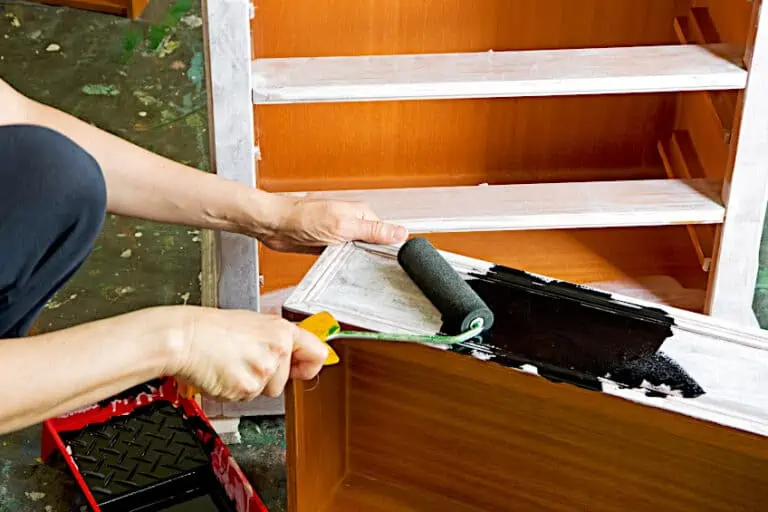
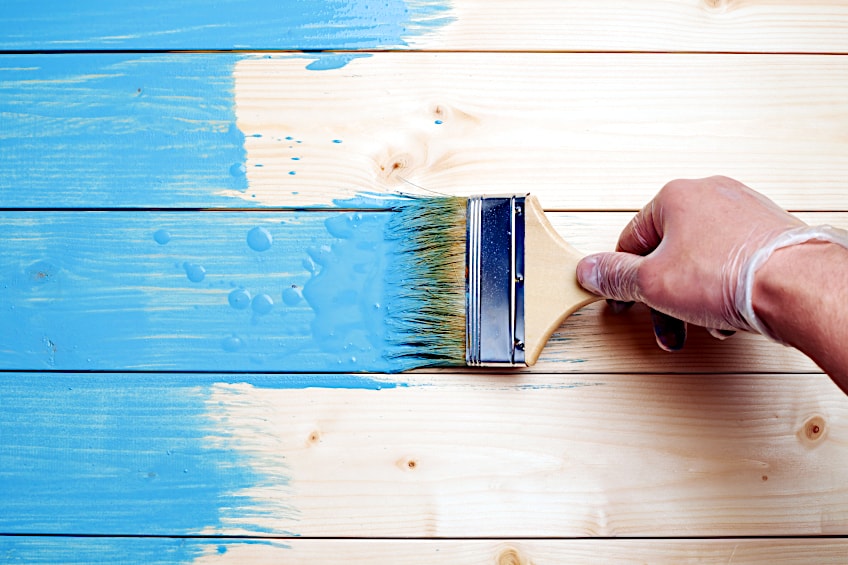
Paint Your Wood Paneling
It’s finally time to paint your wood paneling. Before you begin applying paint using your roller, cut in any corners that you won’t be able to reach with your roller. Hold your brush horizontally when painting vertical edges and hold it vertically when painting horizontal edges. Take your time and don’t forget about the areas closest to the trim that have been covered with painter’s tape/
If you don’t have any spare ones, clean your painter’s tray and roller applicator. Give the paint container a good shake and pour some paint into your tray. As you did with the primer, dip your roller into the paint until half of the applicator has been submerged into the paint.
Remove the applicator and roll it on the ramp of the tray until the paint has been evenly distributed on the roller and any excess paint has been removed. Start painting your trim as you initially applied the primer, either working from the top to the bottom or simply working in sections. Focus on ensuring your paint is evenly applied to the primed surface, reloading your roller when needed.
If your paneling is large don’t hesitate to work in sections, or if it is oddly shaped, you could try working from the center toward the edges. Repeat the process until the entire surface has been painted and then allow the paint to dry as recommended on the label by the manufacturer. If you would like to apply additional coats, allow the initial one to dry for a bit first.
If you still haven’t been able to reach some areas of your trim don’t hesitate to use a brush to ensure that no areas that could catch the eye of a viewer remain unpainted. When you have completed applying the last coat of paint, simply follow the instructions are directed by the manufacturer regarding drying time before attempting to make physical contact with the paneling.
Finishing Touches
Your paneling has now been painted. However, don’t pack in your tools just yet. Remove the painter’s tape from your walls and fold up your tarp so that it’s ready for the next time you need it. Also remember to reinstall any fixtures and relocate any furnishings that may have been removed for the painting process, and then pat yourself on the back for a job well done.
Maintenance and Care
Wood paneling doesn’t take too much maintenance, but there are a few tricks you can use to ensure that it lasts a long time. For one, you can use a wax wood cleaner and a clean cloth to wipe down the surface. This will both clean the surface and ensure that it repels any dust particles that are attracted to it over time. As far as physical repairs go, you likely won’t have to repaint your wood paneling anytime soon. If you do notice cracks and scratches these can generally be spot repaired with some spackle and spot matching the paint. Apply as many coats as are needed to blend in the affected area nicely and you should be good to go.
As you can see, painting wood paneling is easy and doesn’t take an expert to execute correctly. Wall paneling is a nice addition to virtually any space and the possibilities are endless when it comes to aesthetics, so get creative and enjoy the experience. Finally, always remember to wear your gloves, mask, and goggles when working with potentially harmful chemicals.
Frequently Asked Questions
Can You Paint Paneling?
Old homes usually have stained wood paneling, but these can feel a bit dated at times. Can you paint the wood paneling, then? Absolutely, painting wood paneling is easy and can bring a modern feeling to an otherwise dated space.
Is Painting Wood Paneling White a Good Idea?
Traditionally, wood paneling was simply sealed to show off the color and grain of the timber. Is painting wood paneling white a good idea then? Well, it depends on the existing colors in the space, and if the white won’t be too distracting, then go for it. On the other hand, if you want your paneling to stand out, white is perfect too! When painting paneling white, be sure to use a good primer or the natural resins in the wood may bleed through, resulting in yellowish staining on your paint.
How Do You Paint Wall Paneling?
Are you wondering how to paint wall paneling? There are many guides out there detailing how to paint wall paneling, but the basic idea is to clean, sand, prime, and then paint the surface. As you can see, this isn’t much different from painting any other wooden surface.

I have been into woodworking since 2005 and woodturning since 2011. Because of my love for wood and woodworking, I started woodhappen.com to teach other enthusiasts about how to finish and seal wood, the best woodworking tools, the different types of wood, and everything else related to woodworking! Read more about me here.