How to Age Wood – Looking at Various Aging Wood Techniques
The appeal of rustic-looking wood is something we are all familiar with. It is the lived-in, shabby chic look that most homeowners are trying to achieve. Usually, this weathered down look takes years to achieve as the wood is exposed to the elements and daily wear and tear. Unfortunately, we do not always have years to wait when it comes to achieving the desired look for our homes – seriously, do you want to wait that long for your home makeover? By the time the wood is in the right condition, you will more than likely be looking for a new home style and design. This article will look at how to weather wood quickly. We have got a few tips to show you on how to age wood in less than a weekend.
How to Weather Wood
There are numerous ways to age your wood; however, different woods will have different reactions to the same process. When it comes to looking at how to weather wood, you need to consider the wood being used and the fact that while the instructions may be straightforward, it is not an exact science and you cannot guarantee the end result. If you have a sense of adventure, this process can be interesting and fun as you try to determine the final outcome.
Important Things to Remember When Aging Wood
Each piece of wood you use will be different, regardless of whether or not they come from the same “batch”. This means that even if you are able to replicate your process down to a T, the pieces will look different, and this is not as a result of something that you did. The appeal of aging wood is that the pieces look different and rustic – if that is not what you are looking for, then a stain or paint finish will be more up your alley.
Recommended Products for Aging Wood
There are a number of ways in which to go about weathering wood, many of which we will cover below. In addition to the methods you can try at home, there are also store-bought products that you can buy to simplify the process and give you added peace of mind that the end result will be what you envisioned.
Grey Wood Stain
If you are not too keen on the rustic, mix-and-match type of look and would prefer something more uniform, a grey wood stain is by the far the simplest way of achieving it. When we look at how to grey wood, it is the same as with most stains: You simply apply the solution to the rag and apply it onto the wood. Wait a few minutes before wiping off any residue.
Weathered Wood Accelerator
To maintain the wood’s personality and embrace the imperfections, a weathered wood accelerator product is what you should be looking for. This product works in a similar fashion to the at-home weathering method of using vinegar and baking soda in that it creates a chemical reaction on the wood’s surface. The accelerator can be applied using a rag or brush, and as it begins to dry, the grey coloring will begin to present itself. Unlike a water and baking soda wood aging solution, the accelerator is able to provide a consistent grey finish. This option produces a more authentic result when it comes to weathering wood.
Aged Wood Accelerator
The product is similar to the weathered wood accelerator in that it uses the same principle to preserve the wood’s imperfections and natural look. The difference is that the aged wood accelerator produces a brown color instead of grey. If you are looking for a brown, rust-like color, this product is what you need. The color is predictable, which makes it less hassle to use than the vinegar and steel wool method.
Aging Wood Techniques to Try at Home
Aging wood can be achieved by using a wide variety of common household products. We recommended using a light hand and that you repeat the process for the best result. Do not be afraid to improvise when following aging wood techniques. To assist you in aging wood, we have compiled a list of options.
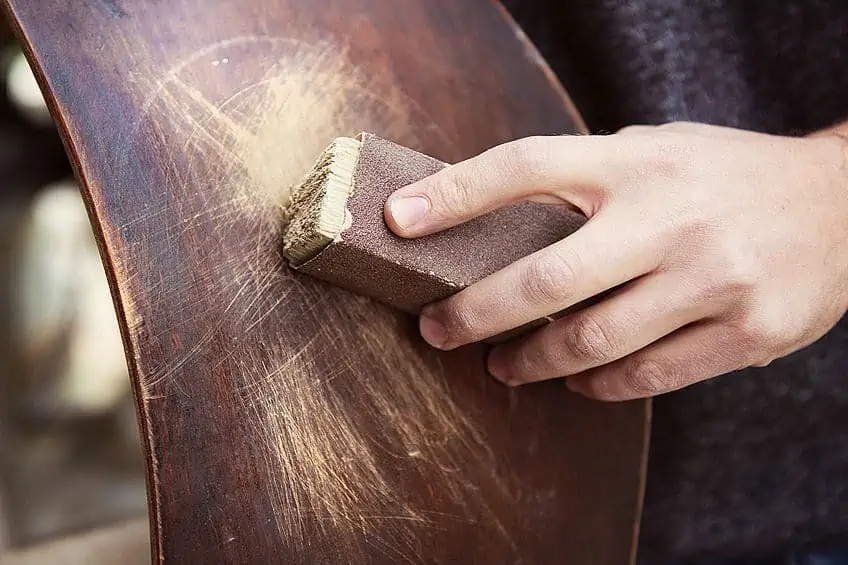
Improvised Wear and Tear
The first thing that comes to mind when it comes to aged wood is the imperfect texture. This can be easily achieved in a matter of minutes by using one of the below-mentioned techniques. It is also a great way to work out any pent-up frustrations that you may have.
Four Ways to Improvise Wear and Tear
- Beat and bang up the wood using crowbars and hammers, focusing on perfect edges – weathered wood is not perfect.
- Hit the wood with a bag of screws and nails to create an uneven, random texture. We recommended wearing safety goggles for this one.
- Use steel wool or a wire brush to rough up the wood, dragging it along the grain to create striations.
- Gently tap a drill bit or awl into the wood with a hammer – this is a great way to mimic insect damage.
You do not need to make use of every single method. Look at the tools that you have on hand, the wood you are using, and the finish that you are going for, and use your discretion when it comes to choosing the way forward.
How to Grey Wood
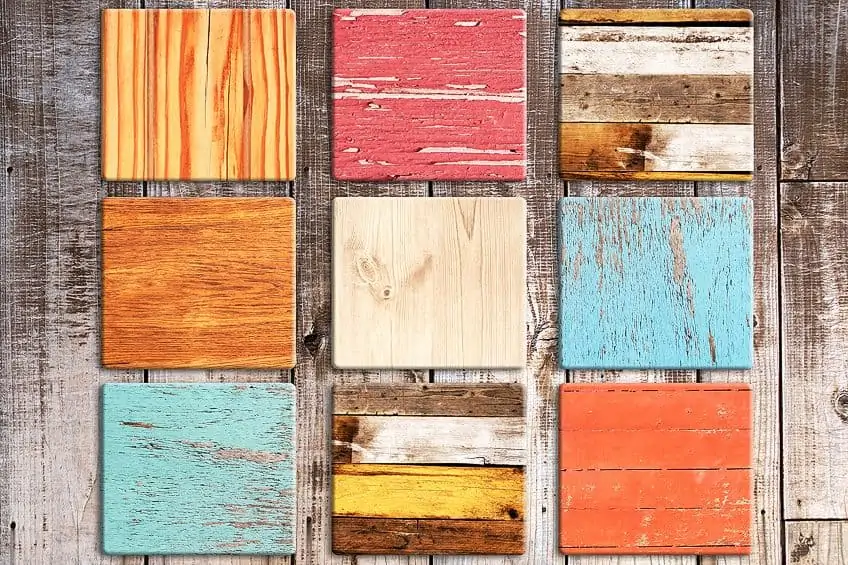
Pinterest has been flooded with weathered wood featuring an ashen-grey color. It resembles driftwood and the color tone can be achieved with a simple wood stain. All you need is some vinegar and a pack of steel wool.
The process is simple: Fill a mason jar with vinegar and pop a steel wool pad into it. Put on the lid and let the wool rust in the vinegar, changing the color of the liquid. When you are happy with the liquid’s color, you can brush the steel wool onto your wood. The amount of vinegar and steel wool used will influence the color and shade of the stain.
For a subtle grey discoloration, leave the steel wool in the vinegar for around 30 minutes. For a silvery grey color, leave the vinegar to sit for two days. Light greys are ideal for blond woods while darker greys are more suited for brown and red woods.
Once you have determined that the solution is the correct color, remove the steel wool and use a paintbrush to spread the mixture onto the wood’s surface. As with any wood stain, wait for the wood to dry to determine the final color. Once you have seen the end result, it will be easier to determine if it needs another coat or not.
Pro tip: For a richer color, leave the steel wool in the vinegar for a month or until it completely dissolves. If you want to use it before the steel wool has dissolved, use tongs or rubber gloves to remove it before you start coating the wood.
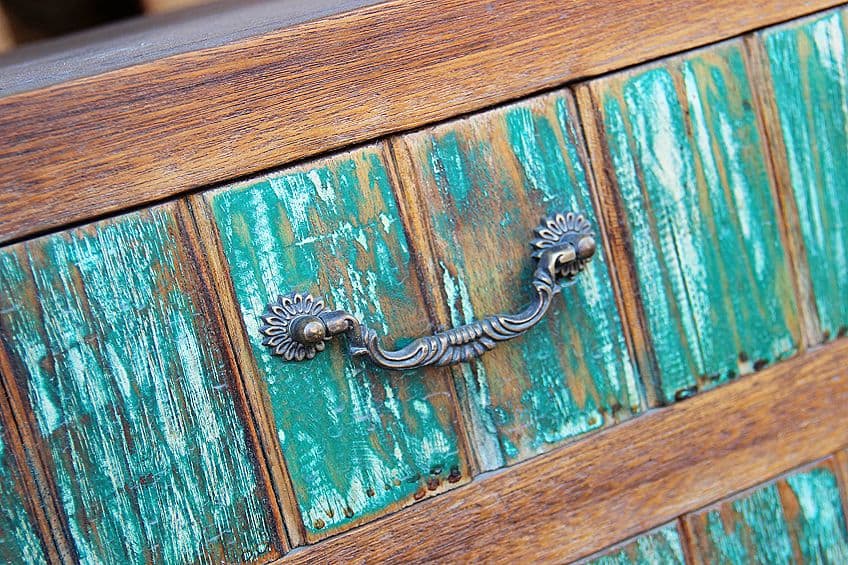
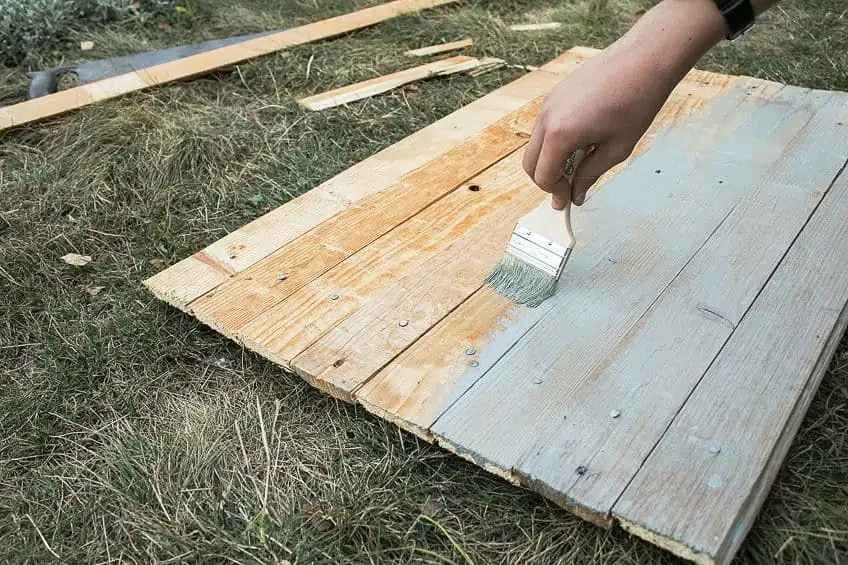
Weathering Wood Using Paint
To start the process, sand the wood and hit any perfect edges with a hammer to give it a weathered, rustic look. Choose three to four colors to paint on the wood (we recommend one of them being white to give it contrast). The key is to paint inconsistently thin layers of each color, so it is okay to have some of the wood uncovered. You do not even have to wait for the paint to dry, as having the colors blend will add to the weathered, aged wood effect.
Once you are happy with the color, leave the wood to dry overnight before sanding down the wood again the next day. Remember, in the case of aging wood, imperfections are perfection. So as soon as you are happy with your color creation, apply a thin coat of wood stain or sealant to ensure that your hard work is preserved.
Bleaching Wood for a Weathered Effect
Right at the beginning of this article, we mentioned the time-honored classic of weathering wood using the elements, and that is what this method is all about. Let us look at how to weather wood quickly using the sun to bleach it.
A quick afternoon in the sun could be all you need to weather your wood. This only works on tannic woods, which include red oak, redwood, oak, cedar, and mahogany. Make sure that you know what wood you are working with before starting the process. Another thing to look out for is wood that has already been treated. This is something you should avoid, as treated wood may already be sealed and will prevent the baking soda required for this method from seeping in and bleaching the wood.
Find a sunny spot in your yard to work in and set up your working station accordingly. To age wood with baking soda, mix equal parts of baking soda with water to create a thick paste. Use a paintbrush to apply a thick coat of paste onto the wood before leaving it in the sun to dry.
It will take about six hours. Once it has dried, remove the dried mixture with a brush along the grain of the wood. Rinse the wood and then dry it off with a clean cloth. You can repeat the process to further age wood with baking soda for an aged wood look. Once you are happy with the color, apply a wood sealant or stain to preserve the color.
Using Tea to Discolor Wood
This wood aging process uses ingredients that are already in your pantry, which means it is a quick, easy and cost-effective solution to try. The first step of this process is to follow the vinegar and steel wool method mentioned above: Fill a jar halfway with vinegar, pop in some steel wool, and leave it to sit uncovered for a day. The longer you leave it in the vinegar solution, the darker the liquid will become.
Once the solution is ready, make a cup of tea. The tea has tannins which will help to create a darker finish. Keep the tea separate from the vinegar solution – do not mix! Next, you will need to prepare your wood by sanding it in order to ensure that the liquids stick to it before applying any solutions. Now, you will brush your tea onto the wood and allow it to dry and penetrate the wood completely. Once dry, you can apply the vinegar solution.
As it dries, the aging process will continue, so wait for the second coat to dry properly to see the final result. You can always apply an additional layer if you are not happy. When you are happy with the finish, be sure to seal it properly to protect the wood.
Frequently Asked Questions
Can You Reverse Aged Wood?
You can bring old, weathered wood back to life with a bit of effort and TLC. Boiled linseed oil is the best treatment option for old and dried-out wood. If the wood is physically damaged or beginning to rot, you may want to remove or sand away the affected areas before applying any sealer or stains.
Can You Seal Weathered Wood?
Yes, there are three commonly used methods for sealing weathered wood, namely:
- Applying an oil-based sealant, for example, linseed oil or tung oil;
- Applying varnish, lacquer, or a coat of polyurethane;
- Or using a combination of stain and sealant to finish off the project.
Do I Need to Prepare the Wood Before Aging it?
When in doubt, you can rest assured that answer is almost always a yes. The same way you prepare wood for sealing and staining should suffice when it comes to aging the wood. The surface needs to be bare and treatment-free, so be sure to remove any sealants or stains beforehand. Sand the wood to open the grain and allow for more of the solution to be absorbed and to prevent a blotchy, uneven finish. Always ensure that you prepare your working area beforehand as well to prevent any surfaces from being damaged or stained in the process.
How Can I Remove Spots in My Finish?
Wait for the wood surface to be dried and then sand it down. Reapply your aging method, paying close attention to how you apply it. The most common causes of spots include over-sanding, closed grains, and solutions that have been applied too thinly or that have been watered down to lighten the color.
What Causes Watermarks on Artificially Aged Wood?
Most often, this is caused by applying a thick layer of stain or sealant, or it could be as a result of it taking longer than usual to dry. To prevent this, apply thinner coats of stain or sealant and work in an environment that has proper ventilation and is not too cold. Watermarks can easily be buffed out, so do not stress about it too much.
Why Do My Wooden Planks Have Different Colors?
As we have mentioned, wood can be tricky to work with and you cannot always guarantee the results. So, the chances are very good that even if you followed the exact same aging method on all of your planks, they would still have different colors – it is not as a result of something that you did, it is just one of those things. Most people look for this “mix/match” look when it comes to aging wood. If the raw wood has dark and light planks, you can always lightly sand the darker wood to lighten the color. You can also reapply your solution to make the wood darker or lighter if need be. If you have ever seen an old barn or tool shed, you will notice the different colors and shades present on the wood. This is a result of exposure to the elements over a few years and is the look most people are going for when it comes to a weathered wood effect.

I have been into woodworking since 2005 and woodturning since 2011. Because of my love for wood and woodworking, I started woodhappen.com to teach other enthusiasts about how to finish and seal wood, the best woodworking tools, the different types of wood, and everything else related to woodworking! Read more about me here.