How to Stain a Fence – A Guide to Staining a Fence With a Sprayer
The need to personalize and beautify our surroundings has been part of the human condition since we marked ourselves to signify which clans we belong to (a practice some people still practice to this day). We have come a long way since then, but we still love customizing our surroundings to reflect our personal styles and preferences. These days home improvement isn’t a practice reserved for those with a lifetime of DIY or industry experience, therefore things like staining wooden fences are as easy as watching a YouTube tutorial or reading this super helpful step-by-step guide (or both). Let’s have a look at why you would want to stain your fence, what the benefits are and how you would go about it.
Why Stain Your Fence?
Maybe you just had your wooden fence installed and you can’t wait to get your hands on some stain to add some depth to the look, or perhaps you have been looking at your old wooden fence lately and feel you could breathe some life back into it. Regardless of the reason, there’s always a good excuse to stain your fence whether you simply can’t stand the look of the natural wood used to make it or your fence has seen some serious mileage.
Fence staining is a pretty straightforward process and is one of the least time-consuming and inexpensive “upgrades” you can make to your outdoor fences, not to mention that it automatically increases the curb appeal of your home once people get an eyeful of it.
The advantages of fence staining are not purely aesthetic though, in fact staining outdoor wooden fences, in particular, comes with a number of advantages such as minor weatherproofing, rot prevention, aversion to swelling, aversion to splitting, not to mention that it lowers the probability of rot and mold.
You might be wondering how simply staining a fence can grant it such protection, and the answer is a lot simpler than you might think. Staining wood is primarily considered an aesthetic upgrade as we mentioned previously; however, the process of staining wood means that the coating seeps deep into the wood fibers and creates a type of seal that is virtually watertight. This seal, therefore, protects the wood fibers from invasive particles such as moisture, insects, mold, and to a degree even heat degradation (splitting).
This illustrates that there are not many reasons not to at least consider staining your outdoor wooden fences, although there are certain woods that could do with other improvements especially if their natural hue is already appealing, in which case you should simply consider a sealer which is essentially just wood stain without any dye added to it.
In either case, almost all woods can benefit from a healthy coat of something!
How to Stain Your Wooden Fence
There are two ways you could go about staining your wooden fence and depending on your skill level and whether the nature of the matter is time-sensitive you could go about it either way. You could go about it the good old-fashioned way and simply use a roller and brush, and there is really nothing wrong with this especially if you are passionate about your craft.
The second way is to use a paint sprayer, this is definitely faster as you end up covering a large surface area a lot quicker, but it does increase the probability of making somewhat of a mess. There are advantages and disadvantages to both methods, and we will have a deeper look into these in a moment, but ultimately your choice will be affected by the scale and time frame you are working with.
Using a Brush and Roller vs. Using a Sprayer
If you were wondering how to stain a fence with a brush and roller it is nearly identical to painting a wooden surface. This being said, there are a few disadvantages to do doing so, namely, it is slower than using a paint sprayer and it is far more labor-intensive as you are physically applying the coating to every inch of the board by hand.
This does not mean that using a brush is a bad way to go about staining a fence, as it gives you the opportunity to pay more attention to detail than you would have when using a sprayer and (in our opinion) it does give you a far bigger sense of accomplishment, which is always good.
Prepare Your Workspace
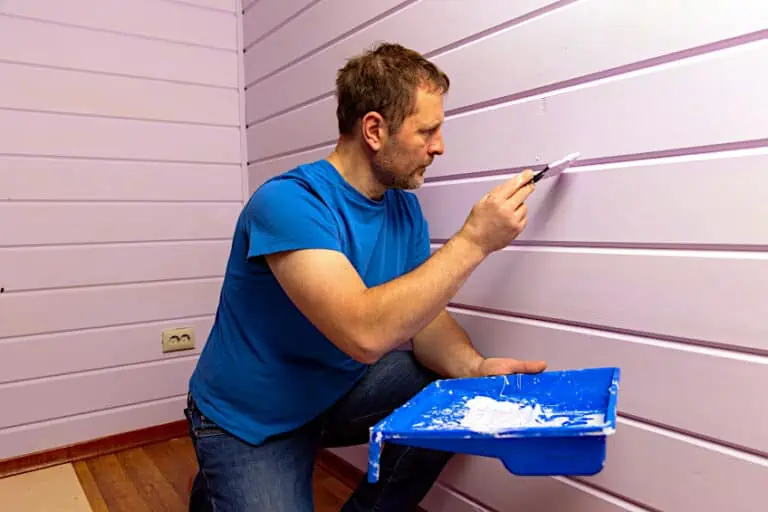
If you will be staining a face that grows along the edge of your lawn or driveway you might want to consider laying down a tarp or other covering to ensure that the surfaces don’t get stained accidentally. Aside from protecting these surfaces, you may want to ensure that you get all your tools ready, namely your paintbrush or sprayer, your exterior wood stain, your mixer, and a few rags in case you need to clean up some run-off.
Once you have your work area prepared, try to arrange your tools preemptively in order to minimize any running around you might have to do later. A good way to go about this is simply to keep all of your tools on the side of your dominant hand to ensure that they are right there when you might need them.
Once you have all of your tools sorted and your space covered up nicely you should ensure that you have the correct personal protective gear for the job, including a face mask, some eye protection, and a set of gloves to protect your hands from the stain (and possible splinters from the fence).
Prepare Your Fence Surface
We mentioned earlier that you may want to stain your fence for different reasons, namely that you could have a fresh fence that you feel could use some staining or an older fence that you would like to breathe some life back into. Before you get started you might want to clean off your fence with some soapy water or a power washer depending on your preference. Allow your fence to dry before proceeding.
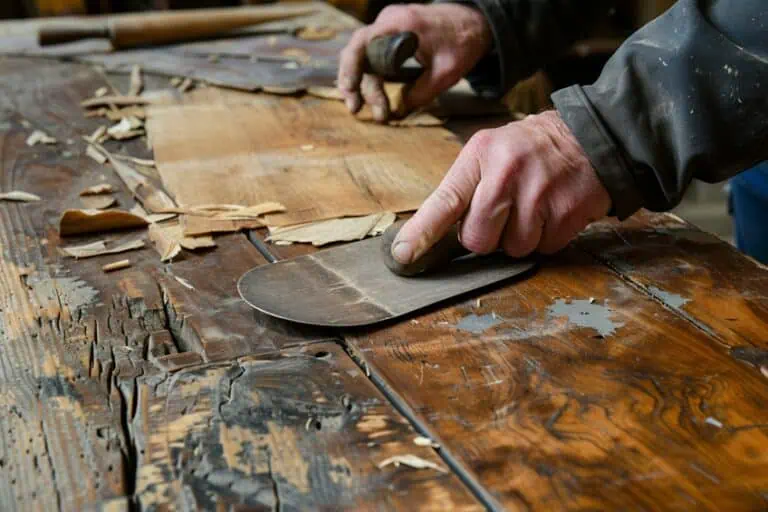
The process of preparing your fence in either instance is fairly simple; if you have a new fence, you need to check that the wood is good to receive a stain. In this case, simply pick a section of the fence and wet it with some water.
If the water beads on the surface, you will need to sand down the surface of the fence, however, if the water absorbs into the fence, you should be good to go.
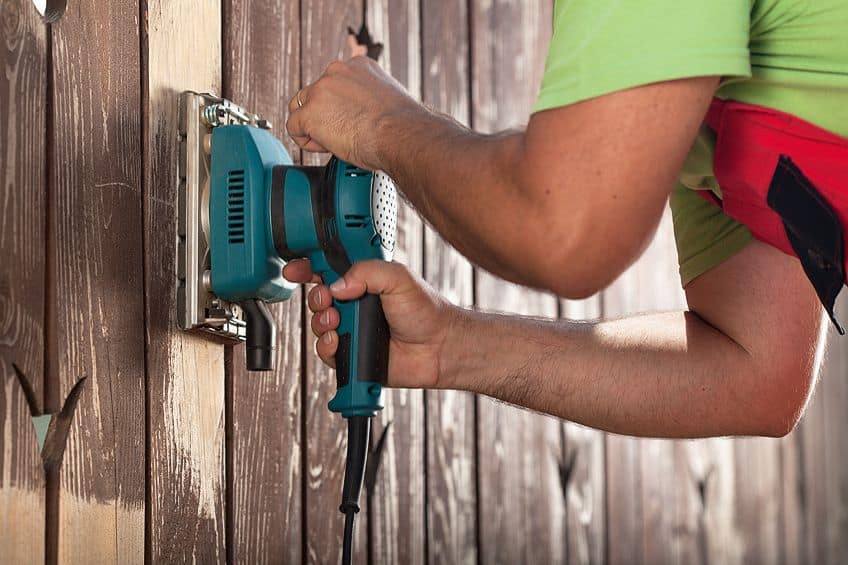
If you are restoring an older fence that has seen bad weather for some time, the chances are that it has already either been coated or stained previously. In this case, you will have to sand down the surface of the fence and expose fresh wood fibers underneath in order for the wood to accept the wood stain. If you are working with a large fence you should send the length of the board and work in sections, remember that this is a marathon, not a race so being patient with both the process and yourself will certainly pay off in the long run.
Fill Any Holes in Your Fence
Whether you have a new fence or you’re restoring an old one you could benefit from using some wood filler on the surface before you get to staining it. New fences (even ones that have just been installed) can have defects in the board that need to be filled. It also goes without saying that fences that have seen some winters, dog paws, and soccer ball impacts might have scratches or two that need to be filled in order to make the surface completely flush.
You can get around this with some wood filler.
Simply pop some into these cracks and recesses along the surface of the boards and ensure that you don’t forget to check the edges of each board as even one untreated spot can act as an invitation for rot in the future.
Once you have filled all of the spots in the surface of your fence check what the condition of each board is while the filler is drying to ensure that you don’t have any bad apples in the bunch, if you have a new fence this is highly unlikely but if you have an older one you would do well to replace any slats that won’t last much longer. Allow your wood filler to set in and dry before moving on to the next step in the process.
Stain Your Fence
This section has been divided into two as there are two ways you could go about staining your fence, as we mentioned previously you have the option of using a brush/roller or simply using a paint spray. Below, we have detailed the most effective way to do each for your convenience.
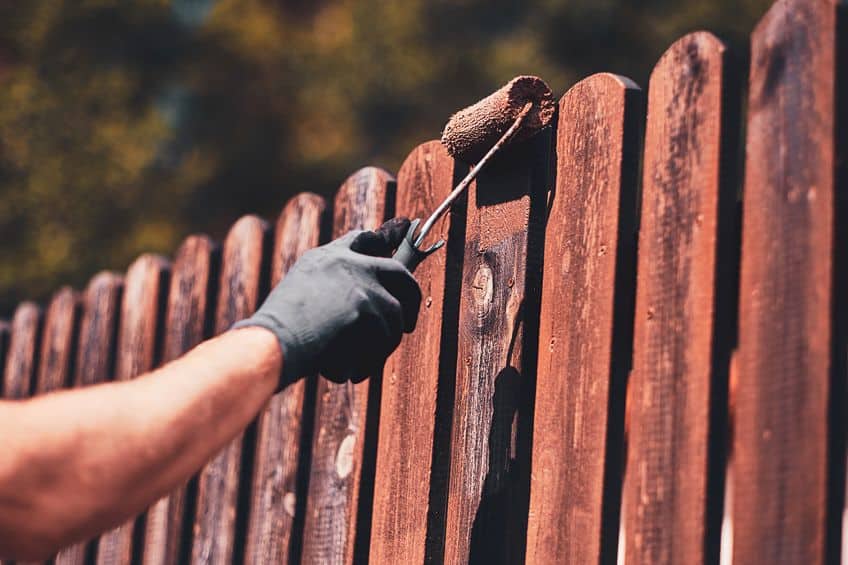
Using a Brush/Roller
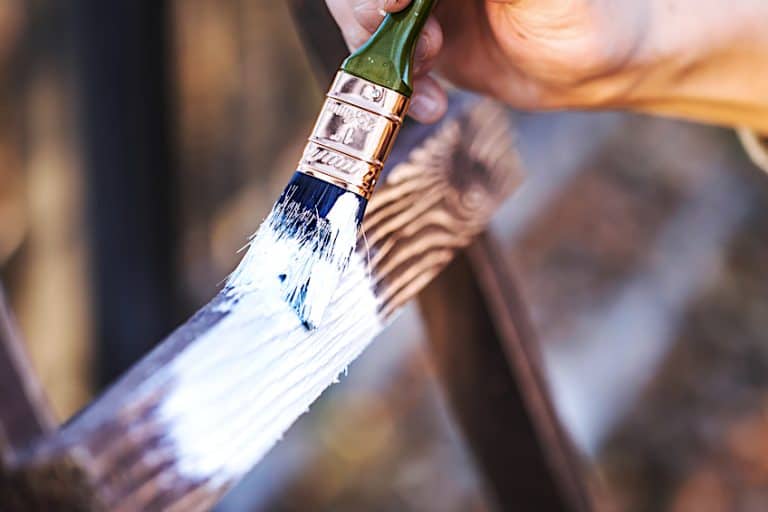
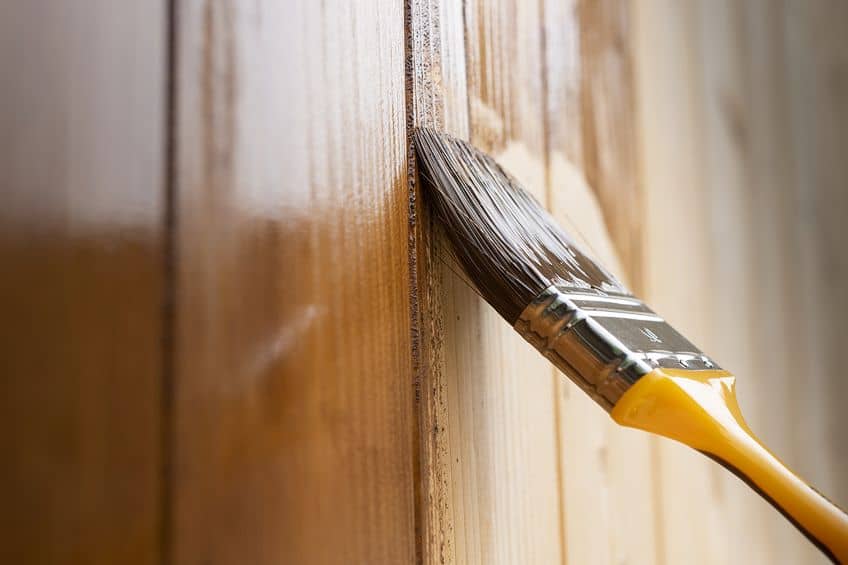
The brush and roller methods are fairly straightforward. When using a brush simply dip the tip of the brush in the wood stain and apply it along the length of the board in order to maximize coverage and efficiency. Ensure that you use the edge of the bristles to get between the edges of the individual boards.
This will ensure that edges of the board also receive the weatherproofing benefits of the wood stain even though they won’t be visible.
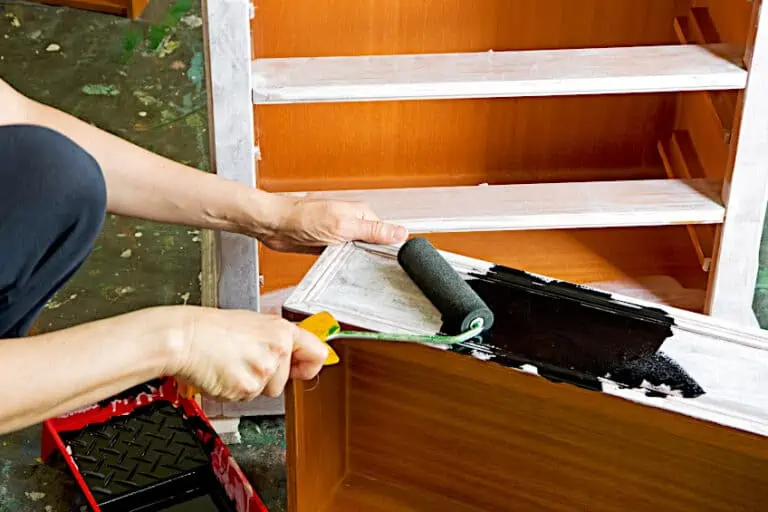
Don’t be afraid to be generous with the stain when applying it with a brush as applying too little can result in overlapping which can be challenging to get rid of. Using a roller is pretty much the same as if you were painting a surface, fill your mixing tray with wood stain and proceed to dip your roller into the substance.
We recommend using a roller with a medium nap for the best results when working with wood stain, you may then start applying the wood stain vertically to the fence board or roll it across the fence horizontally depending on your preference, although you should keep in mind that using the vertical method does give you the added advantage of the wood stain seeping into the edges of the board.
Staining vertically when using a roller also means that you greatly reduce the probability of overlapping since the excess stain is moved toward the end of the board, this means that painting vertically from the top down is the most beneficial in terms of efficiency and range of motion.
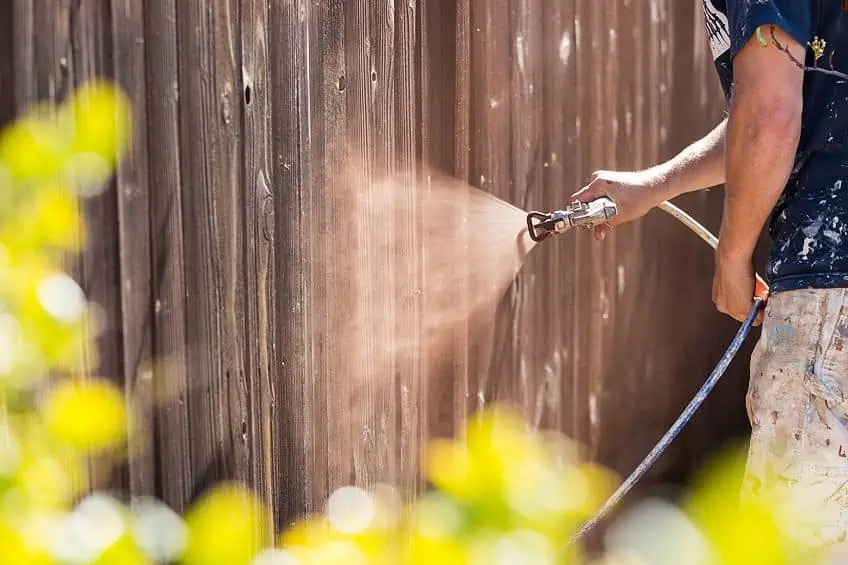
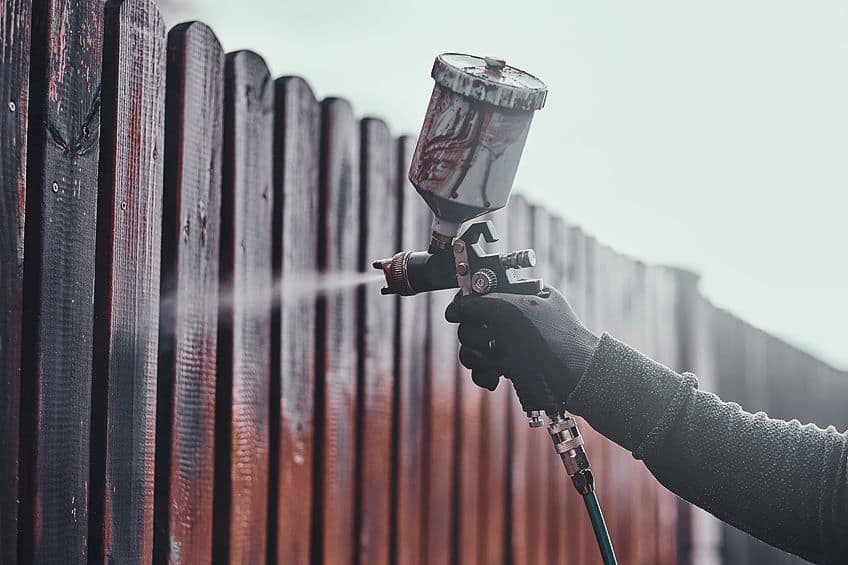
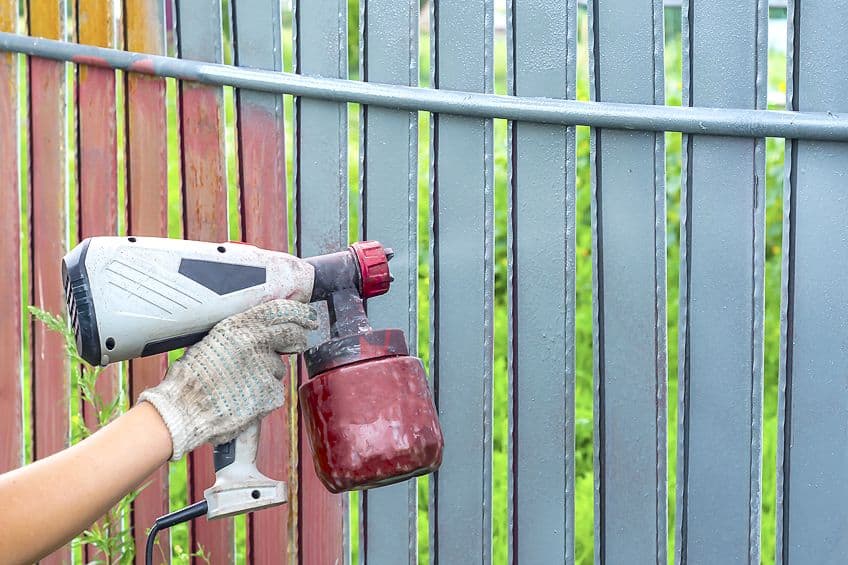
Using a Paint Sprayer
Staining a fence with a sprayer is fairly simple. If you have a paint sprayer you should find out if it is graded for use with wood stain. Although most modern sprayers usually are graded for use with wood stain, taking this chance could result in you being without a sprayer when you need it most. Once you are sure that your sprayer is indeed graded for use with the wood stain you can go ahead and fill your sprayer’s tank or hopper with the wood stain.
Once filled ensure that you have set up your sprayer tip, spray pattern, and pressure rating for use with wood stain.
Different liquids have different consistencies and therefore require different pressure settings, feed rates, and spray patterns to dispense them while ensuring minimal splatter and/or overspray. The ideal settings for most wood stains (oil and acrylic alike) would be a passive feed rate paired with a high-pressure setting for efficient atomization at the nozzle and ease of use. This being said, once you have all of these settings sorted you may begin applying your stain to the fence in question.

Unlike using a brush or roller, the direction you choose to spray in is entirely up to you as the sprayer will ensure decent application as long as you use technique and distance management throughout the application process. Medium distance is advised why applying wood stain as getting too close to the board could result in you over-saturating the board with wood stain, whereas standing too far away could result in too little stain being applied, leaving you having to do a second coat.
Just like spraying paint, your technique should be focused on your wrist, utilizing its range of motion to create even, uninterrupted passes over the surface of the board. Spraying stain is the most time effective way of staining most surfaces and is arguably the best way to stain a fence as it is the most efficient and least time-consuming of the DIY methods available to most people. It is also the best way to stain a fence that has inlays or irregular forms.
Assess Your Fence
Once you have made your final pass with your sprayer, or final stroke with your brush/roller, allow the stain to set in and dry. This time period can range considerably depending on the type of stain you have chosen to use; this is because oil stains take roughly 48 hours to dry up, but an acrylic wood stain can set and dry anywhere between three to four hours.
Once you are sure that your stain is dry you should be able to assess whether it has had the desired result. If you have used a brush/roller in applying your wood stain you might find that your stain is a bit more intense compared to someone that has opted to spray stain, this is because you’re not really applying a metered amount when applying stain manually, but since you are aiming for uniformity when spraying stain (and the fact that you have control over trigger pressure) you typically up applying less stain.
This is not a problem in either case if your stain is too light simply give it another coat as we covered previously and repeat until you are satisfied.
Seal Your Fence
How to stain a fence correctly is a topic that has been discussed since the dawn of the home improvement industry and will likely go on long after we’re all living on another planet (presumably sitting on our porches discussing the best way to stain a fence), but the topic of sealing a fence after it has been stained is often overlooked and undervalued.
A stained fence does increase the curb appeal of your home, or can simply function to spruce up your garden a bit, how long will this last? You see, a stained fence has a lifespan depending on the environment it is situated in and more importantly, the forces that act on it, therefore sealing your fence more often means the difference between getting on your hands dirty once a year or once every four to five years.
As we mentioned previously, stains for wood fences come in two varieties which are oil-based wood stain and acrylic-based stain. The latter usually comes ready mixed with some sealer in the mixture, but oil-based stain (which most people prefer) needs a sealer to be added after it has been set into the wood.
Sealer can be applied using the same method used to stain the fence initially and you can choose whether a sprayer or brush is right for you, although in this instance we do recommend using either brush or roller to avoid any potential damage to your sprayer (however little). Once your sealer has been applied, wait roughly 72 hours before making physical contact with the fence again, and don’t forget to clean up any runoff and dispose of your tarps and other coverings responsibly.
Now that you know how to stain a fence, how to identify a good stain for a wood fence, the difference between using a brush/roller and a sprayer, and how to seal your newly stained fence, it’s time for you to go out and put your newfound knowledge to the test. Remember to always check if your sprayer is graded for use with wood stain, always work in a well-ventilated area, always remember to stain the edge of your board, and most importantly safety first!
Frequently Asked Questions
What Is the Best Way to Stain a Wood Fence?
The best way to stain a wooden fence is arguably using a wide brush or simply using a paint sprayer. Ensure that the sprayer you will be using is graded for use with wood stain or that your brushes bristles are conducive to use with a substance as thick as wood stain.
Is It Better to Spray or Roll Stain on a Fence?
It is always recommended that you use a paint sprayer when staining a fence. If you have the choice, use an airless sprayer as it can be challenging to clean out a paint hopper and/or canister once the stain sets in. Using a brush/roller is not recommended when staining a fence as the process is labor-intensive and can be a hindrance if the matter is time-sensitive.
Should You Stain Wood Fence?
There is not really a good reason not to stain your wooden fence. A stained fence lasts far longer than once that is painted or simply is not coated at all. If your wood is stained well and sealed it will look good and be virtually unaffected by most weather conditions for up to four years. This period can be far longer if your local climate has favorable weather conditions.

I have been into woodworking since 2005 and woodturning since 2011. Because of my love for wood and woodworking, I started woodhappen.com to teach other enthusiasts about how to finish and seal wood, the best woodworking tools, the different types of wood, and everything else related to woodworking! Read more about me here.