How to Distress Wood – How to Make Wood Look Weathered
The process of distressing wood requires a little creativity, a certain sense of adventure, and a willingness to experiment. If you dive into a distressed wood project with this in mind, you are guaranteed to be extremely satisfied with the rustic, aged look you can achieve as well as the way your finished piece contributes to the overall aesthetic of your preferred design style. Once you have your finished project in place, you will see that nothing creates an easy-going atmosphere quite as well as distressed wood.
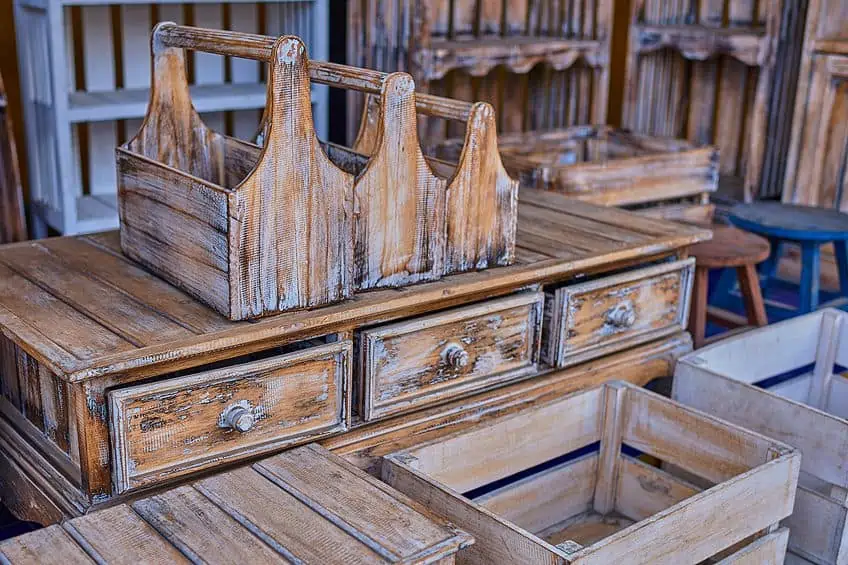
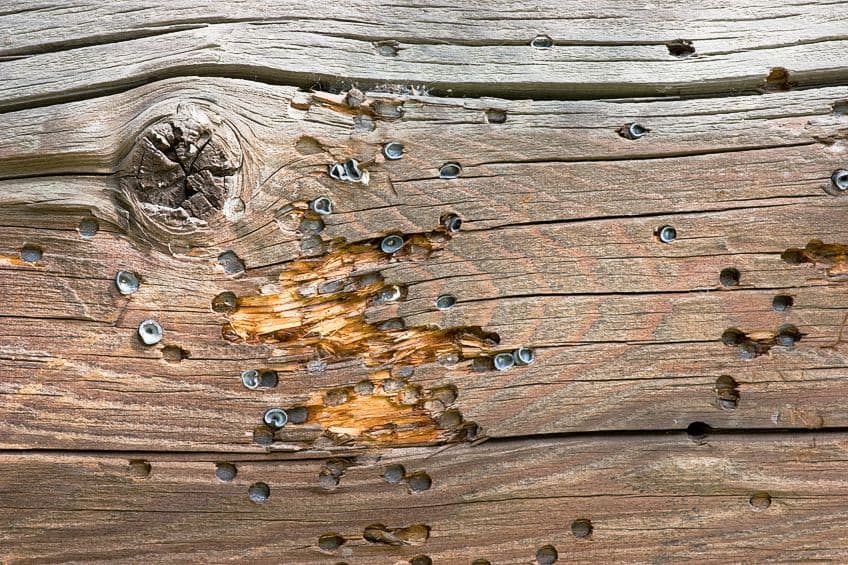
What Is Distressed Wood?
In a materialistic world, the look of old, weather-beaten wood is a priceless antidote to the shiny glitz and sparkle of modern style preferences. Distressed wood has an understated look that helps to create a relaxed social environment while never compromising the host’s status. More generally, distressed wood pieces and furniture imbue an organic feel into spaces that in turn convey a sense of warmth and comfort.
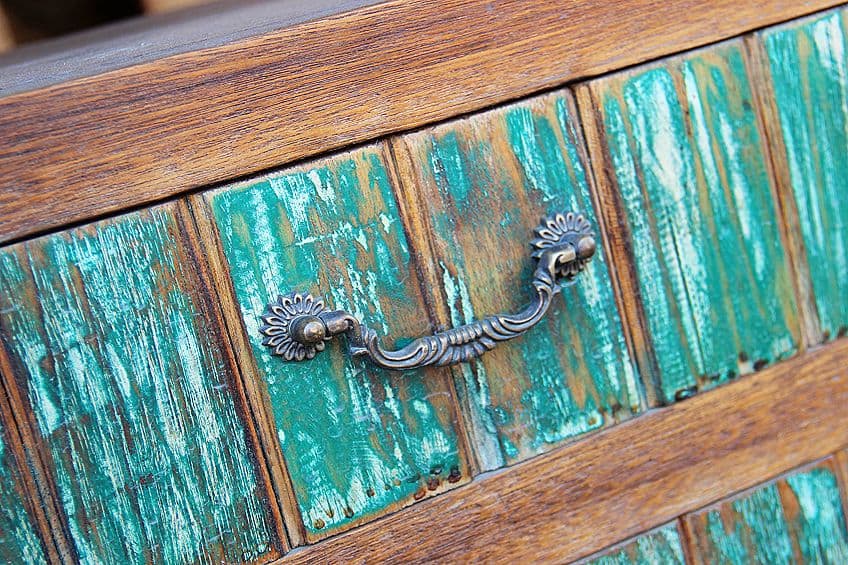
The Design Value of Distressed Wood
The distressed wood look has excellent interior design value and is a popular theme among interior and furniture designers the world over. A certain romance is tied into a great distressed wood piece, whether it is as simple as a picture frame or as commanding as a large dining room table, the presence of distressed wood creates a mellow atmosphere. You may think that getting an authentic distressed wood look is hard to achieve, but it can actually be a relatively simple process.
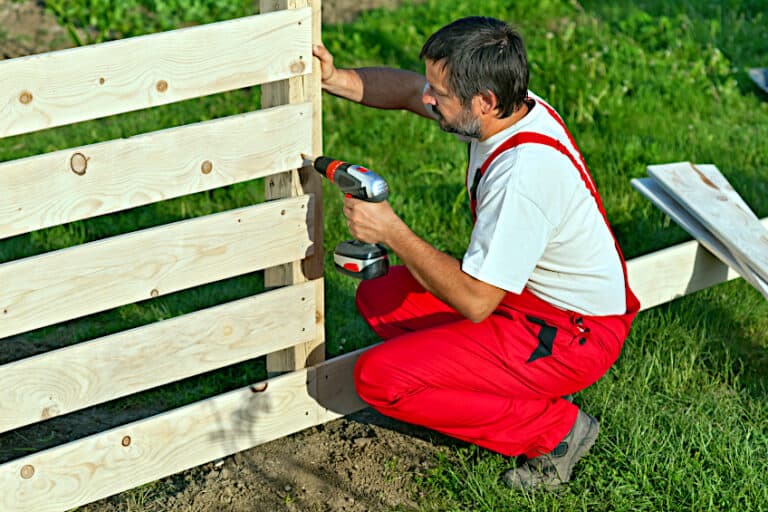
To make new wood look old and get that authentic weather-beaten effect, all you need are a few simple tools and the following easy wood distressing techniques.
Things to Consider Before Starting Your Distressed Wood Project
Distressing wood can be a simple process depending on the effect you are aiming for and the quality and condition of the wood at the start of your process. With that in mind, it is always a good idea to use wood that is already old and weathered. Wood that has been reclaimed or that forms a part of an old item that you can take apart and repurpose is great to use.
It may not be so easy to find old or reclaimed wood in your area, so if you are buying new wood, go for the cheaper softwoods (such as pine) as opposed to the more expensive hardwoods (such as maple). The cheaper woods have more flaws and knots, which will only contribute to that authentic, rustic, weather-beaten look.
Distressing vs Texturing
The process of texturing wood involves anything you do to physically change the geography of the surface of the wood. The easiest and most satisfying way to achieve this is to repeatedly bash and batter the wood with something hard, such as a hammer or a heavy chain. Texturing only refers to the texture that you give the surface of your wood by physical impact.
The process of distressing wood, on the other hand, involves the application and partial removal of various stains, waxes, paints, washes, and masking agents that result in the worn or weather-beaten look we are aiming for. Texturing can be seen as a step forward on the path to distressing, particularly if you are working with new wood that has a smooth finish.
Bear in mind that texturing may not be necessary at all depending on your preferences, the state of your wood, and your desired outcome.
Wood Texturing Techniques
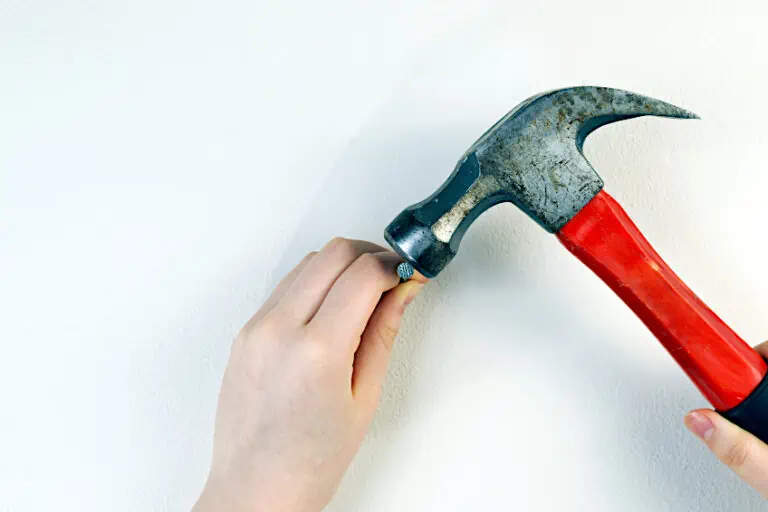
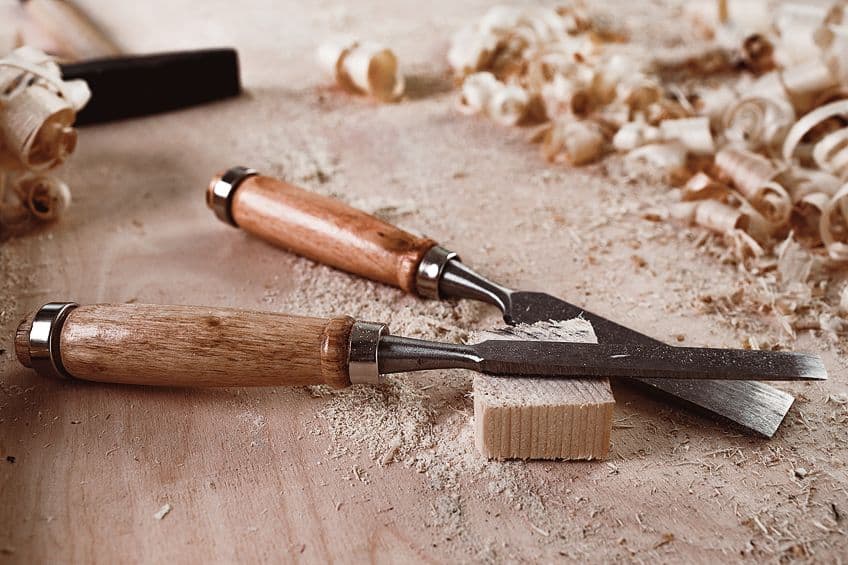
There is a great variety of wood texturing techniques, which in turn results in a great variety of distressed wood finishes. To make new wood look old, you need to physically damage the surface of the wood. Tools like hammers, chains, nails, chisels, scrapers, saws, or anything hard that can make an impact on the wood’s surface and change its geography by force are appropriate.
The more varied your instrument of destruction, the better. The sky is the limit here so anything with a hard surface or edge – whether that edge or surface is rough, smooth, sharp, big, or small – is good to use. You can even use things like broken stone or brick, a steel brush, wire scourers, rusty screws, sand, and gravel.
The beauty of the wood texturing process is the fact that randomness and inaccuracy are advantages when it comes to applying various texturing techniques to wood. This fact makes the process quite fun in comparison to tasks that require you to be focused and precise.
Bear in mind that any pattern on your preferred texturing implement will be mirrored onto the surface of your wood.
If your texturing technique is too regular and evenly spaced, the wood may not end up having an authentic weathered look, as you may have inadvertently created a pattern. This is why trying to be as random and messy as possible without overanalyzing your approach will help you in the long run.
Texturing Do’s and Don’ts
If you are working with new, raw, and untreated wood with a smooth finish, you will need to create some texture on its surface so that paints and stains can fill the dents, holes, scratches, and marks while appearing scant or absent on the flat, ridged, and higher areas. For broader, more apparent dents and gouges, the front and back of a hammer do well, and for sharper and longer cuts and slices, a chisel does a fine job.
A good but hazardous technique is to put a bunch of old nails and screws into an old sock and bash away randomly for a more general, scratchy look. Hitting the wood directly with your dangerous sock should create a few little holes and scratches. If you swipe at your wood with glancing blows, you will get scratches in patches. It is advisable to wear rubber safety gloves if you want to pursue the dangerous sock approach. Work in increments, as once the dents, holes, scratches, or gouges are in, they will not be coming out.
Achieving a Truly Random Texture
A great way of achieving the aforementioned random inaccuracy in the texturing process is to squint or close your eyes or look away just before you start texturing your wooden piece. By not seeing your piece very well or not at all for the first few seconds of the process, you will be able to achieve a truly random and organic-looking textured effect. This is a good way to bypass the mind’s instinct to create or recognize patterns.
It is important to be careful that you are texturing the intended piece and not some other innocent item when using this technique. Do this by making sure that there is a cleared buffer zone around your piece and that the piece is on a work surface or a backing that you would not mind accidentally gouging, scratching, or damaging in general.
Remember, any dents, holes, scratches, or marks that you make in your piece will not be coming out so it is always best to stop texturing and check your work closely at regular intervals until you are happy.
A Case for Precise Texturing
Despite a rather messy approach being to your advantage when it comes to texturing, there is something to be said for an approach that uses precise texturing. In some cases, you might want to try to mimic the exact scratches or repetitive marks that were the byproduct of the rudimentary way that wood was processed back in the day when everything was done by hand. Hand-hewn wood has a rough or uneven finish and a random patterning as a result of the imprecise nature of using hand tools.
The advent of sawmills resulted in a comparatively more regular pattern on the surface of cut wood, where the back-and-forth motion of the sawmill’s blade created a series of long, semi-regular, almost parallel lines. In cases like these, it is best to research the exact look you want to achieve and then to very carefully create a similar texture on your project piece. This may require specialized tools like a gouge (a chisel with a concave blade) or an abrasive drill bit as well as some good fine motor coordination.
Sand Stomping Technique
One interesting technique is partially covering your wood with gravel or coarse sand and placing another piece of wood on top. Then stand or jump on the top piece to partially embed the gravel or sand into both pieces. If you want this effect on both sides, remember to flip both pieces over and repeat the process. Wipe or brush away the remaining gravel so that your wood is clean and free from any partially embedded bits.
This technique will not be practical if you are working with already made-up furniture like chairs.
Best Texturing Material
Using sandpaper may be the easiest and most effective way to texture wood, but it may also be the least dramatic. Also, using sandpaper to texture wood usually works way better on wood that has been painted, especially with two or more coats of different colors.
Keep in mind that power sanders can have a regular arc in their mechanism which may leave a uniform pattern on your wood. Avoid orbital or non-random sanders if you are going to use a sanding machine to add texture. If you would like to sand the wood before you paint it, then remember to apply various degrees of pressure in different places on your piece, as this will allow the paint to be absorbed more in some areas and less in others.
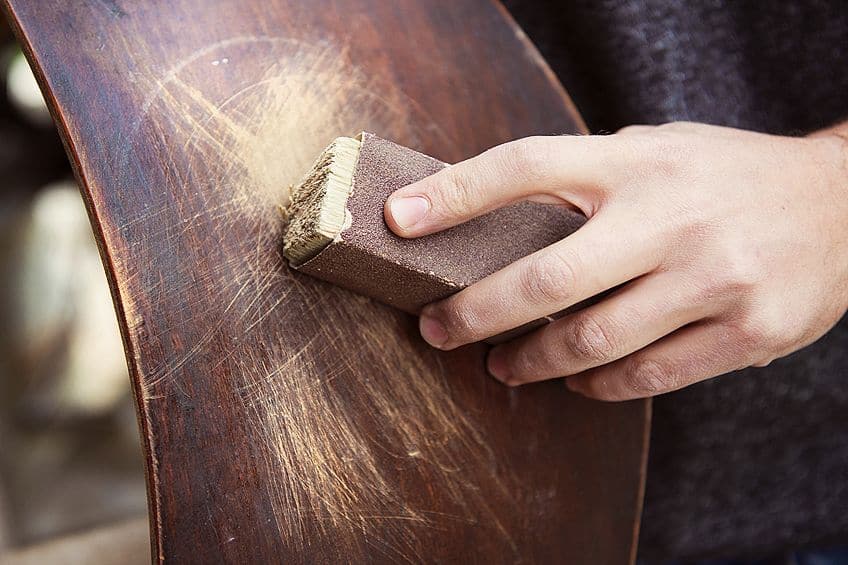
Although sandpaper does a great job at distressing edges and high-use areas, do not overlook using a simple scraper to remove dry paint for the aged wood look. Scrapers are particularly useful for a more rustic look as you will be able to take relatively large chunks of paint off the wood’s surface, thus creating a random chipped effect.
If you are going to use a scraper to distress, do not hold back. Slash and stab at the surface of your wood so that whole chunks of paint come off at a time. Hold the scraper at a steep angle, apply pressure, and drag it along the edge of your piece to get paint bits of various sizes off. For the chipped, distressed look with a scraper, make sure you have painted your wood with three or more layers of different colors of paint.
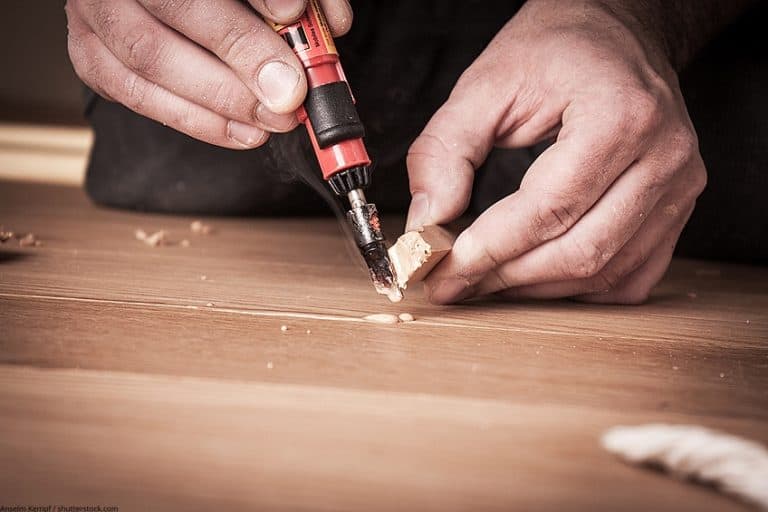
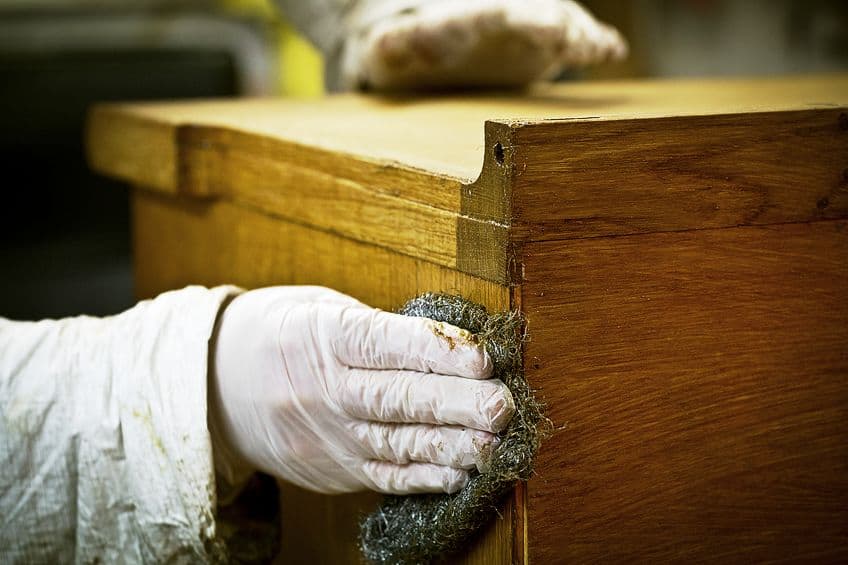
Steel Brush or Abrasive Bit Texturing
Another good way to texturize wood is to use a steel brush or an abrasive bit on a power drill. This may be a relatively expensive option in your texturing implements arsenal, but if you have a lot of texturing to do, it might be a good choice. Just be careful to go slowly in the beginning, because a steel brush or abrasive bit rotating fast can take a lot of wood away from the surface of your piece in a very short space of time.
You can also wield a steel brush in your hand by scraping or slashing at your piece in random places. This may require some muscle, however, as it could be difficult to make any kind of mark or scratch if your steel bristles are long and thin.
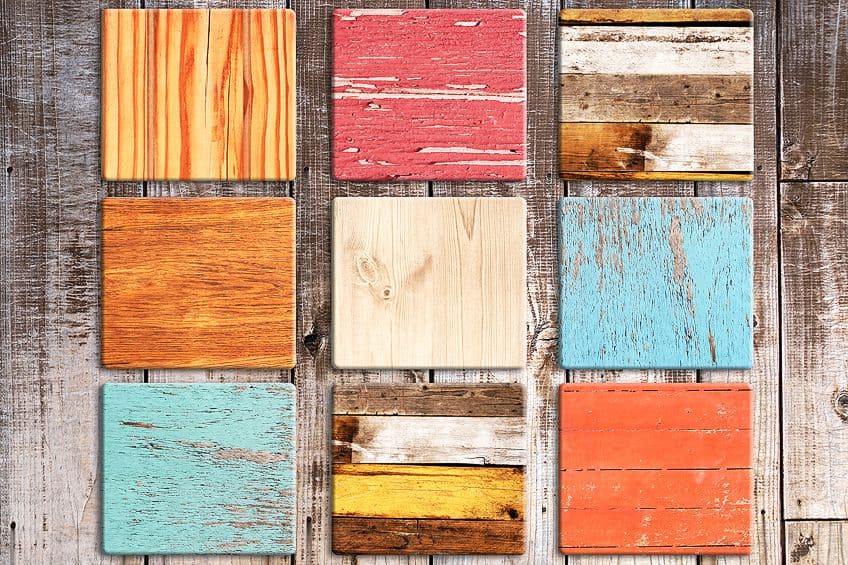
Wood Distressing Techniques
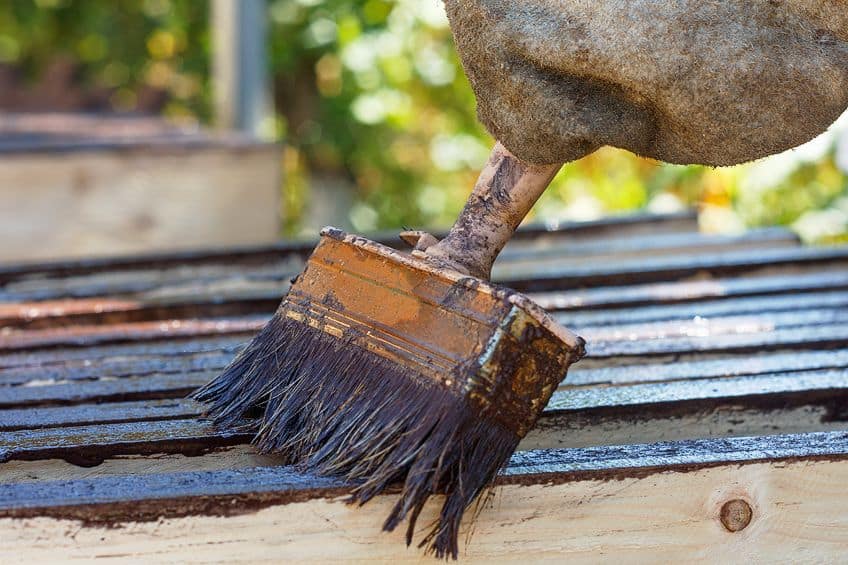
Stains and paints can be applied to any kind of raw, untreated wood to achieve a dried out, weather-beaten, old rustic, or grey look. The easiest and most basic way to achieve this is simply by washing your piece with diluted paint or a light stain so that the natural grain and imperfections of the wood are still visible.
For the wash method, dilute your paint with water so that it becomes quite thin and runny. Aim for about a 1:1 ratio of paint to water. You can then apply the paint either with an old rag or by pouring the diluted paint onto the piece, after which you can spread it over the piece with a scraper or straight blunt edge.
Spreading the paint in this fashion will push the diluted paint into the grooves of the piece, while the ridges and higher areas will only get a thin layer of paint or none at all.
Once you have applied the diluted paint wash or light stain to your piece, you may want to wipe off any excess with a dry rag – this will ensure that you end up with a thin layer through which the natural grain of the wood can still be seen. This step may not be necessary if your paint is already very diluted or if your stain is very light.
If you would prefer to use normal, undiluted paint, you can achieve a similar effect through the use of a dry paintbrush with hard bristles. For this method, it is best to load very small amounts of paint onto your brush and to paint quickly in all directions. Make sure that you leave some of the wooden piece unpainted.
Blending Stain and Paint
Using a combination of stain and paint will produce a unique result that can look really good, depending on your style preferences. This technique will not produce that classic aged-wood look but more of a messy modern-distressed look.
Stain your project piece and let it dry completely before applying a coat of paint. The coat of paint can be scraped while it is still wet to reveal the dry stain underneath, or it can simply be painted on in a random and patchy manner so that you do not cover the entire piece.
The aforementioned dry brush technique works well for this step. Use very small amounts of paint on a dry hard-bristled brush and paint quickly in all directions so that you only cover some of the wood stain. Another way to blend stain and paint is to apply the paint coat before the stain has had a chance to dry. The result can be quite streaky as different stains and paints will mix to various degrees.
If you are going to try this method, it is essential to do a trial run on a spare piece of wood to see how it might turn out before you potentially ruin your entire project piece.
You can also apply a coat of paint to your piece and then apply a coat of stain once the paint is dry. It is best to wipe the stain with a rag directly after you apply it so that you end up with a very thin layer of stain over the paint. Another option is to apply the stain to the edges and high-use areas only. This result can look quite messy, however, depending on how you apply the stain. With all stain-and-paint combinations, sanding and scraping once your piece is dry can make a huge difference to the final result.
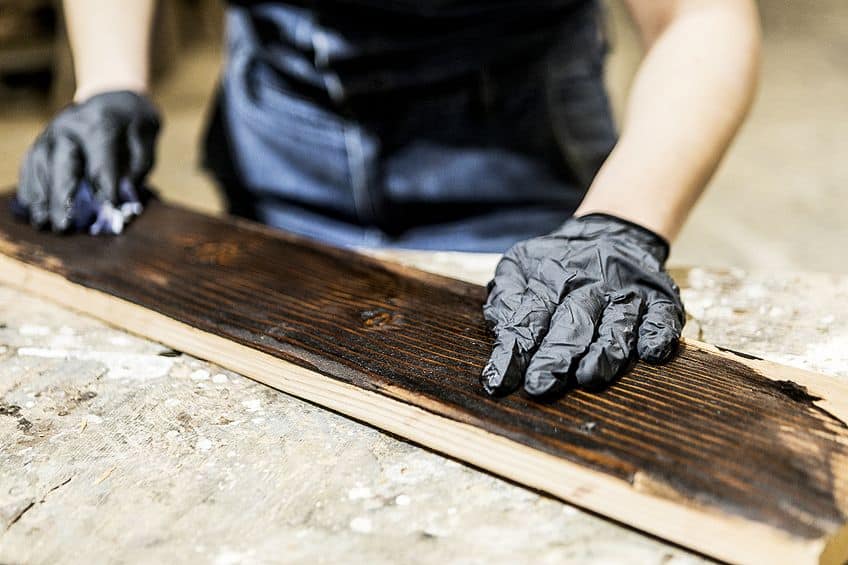
Steel Wool and Vinegar
A unique way to get a lighter, more dried-out grey or slightly ashen look is to use the steel wool and vinegar wash technique. Cut up one to five pads of fine steel wool into a container, cover the steel wool with white vinegar, and then let the container sit for anywhere between an hour and several days. The longer you let your mixture steep, the darker the effect will be. Paint or spray the solution onto the wood and let it dry.
As different ratios of steel wool to vinegar have different results, it is always a good idea to test your mixture on a spare piece of wood before you apply it to the main project piece. The appearance of your solution will also vary, depending on the wood’s species, moisture content, age, and surface condition.
If you are after a darker grey, use a plain black tea wash before applying your steel wool and vinegar solution.
Wood Stain and Sandpaper
To achieve a more standard distressed look, apply a regular wood stain to your project piece and sand the piece once the stain is dry. Take some fine-grit sandpaper and concentrate your sanding on the edges and high-use areas of your piece.
A slightly more advanced way of doing this is to blend some oil-based wood stain with furniture wax on a stovetop, and then to paint your piece with the mixture once it is cool. By buffing the entire piece once dry, you will leave the darker stain and wax mixture in the dents, holes, grooves, and imperfections of the wood for an authentic distressed, antique look. Make sure that your piece has at least a few imperfections to start with, as this process will not work well on wood that has a smooth and even surface.
Modern Distressed Look
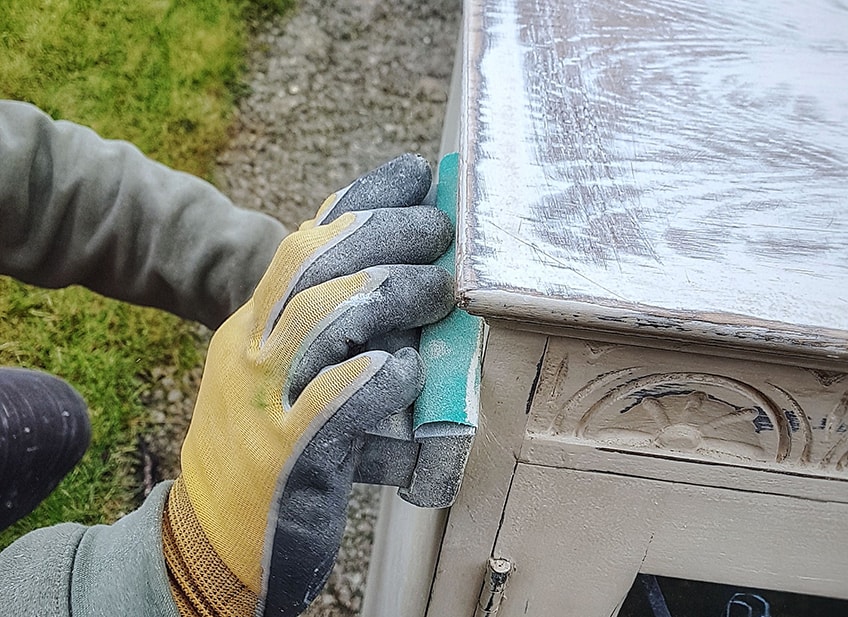
Using regular paint and sandpaper is a popular aging wood technique, although this method results in a distressed look that is more modern than antique. The results of this technique depend on how you decide to expose the parts of your piece that you want to look weathered. You can simply apply one coat of paint, wait for it to dry completely, and then sand the edges and high-use areas.
Another similar method is to apply one coat of paint, let it dry for just a few minutes, and then scrape off paint in random places with a scraper or straight blunt edge. This method depends on the paint being only partially dry, remaining a little wet in places.
A variation of this method is to rinse the wood with water once the paint has dried for just a few minutes and then wipe off some of the paint from the surface. Use an old rag or cloth to wipe off the paint in random places, edges, and high-use areas of the piece.
This method is easy to do and consistently produces great results.
Two Coats of Paint
A better way to achieve the modern rustic look is to use two coats, each with a different shade of paint – one lighter, and one darker. Apply one coat of the lighter paint to your project and let it dry completely for at least 20 hours. Then apply the second coat of darker paint and let it dry for about two hours. You can then either expose the distressed areas with dry materials such as fine-grit sandpaper, a sanding sponge, or a scouring pad. Alternatively, you could expose distressed areas with a wet material such as an old rag or a scouring pad dipped in water. If you choose to do the latter, make sure that your rag or pad is wet, but not dripping wet.
Resist Distressing
An interesting variation of the two-coats method is to apply candle wax or beeswax to the areas of your piece that you would like to be distressed. You will apply the wax in between the first and second coats of paint. The second coat of paint will not be absorbed into the areas where you applied the wax. These areas will then be easy to expose once you start distressing your piece.
This method is known as resist distressing and can be achieved with any masking agent or material that you can get your hands on.
From masking tape and bits of wet paper to hemp oil and vaseline, anything you choose to layer in a random and patchy manner in between the first and second coats of paint will prevent or hinder the absorption of the second coat, resulting in an uneven finish.
Remember that this process can be repeated a number of times on the same piece of wood between several layers of paint, allowing for your final result to be as unique and as colorful as you so desire. The key to getting what you want is experimenting on spare wood before you start on your final project piece.
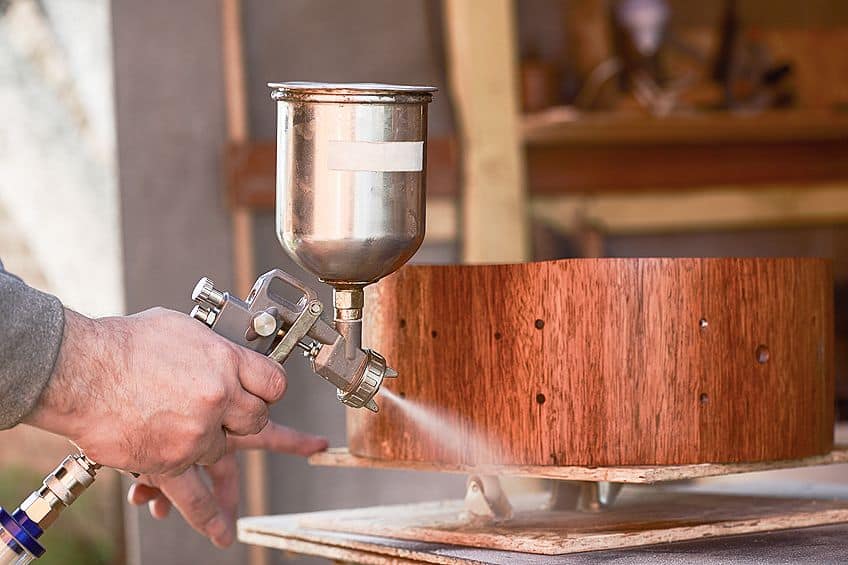
Preserving Your Distressed Wood
A sealant or clear lacquer finish can be applied to your finished piece to preserve and protect its aged, weather-beaten look. Make sure that your piece is clean and free of dust that might have been produced from sanding before you apply this final protective finish. Several coats of a sealant or clear finish will always be better than one and remember to allow each coat to dry completely before applying the next one.
Although there are many good aerosol spray sealants out there, we recommend the regular paint-on kind. You can always ensure that your sealant will only land up on your project by painting it on, whereas using an aerosol spray results in a lot of the sealant landing on and around the surfaces, as well as into the air that you are breathing. If you decide on an aerosol spray sealant, you must wear a respirator mask and make sure that the room is well ventilated. You can also do it outside on a windless day. Typically, protective finishes will only fully dry and harden after at least a week.
Wood Distressing Techniques Comparison Table
| Technique | Difficulty | Cost | Time | Result | Authenticity |
| Wash or Light Stain | Super easy | Average | A few hours (Drying time) | Good and understated | Okay |
| Stain-and-Paint Blend | Requires a little skill | Potentially expensive | About one day | Okay | Messy and modern |
| Steel Wool and Vinegar | Quite easy | Low | Potentially a very long time | Very good | Excellent |
| Stain-and-Wax Blend | Easy | Above average | Several hours (Drying time and sanding) | Excellent | The most authentic |
| Paint and Sandpaper | Requires a little skill | Above average | Potentially several days | Superb | Very good but slightly modern |
| Resist Distressing | Requires some skill | Potentially expensive | Potentially several days | Very good and unique | Great but slightly modern |
Get Stuck In
You will have serious amounts of fun during the distressing wood process, especially if you are not totally set on the exact finish you would like to achieve. Remember that you might not get exactly what you are aiming for in the end, so try to be open to a different outcome from the one you envisage. This process is an opportunity to flex your creative muscle, even in the simplest of steps such as selecting an implement to texture your wood. You could indeed come across a whole new way of distressing wood that comes out way better than anything ever attempted before.
Just stay open-minded, be willing to experiment, try to be random and inaccurate, and do not worry if you mess things up a bit – you can always start over!
Frequently Asked Questions
How Long Will It Take to Distress My Wood Project?
This really depends on how large the surface area of your wood project is, which distressing technique you use, and whether or not your wood is already painted or stained. For techniques that require a coat of paint to dry, you will need at least 20 hours in addition to the time it would take to sand or scrap your project piece, which could take anywhere from half an hour to several hours. Any sealant you choose to apply once you are happy with your piece will also take at least a week to fully dry and harden.
Can I Distress Wood Without Using Sandpaper?
You can distress wood without using sandpaper but you will end up with more of a messy or patchy distressed effect as opposed to an aged or worn distressed effect. You can also use any abrasive item as a replacement for sandpaper. In some cases, substances with a coarser abrasive structure than sandpaper might be a better fit for your project. If you are going for the chipped, distressed effect and need to take large chunks of paint off a surface, then use a scraper or steel pot scrubber instead of sandpaper.
Can I Mess This Up and Not Like the Result?
You most certainly can mess this up, hate the result, and ruin your project piece in the process. That is why it is essential to do a practice run on a spare piece of wood before you start on your main project piece. If you do not have any spare wood of the same type, apply your chosen technique to a small inconspicuous area on your main piece and see how it turns out. You can revive a ruined project piece, but it may take a while to sand everything off until you get down to the bare wood again. Also, some stains can penetrate quite deep into your wood, and no amount of sanding will ever completely remove them.
What Is the Best Distressing Technique for an Authentic Aged Look?
The technique that looks the most convincing in terms of age is definitely the blend of oil-based wood stain and furniture wax. On well-textured wood, the stain-and-wax mixture fills grooves and indentations and will be thinner on the flatter areas, creating a very convincing contrast between the two. Be sure to polish or buff your stain-and-wax piece, as the shine this achieves will only contribute to its authenticity. Once you include paint in your distressing technique, you will always end up with a more modern distressed look.
How Do You distress Wood That Is Already Painted?
To distress wood that is already painted, remove some of the paint on the edges and in the high-use areas of the piece with sandpaper or another abrasive material. You can also apply a stain to the edges and high-use areas of your piece for a more modern-messy or patchy-distressed look. Another option would be to apply a coat of stain onto the painted surface and then wipe away excess stain with a rag, or, you could wait for it to dry and then sand the piece in random areas or on the edges and high-use areas. One of the best options would be to apply a different color coat of paint on top of the paint that is already there, and then to sand random areas, edges, and high-use areas once that coat is dry.

I have been into woodworking since 2005 and woodturning since 2011. Because of my love for wood and woodworking, I started woodhappen.com to teach other enthusiasts about how to finish and seal wood, the best woodworking tools, the different types of wood, and everything else related to woodworking! Read more about me here.