Wood Burning Tips – Pyrography Made Easy
Wood-burning is a fun and relaxing art medium, where you can take a piece of wood, and together with some special wood-burning tools and a great idea, you can burn amazing designs onto a piece of wood. If you want to start wood-burning for the first time, it may be a little intimidating, but in this article, we will be giving you some wood-burning tips and techniques to help you create that special and beautiful project.
What Is Wood Burning?
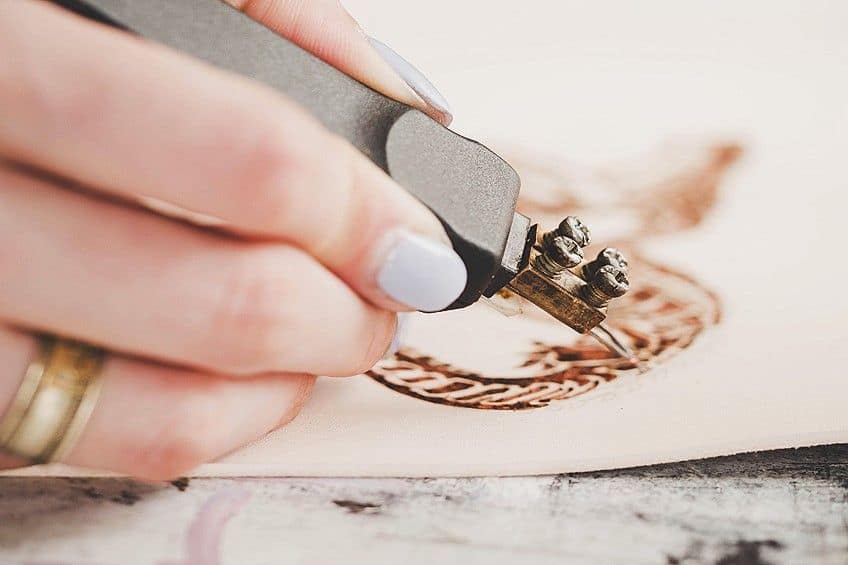
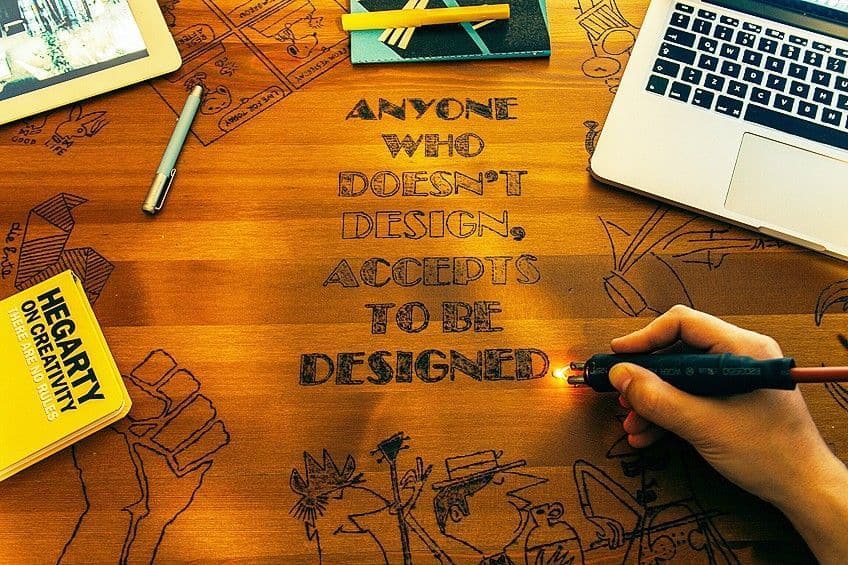
Wood burning art or “Pyrography” as it is also called, is the art of decorating a piece of wood by burning marks into it using a heated object like a poker, or metal pen. It literally translates to writing with fire and officially dates back as far as 206 BC. By using different types of pens, or tips, you will be able to create a wide selection of brushstrokes that produce different effects. By applying different pressures to the pen tips, you will be able to achieve various color tones. Before you start with your wood-burning experience, you must understand all the materials and tools you will need to make your project special.
You need to invest in the right tools and equipment, or you will experience problems and will not get the results you want.
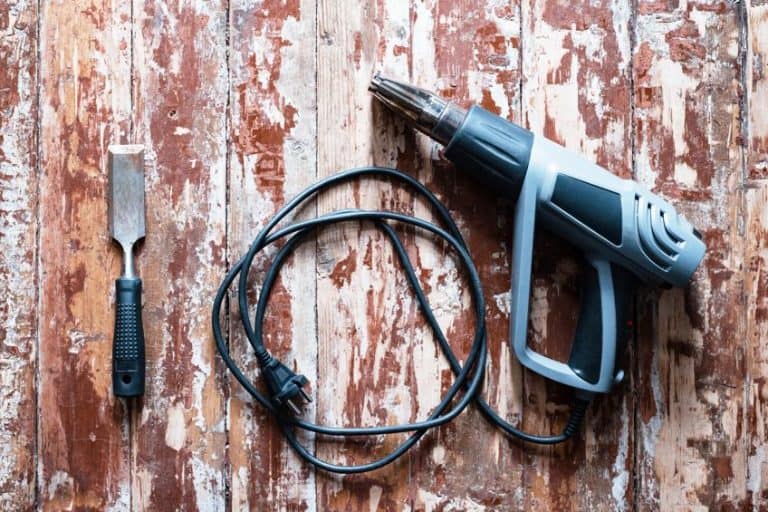
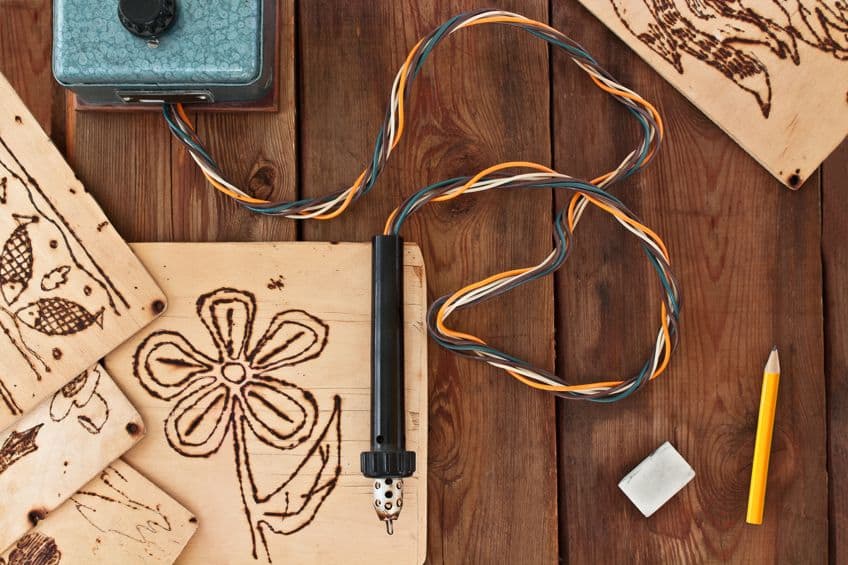
Wood Burning Tools
You need to have a wood-burning tool that will allow you to draw letters or any type of design you want to create. There is a variety of wood-burning tools, sets, and kits available, making it very difficult to choose. We are now going to help and share with you some factors to consider when purchasing a wood-burning tool.
Type of Wood-Burning Tool
A wood-burning tool is very similar to a soldering iron and needs to be lightweight, easy to hold, and easy to manipulate. It must have a comfortable handle that has a groove for your finger that reduces fatigue and allows you to work for extended periods. You should also be able to draw letters and designs, making them multifunctional.
Also, it should come with a stand to hold it when it is hot.
Wood-Burning Pieces
When you buy a wood-burning kit, it is important how many pieces it contains, as that will determine the value of the wood-burning kit. The more pieces the better the kit will be, some kits contain as many as 50 to 72 pieces. The more common pieces that a kit has includes different types and sizes of tips and pens. However, if you are a beginner, it may be advisable to select a wood-burning kit with fewer pieces like one pen, and only a few different size tips.
Power Needed for a Wood-Burning Tool
It is very important that when buying a wood-burning tool, you know how much power it can produce, which is measured in watts. This will indicate what power source you will need to charge the tool, and it will also give you an indication as to how hot the tool can get. If you are going to use the tool often, it will also indicate how much extra you will be adding to your electricity bill. The power factor for good quality wood-burning tools is always on a higher wattage level, as the tool requires more wattage to operate properly, as well as control the many different features that you can apply.
For example, a lower-wattage tool is a better option to use when burning leather and not wood.
Temperature Range
The temperature range for most wood-burning tools varies, but the average temperature range is 392 to 752 degrees Fahrenheit. This temperature range will enable you to burn your designs lightly into soft wood or carve your designs into hardwood. However, a very low temperature is required if you want to burn your designs into plastic. However, temperatures of 900 degrees Fahrenheit, or higher, are necessary when burning into ceramics or leather, as well as hardwoods.
Prices for Wood-Burning Tools
Wood-burning tools are not often sold individually but come in kits that include the tool, different tips, and many other items. Depending on the number of pieces you have in a kit, and the different qualities of the kits, the price will vary. If you are a beginner then the lower-priced kits are perfect.
For the more experienced wood burner, a higher-priced kit is advised.
Types of Tips
There are many different types of tips that you can use, each type of tip having a different function. Some you use for drawing lines and shapes, while others are used for things like shading. Each tip allows you to apply different techniques, so let us consider some of these tips and what they are used for.
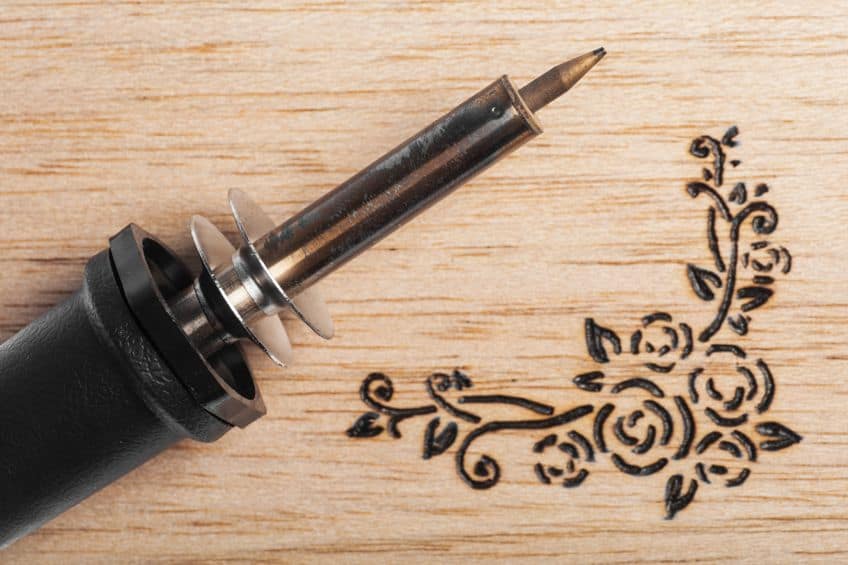
Universal or Chisel Tip
This is the most common of the different tip types and is supplied with most of the kits or sets. The universal tip can do almost everything that the other woodburning tips can do, but it is not recommended that you use it for everything. Here are some of its common uses.
- Best used for drawing straight lines and shading
- Makes dots and large block lettering
- Not recommended for curved lines and circles
Calligraphy Tip
The calligraphy tip is like the universal tip, but instead of having an ordinary chisel shape, the tip edges are evenly tapered from both sides. When using the tip, it feels like you are using one of those flat-edged permanent markers. Here are some of its uses.
- Best used for drawing straight lines and shading
- Makes large block lettering
- Not recommended for curved lines, circles, and dots
Flow Tip
The flow tip is the smoothest of all the tips and just seems to glide over the wood without much effort, and can handle most of the wood-burning techniques. When using this tip, it feels just like using a bullet-tip permanent marker. Here are some of its uses.
- Best used for drawing straight and curved lines, dots, circles, and curved lettering
- Used for block lettering and shading, but it may prove difficult
- Not recommended for shading
Cone Tip
The cone tip is usually part of every kit you can purchase. It has a short cone at the end of the tip and can handle many different wood-burning techniques, and almost feels like using a ball-point pen. Here are some of its uses.
- Best used for large or small dots, stippling lines, curved or straight lines, and circles
- Used for block lettering, but it may prove difficult
- Not recommended for shading
Shading Tip
The shading tip is just as versatile as the chisel tip and can do a lot of wood-burning techniques much easier than all the other tips. It is like a teardrop with a leaf-type point, and it is this aspect that makes it so versatile. Here are some of its uses:
- Best used for lettering and fine lines, small dots, and shading
- Used for curved and straight lines, but it may prove difficult
- It can handle all techniques very well
Tapered Tip
The tapered tip has a very long cone ending with a sharp point, and it is with this sharp point that you can burn fine lines and detailed artwork. However, due to the long cone shape, it may prove to be challenging to handle. Here are some of its uses:
- Best used for fine lines curved or straight, and perfect for dots
- Used for lettering and circles, but it may prove difficult
- Not recommended for shading
Transfer Tip
The transfer tip measures about one inch in diameter, and it is flat and thick, almost like a bulky coin. You use the transfer tip to transfer a pattern onto the wood. This is simpler and more efficient than using tracing paper. Here are some of its uses.
- Best used for transferring printed design copies onto the wood
- It is not recommended for any other wood-burning techniques
Hot Knife Tip
The hot knife tip has a diamond shape ending in a sharp point, like a trowel. When you use it for any wood-burning technique it only leaves light marks, so it is only to be used for cutting plastic, foam, or other soft materials. Here are some of its uses:
- Best used for scrapping burned areas and fixing mistakes or adding highlights
- Not recommended for any wood-burning techniques
Hot Stamp Tip
The hot stamp tip is used mainly for decorative designs. Another purpose is for creating borders around your art piece, or you can just use it for fun creating design patterns. Here are some of its uses:
- Best used for decorative designs and borders
- Not recommended for any other wood-burning techniques
Types of Wood
There are many different types of wood available and the type of wood for your purpose may depend on the cost and the availability of that type of wood in your area. It is better to use good-quality wood, but the best wood to choose for wood-burning should be a light-colored wood, with soft and fine grain.
Here are a few wood types you can use.
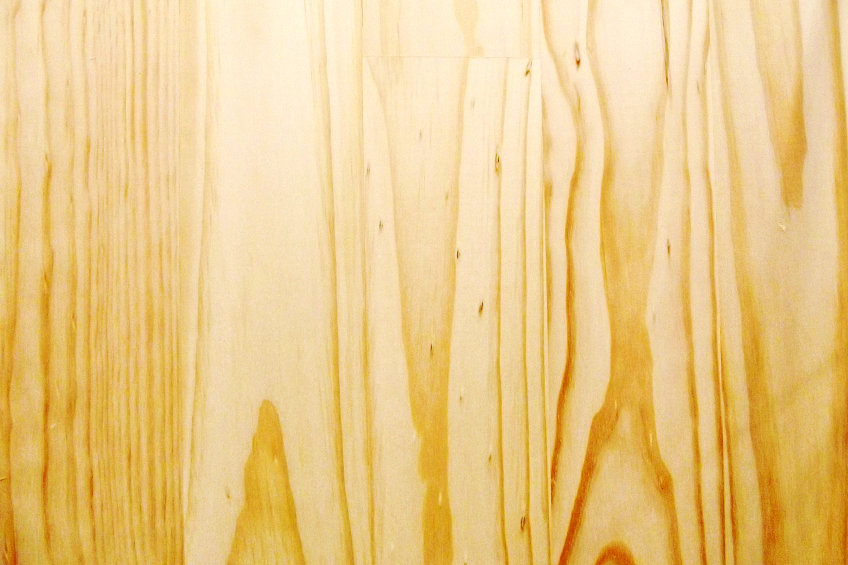
Pine Wood
Pine is easily available from most craft and hardware stores and is also cheap. However, it may not be such a good choice as the grain pattern of the wood is very inconsistent, and it also contains a lot of sap which causes excessive smoking. All these factors make pine wood very difficult to keep all your designs consistent.
Basswood
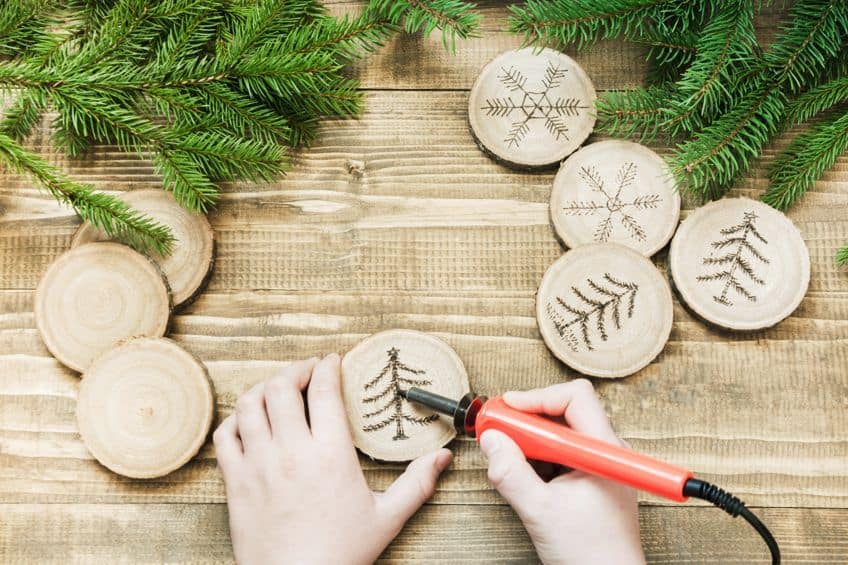
This wood is soft and light in color, with a fine grain, making it a good choice for wood-burning. It is also easy to burn with dark and light burns and is perfect for fine detail. Basswood is a very popular wood choice for all wood-burning techniques.
Birch Wood
This is a hard wood with a wood grain that is smooth, and it is also light in color, making it a good choice for wood-burning. However, it is often used for veneer and plywood products, and you need to take care of chemicals in the wood that could give off toxic vapor, protective wear is recommended when using it.
Poplar Wood
This is a very popular wood as it is effortless to use when burning. It has a soft consistent grain, is perfect for fine details, and is also readily available. You do pay more for it than some other woods, but it is a better-quality wood for wood-burning.
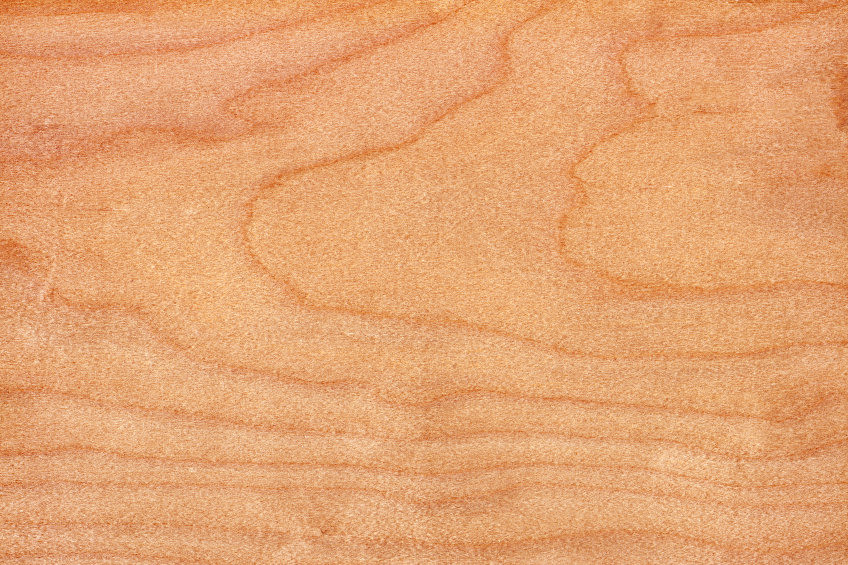
Cherry Wood
Cherry wood Is a very durable hardwood and has a medium to dark color, the wood grain is smooth and consistent and is ideal for detailed and lighter wood-burning designs. It is a very well-liked type of wood for many wood-burning artists.
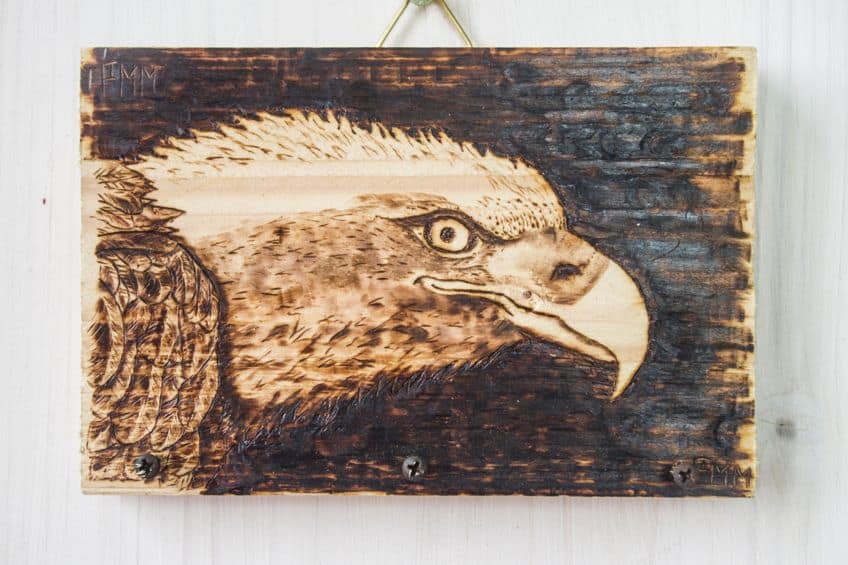
Wood-Burning Tips and Techniques for Smooth Results
If you are going to attempt wood-burning for yourself, then you will need some help. So, we are now going to give you a wood-burning tutorial with tips and techniques that will guide you through the whole process. Materials you will need include the following.
- Writing tip
- Shading tip
- Piece of wood (any size)
Prepare the Wood
The proper preparation of the wood is very important, for if there are any blemishes or roughness on the wood board surface, it could snag the tip and cause inconsistent results. This means that the smoother the wood surface, the smoother your results. Take 220-grit sandpaper and start to sand the entire wood board down, then use a damp cloth or spray bottle to wet the entire board. Now take a clean dry cloth, or paper towel and remove all the excess water, leaving the wood damp but not soaking wet, and allow it to dry completely. When the board is dry it will feel fuzzy, which is a good sign that the grain of the wood has been raised and sticking out above the rest of the wood surface. This is a vital step that you must not neglect as you do not want the wood grain to rise after you begin to burn.
Now using the same grit sandpaper, sand the wood surface again, making the wood ultra-smooth.
Adjust the Heat
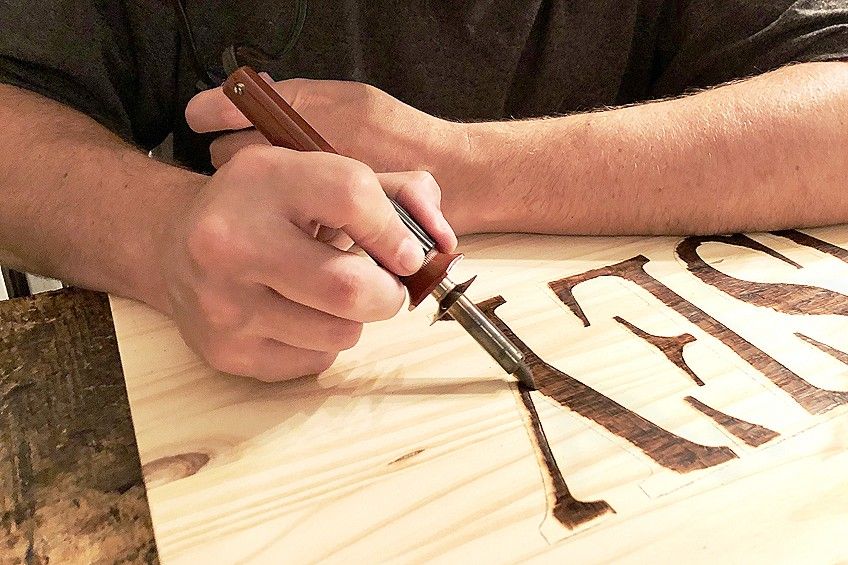
Before you even start to burn the wood, you need to adjust the heat setting of your burner and test it on a piece of scrap wood. Adjust the heat setting in small increments until you are satisfied with the setting, which could take up to 30 minutes or more. It is better to set the heat to a few shades lighter than what you want, which will then allow you an opportunity to re-burn for a darker shade at a later stage. When you change pen tips be sure to readjust your heat setting as tips do not have the same heat setting.
Blot and Move
Before you start, you need to blot your pen tip, which removes any excess heat from the pen tip. This is done by quickly applying the tip onto some scrap wood. The moment your pen tip touches the wood you need to keep it moving because if you pause, you allow the pen tip to make uneven burn marks. Whenever the pen tip is not in contact with the wood it builds up heat, and when you start to burn again, the excess heat leaves dark burn spots or blotches. If you set the heat setting too high, it is harder to control and achieve smooth burn patterns. Also, your hand needs to move faster, making it very difficult to maintain a consistent and precise burn pattern.
If the heat setting is too low, you will not be able to achieve a dark burn mark, and it may even be too light to see.
Hand Pressure and Speed
When burning your wood, it is very important that you only apply light pressure, which will help keep the heat at a steady level and produce a more consistent result. It will also help to give your hand easier movement over the wood surface, the harder the pressure the darker the result. The same applies to the hand speed, you need to keep a constant hand speed. The slower you move, the darker your burn mark. Speed up your hand movement, and the result will be a lighter burn mark.
Burn Direction
When you burn, try to start at the top of the board and move the tip down to the bottom of the wood piece. This movement makes it much easier to control your hand pressure as well as your hand speed. Trying to push your pen tip toward the top of the wood piece, makes it harder to keep your hand pressure and speed consistent. You also need to consider the direction of the wood grain, and then move your hand vertically or horizontally in the direction of the grain.
This produces a much smoother result than going against the grain.
Overlap and Re-Burn
The first burn stroke begins near the top of the wood piece and moves down toward the bottom. The second burn stroke needs to overlap with the first stroke. All the subsequent strokes need to overlap the previous strokes, which helps to hide any individual burn strokes. For an even smoother burn color, try to re-burn over the patch. Remember, when re-burning, you still need to overlap the previous burn strokes. This will result in an even darker burn pattern, which is the reason why you set your burner on a lighter color to start with. You can finish with the darker color burn pattern that you wanted. Here are a few more wood-burning tips.
- For calligraphy effect use the full side of the pen tip.
- When shading, use light circular motions using the side of the tip.
- For more depth and boldness, hold the pen down for a longer time on the wood.
- Purchase the proper equipment to achieve the best results.
- Use a stand for the burner when not in use, and never leave the burner unattended.
- Have a basin of cold water nearby to cool the tips quickly.
We hope that this article helps you to produce smoother wood-burning results. There are numerous skills and techniques you need to master to create your wood-burning art, but be patient, for it only comes with much practice and perseverance. We hope you enjoy your wood-burning experience!
Frequently Asked Questions
What Is Wood-Burning?
Wood-burning, also known as pyrography, is an age-old technique where you take a piece of wood or some other material, and with the use of wood-burning tools, you create a decorative design or pattern on the surface.
Is Wood-Burning Easy to Do?
Mastering all the techniques of wood-burning may take some time and effort, but all you need to do to get started is find a piece of wood and get yourself a basic wood-burning kit. After that, it is all about patience and practice.
What Do I Need for Wood-Burning Art?
The basic materials you will need to get started are a piece of wood, a beginner wood-burning kit, a clean and dry cloth, and 220-grit sandpaper, and you are set to go!

I have been into woodworking since 2005 and woodturning since 2011. Because of my love for wood and woodworking, I started woodhappen.com to teach other enthusiasts about how to finish and seal wood, the best woodworking tools, the different types of wood, and everything else related to woodworking! Read more about me here.