How to Round Edges of Wood – Easy Wood Shaping Techniques
It can be difficult to find the right finish for a wooden workpiece. After all, there are so many wood treatment oils, paints, dyes, stencils, and coatings to choose from. The shaping of your workpiece can determine the overall feel too, and this is where one of the most frustrating questions in woodwork rears its head: round edges or squared edges? Round edges look great and allow the eye to flow along the shape of a workpiece, but they can be challenging to pull off. That being said, let’s have a look at how to round the edges of wood, what you’ll need to pull it off, and why rounding the edges of your workpiece can be beneficial.
Why Should You Round the Edges of Your Workpiece?
Before we get into how to round the edges of wood, we thought it would be a good idea to show you some of the advantages of rounding the edges of your workpiece. Aside from improving the aesthetic of a workpiece, there are a number of practical benefits to rounding the edges of a wooden workpiece, so let’s have a look at a few of them.
Benefits of Rounding Edges
Rounding the edges of your wooden workpiece might seem like a purely aesthetic addition but there are a number of benefits besides making it look nice and smooth that you should consider. In some instances, it might be necessary if you’re going for a particular style of furniture or, if you’re a professional, to fit your clients’ specifications.
Rounded edges also ensure the workpiece is slightly more durable. How is this possible you ask? Well, edged surfaces tend to be more rigid due to being fashioned to a point. This means that if something impacts the edge of your workpiece, it is more likely to chip or break completely. What’s more is that if your edge is veneered, it could strip the finish off at the edge.
Aside from structural integrity, there is the obvious aesthetic advantage of rounded edges. While rigid lines make for a very “put together” look, rounded edges make for a more calming, natural presence. After all, your eyes naturally follow curvature, making workpieces with rounded edges feel cozy, eloquent, and less imposing to look at.
Rounded wood edges aren’t anything new and have actually been around for hundreds of years. In recent years, modern minimalist furnishings typically had straight-edged designs, but newer minimalist furnishings tend to be rounded and incorporate gentle curvature into their overall design, likely in an effort to make spaces feel more inviting.

What Do You Need to Round Edges?
There are a couple of ways you can go about rounding the edges of your workpiece. You can either use specialized power tools, or you could use a file and give it a go by hand. It goes without saying that hand tools are a bit more time-consuming and labor-intensive to use, while power tools tend to be more expensive, but they do get the job done quickly and with a smaller margin for error.
Power Tools for Round Edges
Depending on the size of your workpiece and the type of rounding you’re looking to do, there are a few power tools you could use to round the edges of your workpiece. Namely, these are portable routers, table routers, and multi-purpose rotary tools. Portable routers are clamped to a workpiece/worktable and are operated by sliding the bit up and down along a shaft.
A portable router (as the name suggests) can be picked up and moved around far more easily. Unlike the table router that raises and lowers the cutting/rounding tool along the length of a shaft, a portable router tool is capable of ascending and descending by raising and lowering the entire shaft, because the tool is located on the end of the shaft.
While a Dremel is designed to smoothen sharp pieces after they have been cut, you can also use one to curve small edges on a wooden workpiece. If you’ve never used a Dremel before, it’s essentially a small disk positioned horizontally on a vertical shaft. The disk spins at high speeds, allowing it to sand, smooth, and remove the material upon contact.
Hand Tools
As we mentioned previously, using hand tools tends to be more labor-intensive and time-consuming. However, if you’re just starting, want to master the use of these tools, or simply don’t have access to power tools, hand tools are perfectly fine. There are a few hand tools out there that can be used to achieve rounded wood edges.

Some of the most popular hand tools to get rounded edges on wood are hand planes, chisels, wood files, sandpaper, and, of course, the jigsaw. These tools are typically used in conjunction with one another to achieve nicely rounded edges on wood, and the more you practice with them the better your rounded skills will become.
There are many methods and techniques to explore when rounding wooden edges by hand. The application of these methods and their effectiveness can vary considerably depending on the type of wood you’re working with, the size of your workpiece, what type of edge you’re trying to achieve, as well as your overall skill and comfort level.
Sanding Your Workpiece
If you’re going to be rounding the edges of your workpiece by hand you should consider choosing the right types of sandpaper for the job. What type of sandpaper should you use to achieve rounded edges on wood though? The best sandpaper to use when forming rounded edges of wood is low grit, and then slowly increasing the grit count as you move along.
Why? Sanding by hand leaves quite a lot of room for error considering that all you have to rely on is your eyesight and skills. Using rough sandpaper to remove the majority of the material and achieve a rough-rounded shape narrows this margin a bit. Once you have the general shape of the workpiece’s edge you can progress to finer grit sandpaper to smooth it out.
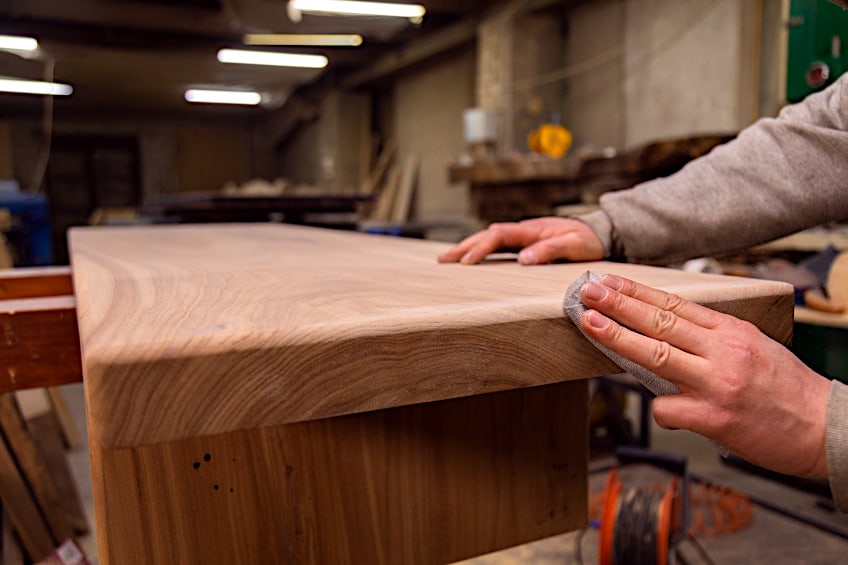
Sanding by hand not only takes a really long time, but it can be extremely labor intensive. If you’ve tried using sandpaper and find it to be a bit too much work, you can make things a bit easier for yourself and use a sanding block instead. Not only does this give you a better grip and control over your tool, but it will also be less tiring, especially if you’re working with a larger workpiece.
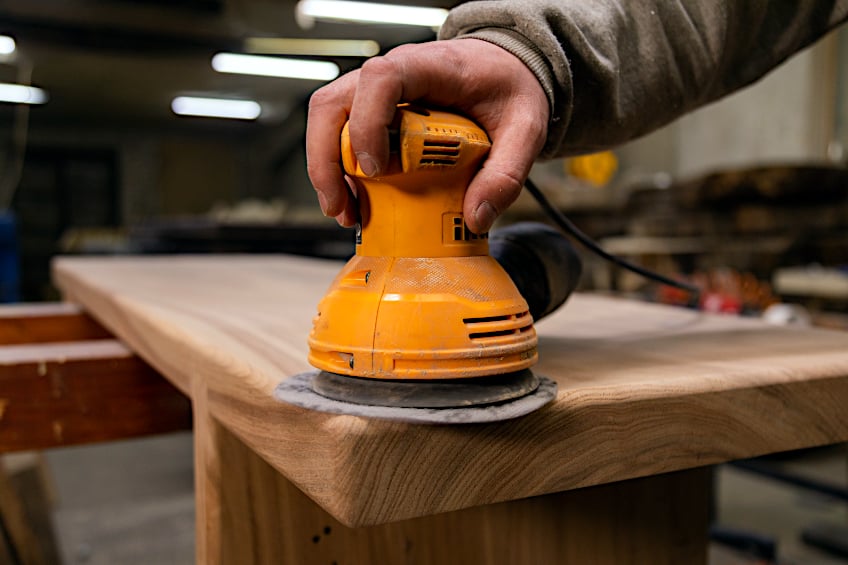
Can You Use a Power Sander to Round Edges?
While it might seem logical to use a power sander to achieve rounded edges on wood, this could end up being more trouble than its work depending on your skill level. Why? While belt and orbital sanders can be used to round the edges of wood, you’ll find that even the most skilled wood crafters avoid this as far as possible.
Again, why? Well. Even with a relatively tame power sander, it can be quite challenging to control the sander when rounding an edge. After all, sanders are designed to even out flat surfaces, or make relatively level surfaces flush. Attempting to use a sander to smooth and round a single point can be really tricky and could result in you sending your edge to nothing more than a nub.
If you’re absolutely set on using a power sander to round the edges of your workpiece we highly recommend that you use an orbital sander instead. Why? Orbital sanders oscillate when sanding to provide an evenly sanded surface. This is ideal when compared to belt sanders that travel in one direction, increasing the probability of an error occurring.
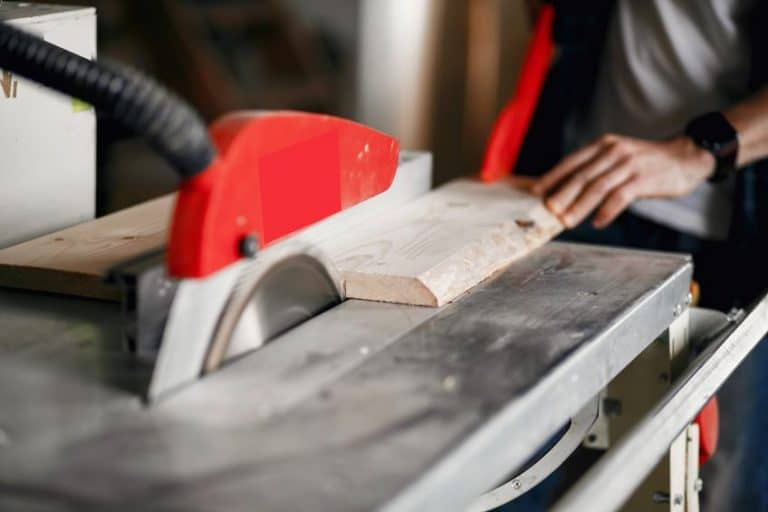
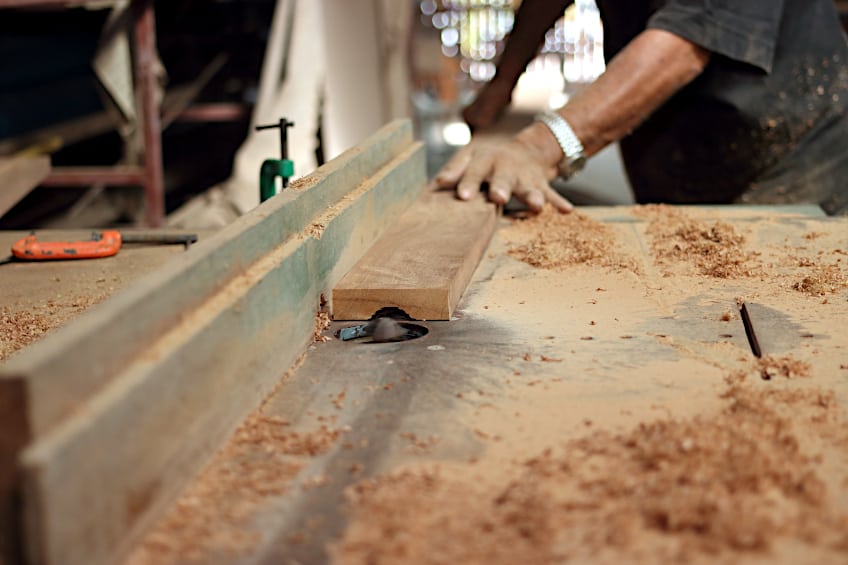
Using a Router to Cut Wood Corners
As we mentioned previously, there are many tools to round wood edges. One of the most popular and convenient tools used to round the edges of wood is the router. What is a router exactly? A router is a tool that has been specially designed to round the edges of a wood workpiece and is available in both a portable hand-held version and table mounted version. Let’s have a look at why these machines are among the most popular tools to round wood edges.
The Handheld Router
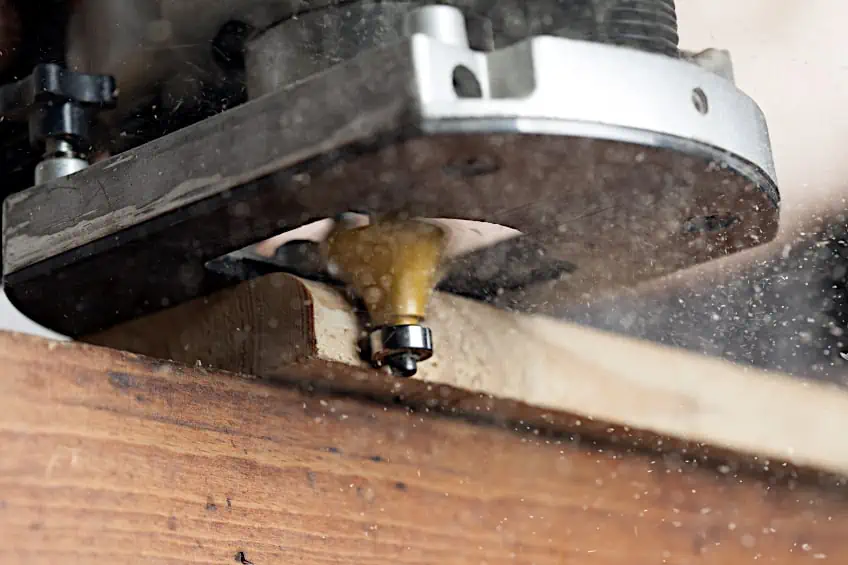
The handheld router, also known as the plunge router, is designed to be portable and a bit more versatile than its alternative. This router’s design is essentially a cubed frame with a motor mechanism attached to its top. The motor rotates a shaft that runs down the center of the cube frame. Attached to the end of the shaft is a bit that rotates at high speed, allowing it to round wooden edges.

The tool is operated by plunging the shaft down into the edge you would like to round. The depth of the cut can be changed while the tool is being operated, and it allows you to drill holes right in the middle of a wood board. If you’d like a tool that can be used for drilling, tapping, cutting, and shaping, this type of router might be just what you’re looking for.
Handheld routers are relatively lightweight and can be used with minimal expertise. However, more experienced crafters will find the tool to be far more versatile than those who are just starting out. That being said, this tool is designed to save you some time and effort when rounding the edges of wood boards and is extremely convenient to have around.
Your experience when using a router depends on your level of skill and experience in using one, but there’s one thing that you can do to ensure the best cutting experience. Choosing the right bit for your router is important, but what is the right sized bit? Usually, a ½ inch bit is perfect for everyday applications, but we recommend a ¼ inch one for edge work.
How to Use a Handheld Router
The first thing that you need to do is fit the bit into the router. The part receiving the bit is called a collet, and the size of the bit you’re inserting needs to be able to fit the size of your router’s collet. Once the bit has been inserted into the collet, slide the shank back until there is as little space between the end of the collet and the shank of the bit.
Once the bit has been inserted into the collet you will need to secure it so it doesn’t dislodge during operation. To do this you could need two open-ended spanners or just one if you have a spindle top router. All that you need to do is turn the locking mechanism until the bit has been tightly secured inside the collet.

The only thing that’s left for you to do is to adjust your cutting depth. Since you’re using a handheld router, this can be done before and after the operation begins. All that you need to do when adjusting the cutting depth on a handheld router is push the shaft down to your desired depth/height and secure it using the mechanism available.
The Table Router
A table router is a bit different from a handheld one. As the name suggests, a table router is designed to be attached to the surface of a table where the workpiece can be clamped. It might not have the portability of a portable router, but it does have some advantages that are unique to this type of router.

A table router is often better suited for working with smaller workpieces, and even though you can’t use it to tap holes or start trimming in the middle of a board, it does offer more stability. Unlike the handheld router that uses a plunging system, the table router’s bit is raised and lowered along a fixed shaft that runs down the middle of its frame.
One notable disadvantage of this type of router is that the depth of a cut is not easily adjusted while in operation. On the upside, this type of router is far easier to maneuver when you’re shaping edges, which is what most wood crafters use this unit for. That being said, the ideal scenario would be to have both of these router types available to you.
What is the right size bit for this router, you ask? Well, even though the table router and the handheld router are quite different, the same bit sizes apply for the same applications. That being said, a ½ inch bit should be used for most general applications, but if you’re going to be rounding corners, it’s best to go with a ¼ inch bit.
How to Use a Table Router
If you’re going to be using a table router the setup process isn’t much different from that of a handheld one. First off, you need to secure the bit into the router’s collet. Always ensure that the bit you’re inserting is the appropriate size for the router you’re using, or you could end up damaging the shank of the bit or the router’s collet itself.
Once your bit has been inserted into the collet it’s time to secure it. This step in the process is important, as failing to secure the shank of your bit could result in the bit dislodging during operation, causing damage to your router, workpiece, and potentially yourself. Generally, tightening is done with two open-end spanners until the bit is tightly secured.
Once the bit has been secured correctly, it’s time for you to make your final adjustment before cutting commences. You need to ensure that your cutting depth is suitable for your workpiece. On a table router, this needs to be done before cutting commences, as adjusting the depth during operation can be a tedious task.
Unlike a handheld router, adjusting the cutting depth needs to be done with a tool that raises and lowers the shaft depending on whether it is turned clockwise or counter clockwise. Once your desired depth has been achieved, you can begin cutting.
How to Round Wood Edges Without a Router
Routers are pretty cool, but they can be pretty expensive and they’re not always the best tool for the job. So, what do you do if you don’t have access to a router, or simply can’t use one with your project? Well, you could round your edges by hand using hand tools. Wondering how to round wood edges without a router? Here are a few tools and tricks you can use to hand carve the best corners for your wooden workpiece.
Use a Block Plane
Before the advent of power tools, the block plane was the go-to tool for rounding the corners of your workpiece. Put simply, a block plane is a handheld tool used to shave the surface of a wood board. While it is usually used to create flush surfaces, if you adjust your angle of approach, it can also be used to create nice, smooth corners.
How do you use a block plane? It’s pretty easy. The plane fits into the palm of your hand, and while you’d usually place it on a flat surface and apply pressure to remove material from the board when rounding edges, you’re going to be keeping it at a 45-degree angle.
Move the plane across the length of your wood until you’ve created an edge, and then repeat the process on each newly created edge until the board’s end has been rounded. It could look extremely rough depending on your skill level, but you’ll be smoothing it out with some sandpaper so don’t worry too much. Sanding an edge can take some time, so be patient and monitor the curvature of your corner.
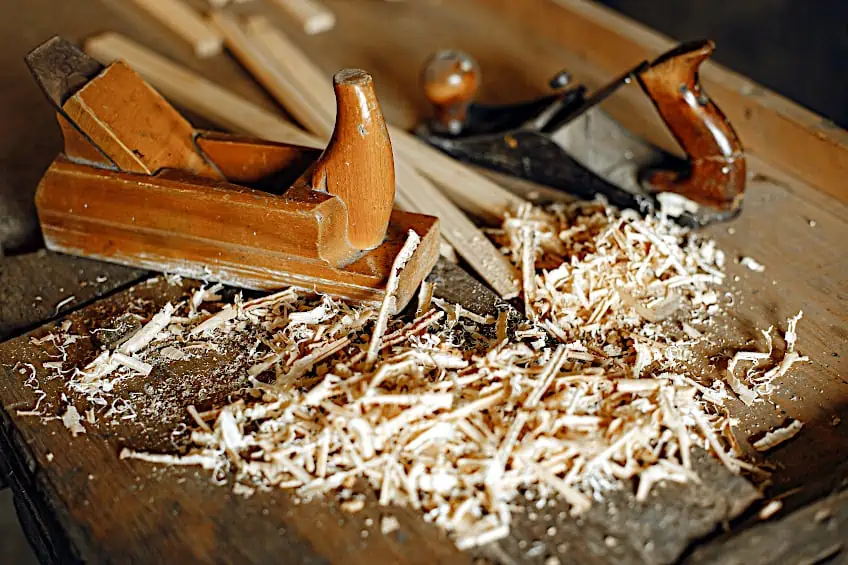
How do you choose the right block plane for your project? Historically speaking, the best block plane for rounding corners would be the compass plane. The compass plane is a hand tool used specifically for creating convex and concave corners. They’re relatively easy to find but can vary in price depending on the brand and quality.
Use a Spoke-Shave
A spoke-shave is one of the most useful tools when it comes to rounding wooden edges. What is a spoke-shave? Essentially, it’s a medium-sized handle with a razor blade in the middle. The handles are gripped on both ends while the razor in the center is placed in contact with the corner of the wood. The spoke-shave can then be pulled or pushed to shave material off the board until the edge has been rounded.
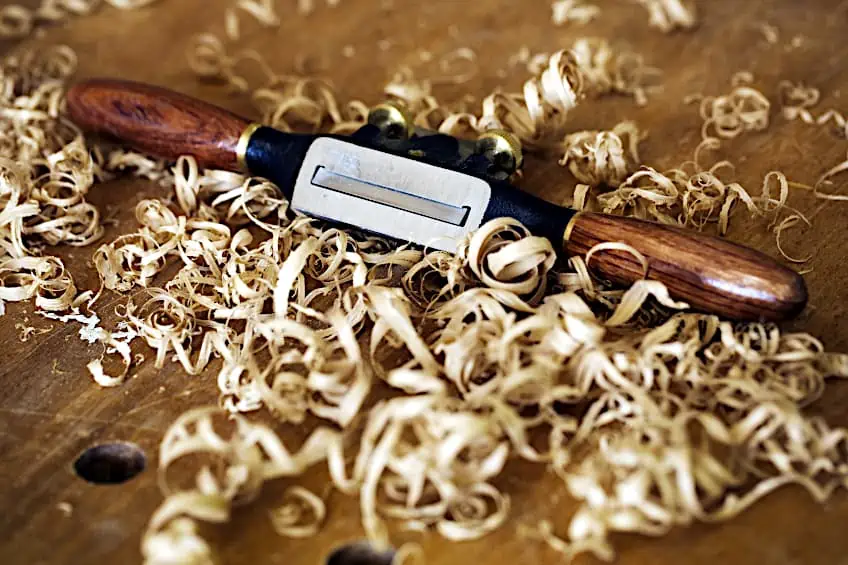
Wondering how to round corners on wood using a spoke-shave? This tool can be used in one of two ways. Either, you could place the blade on the edge of the wood and push using your thumbs to remove material, or, you could place the blade on your edge and pull using your index fingers. This can be quite labor-intensive as you will have to adjust your angle of approach quite often.
Think of the spoke-shave as a two-handed version of a block plane. While both are usually used to plane flat surfaces, they can also be used to round edges simply by adjusting your angle of approach. In both instances, controlling the amount of pressure applied during operation will determine the depth of your, and subsequently how your corners are formed.
How do you choose the right spoke-shave for your project? Since you’ll be rounding corners there’s actually a special spoke-shave you can use. This is known as the convex spoke-shave, as it’s curved inward to allow you to run the blade over the edges. Like the compass block plane, these are pretty easy to find, but unlike the compass block plane, they tend to be a bit less pricey.
Now that you know how to round corners on wood, why it’s a good idea to round corners on wooden workpieces, what tools are out there for this application, and how to use both hand and power tools to round edges, it’s time for you to get out there and put your newfound knowledge to the test. Remember to always wear the appropriate personal protective gear when working with both hand and power tools!
Frequently Asked Questions
Should You Round the Edges of Wood?
While it definitely isn’t a must, there are a few advantages to rounding the edges of a wooden workpiece compared to straight edges. For one, rounded edges are less likely to chip or break off under impact, and they provide a smoother overall look to most furnishings.
Do Rounded Edges Look Better?
It should go without saying that style is entirely subjective. After all, what looks good to you might not appeal to the next person. However, if you’re trying to replicate a particular style of furniture or want your project to have a naturalistic feel, rounded edges tend to fit better than straight ones.
Are Rounded Edges Better on a Wood Workpiece?
Objectively speaking, rounded edges on the wood are better, but this depends on the application of your workpiece. If your workpiece will be situated in a highly trafficked area and is at a high risk of being damaged, rounded edges reduce the probability of chipping, denting, and breaking over time.

I have been into woodworking since 2005 and woodturning since 2011. Because of my love for wood and woodworking, I started woodhappen.com to teach other enthusiasts about how to finish and seal wood, the best woodworking tools, the different types of wood, and everything else related to woodworking! Read more about me here.