How to Remove Stain from Wood

How to Remove Stain From Wood – Your Easy Woodstain Removal Guide

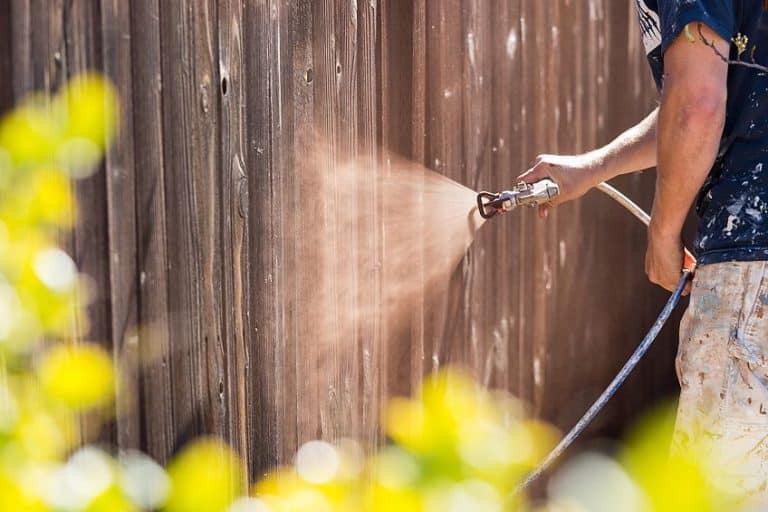
A rite of passage for any craftsman is restoring a workpiece that’s appeal has faded over time. One of the most challenging parts of getting this done is removing the existing finish before you get to spruce the workpiece up, but how do you go about this? Removing paint that has started to separate from a surface is simple enough, just apply some paint thinners, get your scraper and some sandpaper and you’ll have that done in next to no time! This being said, how does one remove wood stain from a surface? Let’s have a look at how to remove stains from wood.


Why Would You Remove Stain from Wood?

As much as we all enjoy shopping for new and exciting furniture for our homes, there are always some items that hold a certain sentimental value to them. Maybe they were given to you as a gift or passed down to you as a family heirloom, either way, your first instinct certainly won’t be to throw these memorabilia out with this week’s trash. Restoring furniture requires removing what remains of their existing finishes, no matter how tarnished or intact they might be at the time. Removing paint is quite a straightforward process but figuring out how to remove stain from wood can be considerably more challenging if you don’t know how to.

Wood Stain Stripper

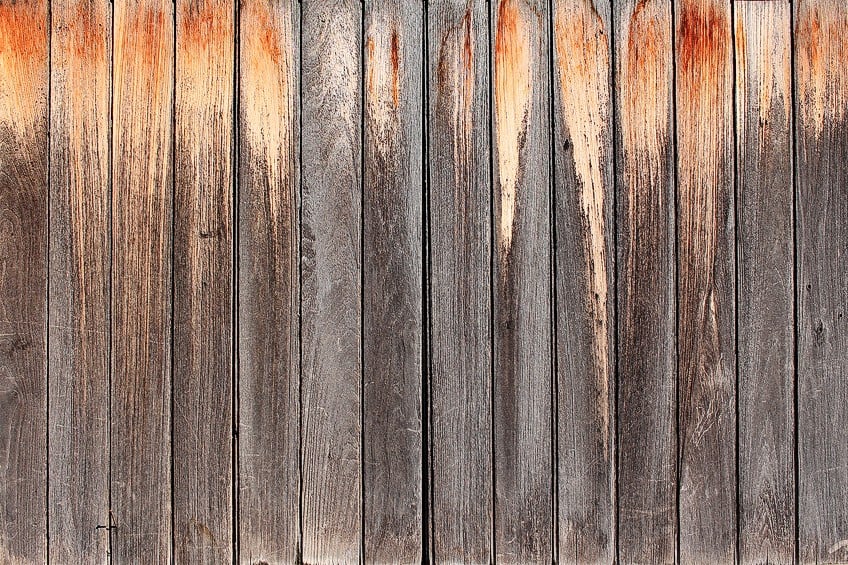
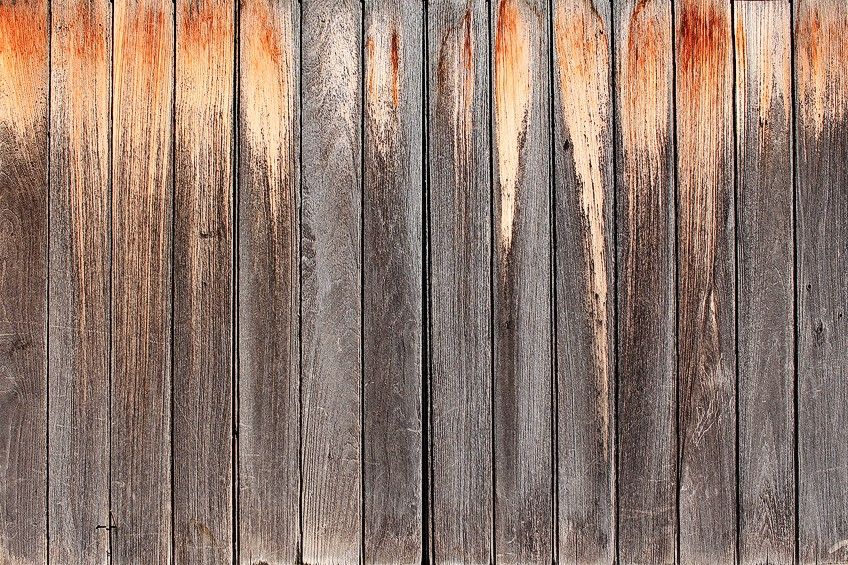
Another reason you might be considering removing wood stain from a surface is to breathe some life back into it. As aesthetically appealing and long-lasting as the wood stain is, you will notice that it has the tendency to lose the intensity of its color over time.

This can be attributed to a number of factors, including the degradation of the wood fibers or over-exposure to sunlight and/or moisture. Regardless of the reason, this can leave your furnishings looking a bit lifeless and dull, not to mention the fact that you lose some of the other properties attributed to stained wood such as resistance to moisture damage and abrasion. Other than restoring your own furniture, another common reason for individuals having to remove stains from wood is to make it their own.

These days it’s fairly common to find intricate vintage pieces of furniture at your local goodwill, but their styling might leave something to be desired even if their overall condition is good.

Changing the look of the furniture to reflect the styles of our time is not a new practice, in fact, it was the only option for many middle-class families before the advent of mass production. Re-painting your home and re-finishing your furnishings was a common skill in those days, and it seems to be coming back in a big way with everyone just itching to learn about different facets of crafting and restoration.


How to Remove Stain from Wood Surfaces

Now that you have an idea of what the benefits of removing stain from wood are, you are probably wondering exactly how to remove stain from wood. The problem with this process is that most stained wood furnishings have a layer of transparent protection over them from the initial staining process.

Stain Stripper

This being said, you will ultimately have to remove this layer before you can get around to removing the stain itself. The practice of removing either coating involves getting your hands dirty with a power sander or sanding paper (which we recommend). The process is a bit more nuanced than this though, so let’s have a look at the process of removing stain from wood through a step-by-step guide.


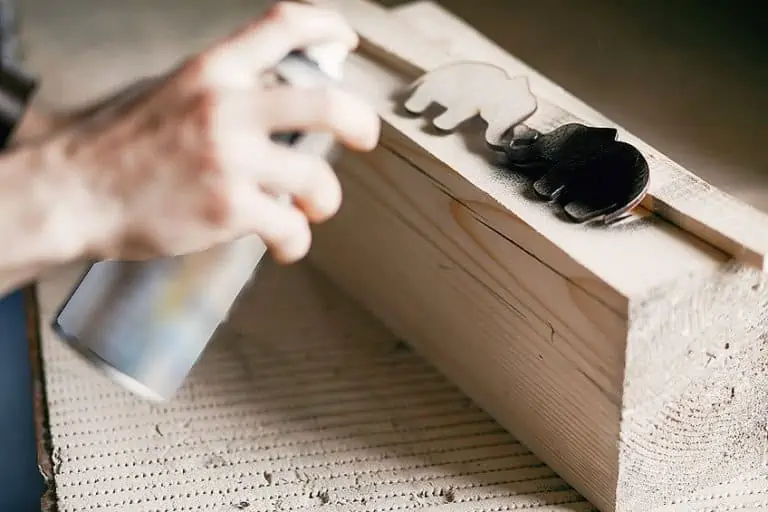
Cover the Workspace Area

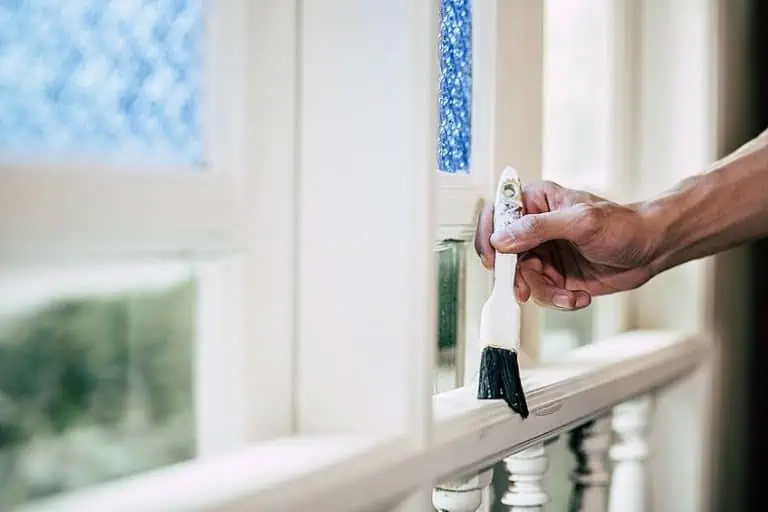
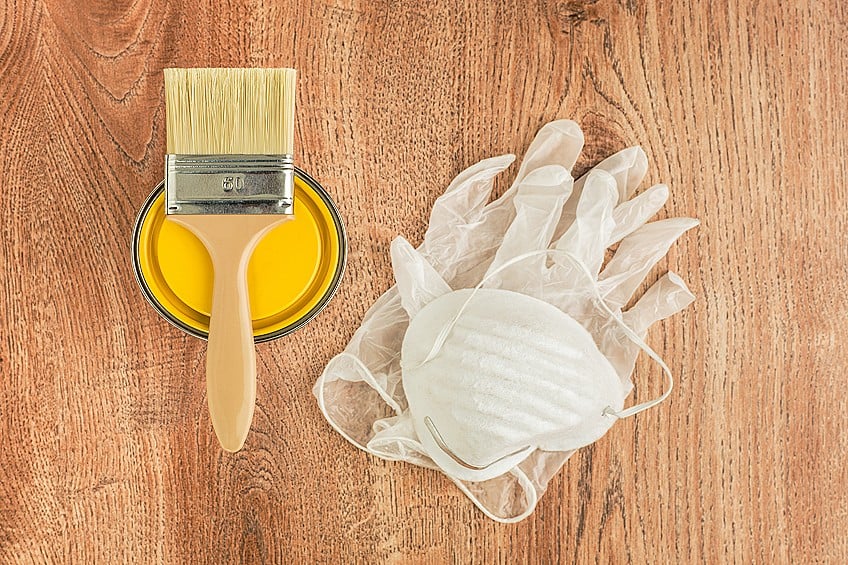
Before you begin it’s important to understand the nature of the chemicals you will be working with. Wood stain remover/ paint strippers can cause extreme discomfort if you inhale them or if they come into contact with your skin. This being said, ensure that you always wear appropriate personal protective gear when working wood/paint strippers.

In addition to having the right gear for the job, you should try to work outdoors or alternatively in a well-ventilated area as often as possible.

Once you have airflow sorted you should work on protecting anything you own that should not get paint stripper on it. Lay down a tarp over anything in your potential splash zone or move it if possible. Wood stain remover acts like acid when it comes into contact with most surfaces, so unless you’d like to have holes of varying depth in all of your belongings, cover them up well!


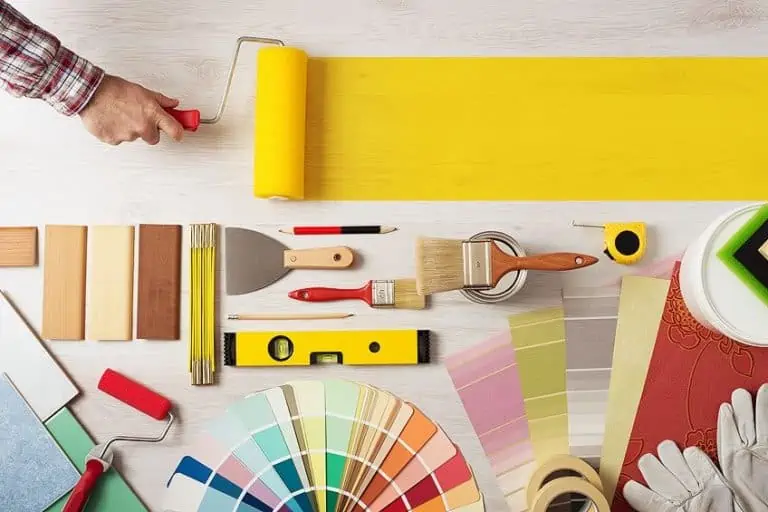
Prepare Your Tools for the Work Ahead

Like most experienced craftsmen will tell you, 80% of the battle when working with surface coatings (whether you are putting them on or taking them off) is in the preparation. Most people immediately think of priming a surface for painting when hearing this piece of advice, but in reality, preparation begins a step before this. Having the right tools ready to go before you get into the meat of the job means that you will save lots of time and effort while avoiding potential accidents.

Wood Stain Remover

A good way to arrange your tools is to place everything you will need on the side of your workpiece parallel to your dominant hand, this includes your stain stripper, your scrapers, your sanding paper, your rags, and even your personal protective gear. Once you have everything organized, work out a system that minimizes clutter while you’re working, a reliable system is placing everything you are done using, including debris, on the opposite end of your workpiece. This minimizes the possibility of an accident happening, and when you’re working with a substance like a stain stripper you should take every possible precaution.


Get Your Stripper Ready

At this point, your workspace and your tools should be organized and well ventilated, so it’s time to get your stain stripper ready for work. You don’t want to crack the entire container open and have that amount of paint stripper fumes around, especially if you are working indoors. This being said, find a container that won’t be affected by the corrosive effects of the paint stripper and pour some stripper into it. If you aren’t sure which materials won’t be affected by the stripper, stainless steel or similar metal container will get the job done.

Choosing the size of the container is entirely dependent on the size of the workpiece you will be stripping, therefore choose a container that won’t have you refilling it every five minutes, and also ensure there are no leaks in the container before you pour the stripper in.

Once you have all of the aforementioned sorted out be careful not to spill any of the stripper on yourself or anything around you, although considering that everything that you have covered up everything even if you do spill some it’s nothing to be concerned about.
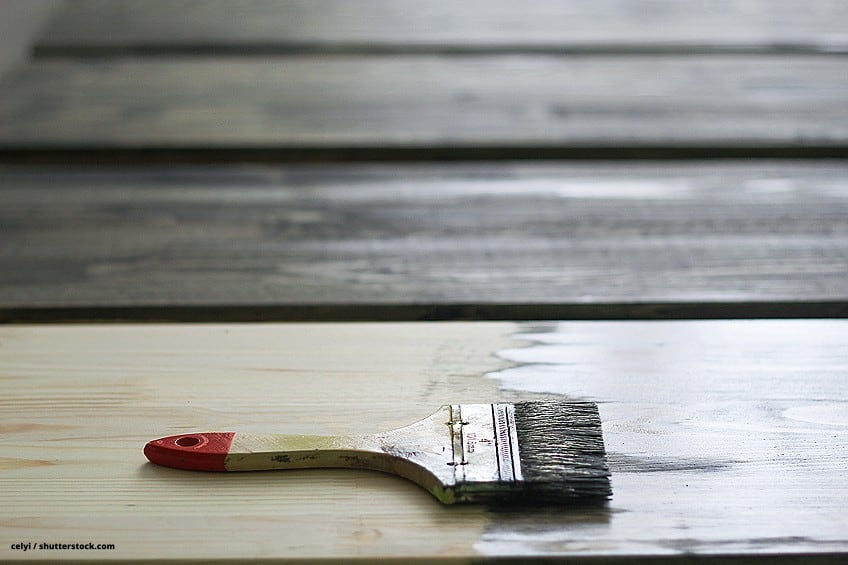
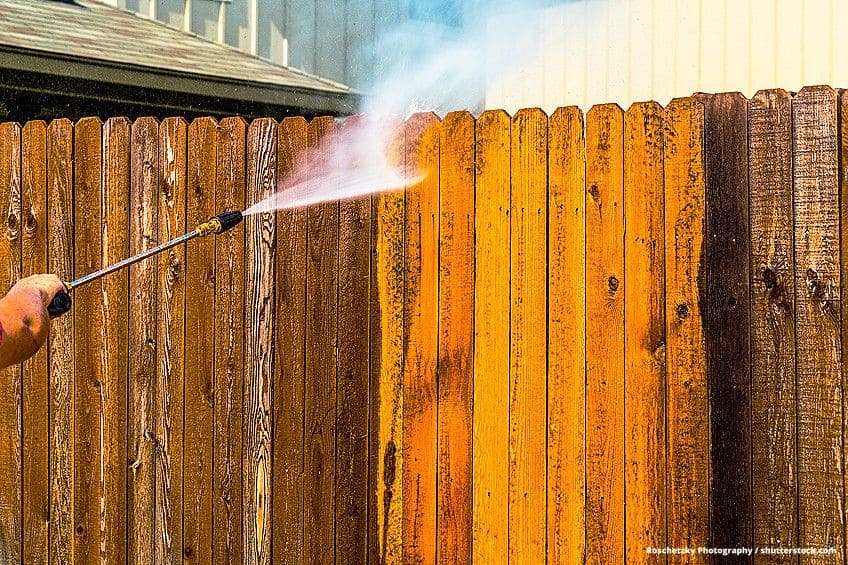
 

Apply the Stripper

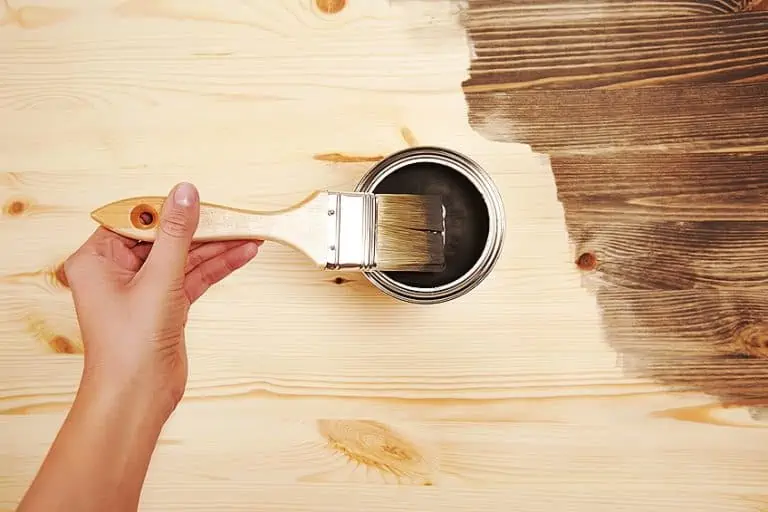
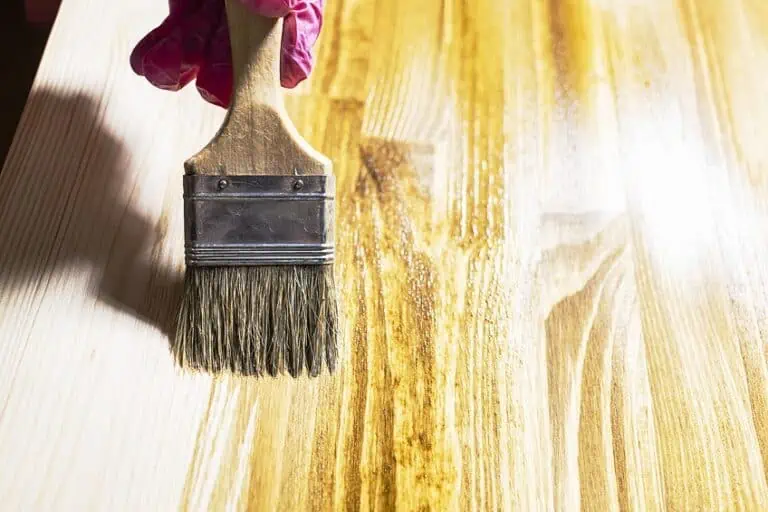
If you have a background in applying paint you know that you shouldn’t overdo your coats, allowing each coat to dry before sanding down and applying your next coat. This is not the case when you are applying paint strippers. When learning how to strip stain from wood you should ensure that you apply a really thick coat, this is especially important if you are working with fairly large workpieces like doors or tables. Why you might ask? Well, when you are stripping wood stain from a surface you need to penetrate deep into the surface of the wood, this is due to the wood stain itself being soaked deep into the wood’s fibers in order to color and protect it.

Woodstain Removal

If this is your first time working with a wood stripper and you don’t feel too comfortable covering your entire workpiece in stripper right off the bat, go ahead and practice your technique on a small section of the workpiece until you build the confidence to move on to bigger areas. Be careful when applying stripper on large surfaces too, if your elbows or cuffs come into contact with the surface of the workpiece once the stripper is applied it will eat tiny holes into your clothes. Now that you know how to strip stain from wood surfaces, let’s move on to the finishing steps.


Let the Stripper Soak In

They say that patience is a virtue. In the case of removing stain from wood, this statement does ring true. The soaking process is integral when removing stain from wood and should not be rushed by any means. As we mentioned previously, wood stain seeps deep into the fibers of the wood (far past the surface), therefore you need to allow enough time for the stripper to do its thing.

If you want to speed this process along you can get rid of any clear coats of sealer on the surface of your workpiece before you apply the stain stripper, this will leave less work for the stain stripper to do and allow it to get eating at that paint instead of having to work through these additional coatings.

The stripper should take roughly 20 to 40 minutes to set in properly when removing stain from wood, this being said if you would like to make yourself a cup of coffee or clean up a bit while it does its work you won’t be missing much. Before you take your well-deserved break, ensure that the entire surface is relatively wet with the stain stripper, if there are any dry areas fill them in with your brush before you leave.


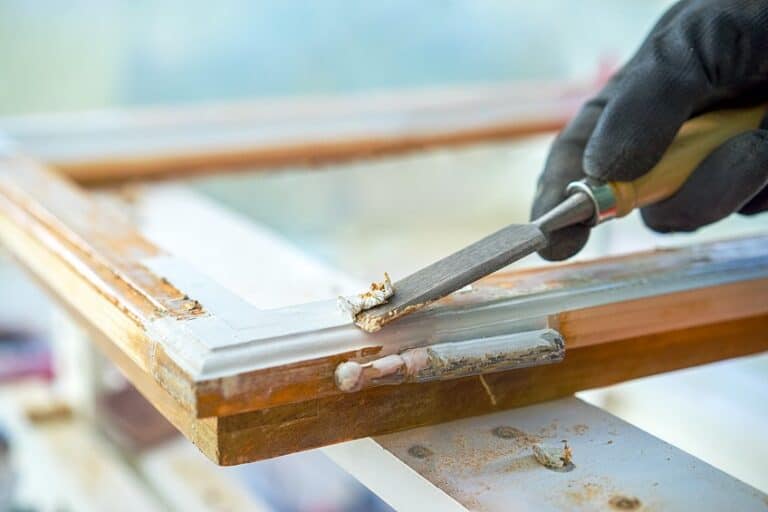
Remove the Stripper from The Surface

Enjoy your coffee? Good! It’s time to get back to work. Ensure that your stain stripper has soaked into the wood’s surface well and that the surface is nowhere near as wet as you left it. If you can still see stain stripper floating on the surface of your workpiece you need to give it a bit more time to set in. Once you are sure that all of the stripper has soaked into the surface of the wood it’s time to get your hands on your scraper. Keep in mind that your scraper should be plastic, the last thing you want is to cause unnecessary damage to your workpiece.

Removing Wood Stains

Begin removing the stripped stain from your workpiece by scraping from one end of the workpiece to the other, work slowly as some debris may still be tightly adhered to the surface of the workpiece, therefore you should aim to be gentle but still decently firm when removing wood stains.

Repeating this process should create clear little “rows” as you progress through the surface of your workpiece, and when you are done ensure that you dispose of the debris you have removed properly. The stain stripper is still active in the fibers you have scraped away and therefore is not only flammable but could easily eat through a refuse bag. Always remember to double down on the packaging you use to dispose of the excess material when removing wood stains.


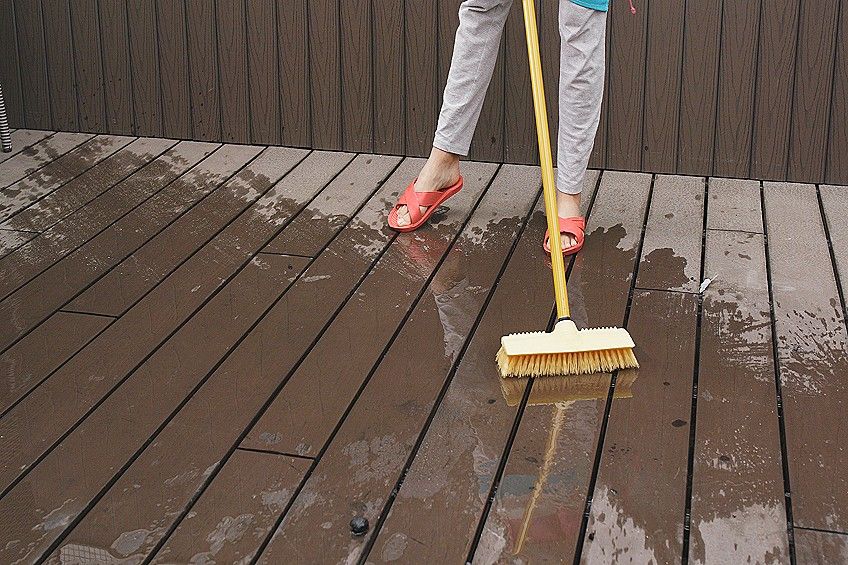
Scour and Wipe Your Surfaces

If you happen to be feeling a bit tired at this point don’t worry about it, it is a rather labor-intensive process. At this point in the process, you will notice that once you have removed the bulk of the wood stain with your scraper there are still a few pieces that have not come loose. If you think it’s the stain strippers’ fault, we promise it is not, some sections of the surface are simply more porous and therefore have absorbed more wood stain than the rest.

You can solve this problem by getting your steel wool and dipping it in your stain stripper, once you have enough of the stripper soaked up you can get to work on the remaining spots on your workpiece.

You can follow the same pattern as you did with your scraper previously, making sure that the surface is clean section by section as you move forward. Make sure that you get every little corner and spot you can reach with your steel wool pad, but don’t worry about deeper spots that you can’t reach.

Once you feel you have reached the limit of your abilities with your steel wool give your workpiece a wipe down with a damp cloth once you have cleared any debris created by your steel wool pad. This is arguably the best way to remove stain from wood, not to mention how to clean wood after stripping. Once you have completed your wipe down give your workpiece roughly 24 hours to dry up before moving on to the next step.


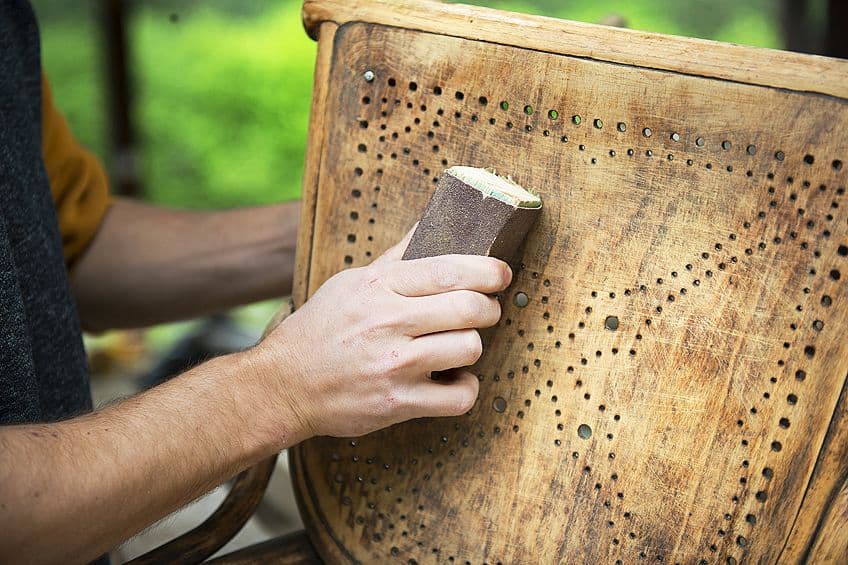
Sand Down Your Surfaces

This step will undoubtedly reward you for your efforts. As we mentioned previously, the best way to remove stain from wood is by working patiently and methodically to avoid disappointment. Once you have ensured that your wood has dried overnight it’s time for you to get sanding. It should go without saying that if you are working on larger surfaces you should use a power sander to speed the process along. If there were any spots you could not remove from the surface of your workpiece you should be able to get them out with your sander/sanding paper.

Removing Stain from Wood

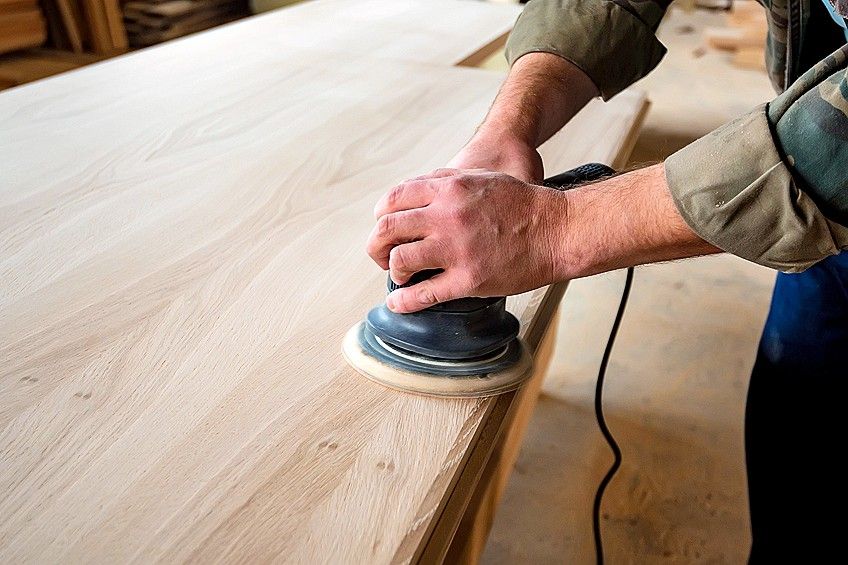
Once again, work from one end of the surface to the other in a clear line and remove any remaining wood stain spots completely. As you work from one end of the board to the other you will notice that the raw wood which was previously saturated with wood stain has now been exposed, this is ultimately what you are working towards.

Ensure that your ventilation is still adequate and that you wear the appropriate eye protection when you are working with and sanding equipment as if any wood chips manage to get into your eyes, they can cause serious discomfort and possible injury. Once you have completed the rough sanding process, remove any debris from the surface of your workpiece and give it a once-over with some fine-grit sandpaper to ensure it is nice and smooth for reconditioning.


Now that you know the best way to remove stain from wood, how to clean wood after stripping, and the nuances of stain removal you are ready to get out there and put your newfound knowledge to the test. Remember to always work in a well-ventilated area, always wear the appropriate personal protective gear, and generally always put your safety and the safety of those around you first!


Frequently Asked Questions


Can Wood Stain Be Removed?

Wood stain removal can be a time-consuming process, but it is possible. You will need some wood stain stripper, a plastic scraper, a few rags, a wide paintbrush, a tarp, some sanding paper, and a well-ventilated work area. Remember that the best philosophy when working on removing the wood stain is to work slowly and be as methodical as possible.


Will Vinegar Remove Wood Stain?

Well, this won’t work as well as wood stain stripper (otherwise known as wood stain remover) but it should work to a much lesser degree. Although people have found success using this substance it is not recommended that you use anything other than products that have been graded for wood stain removal.


What Takes Off Stain?

If you are wondering what works best in removing wood stain it is usually rubbing alcohol or acetone. These substances have a limited acidic effect that essentially eats away at the wood stain in the fibers of the wood, causing it to rise to the surface where it can be scraped and sanded away. We recommend only using certified wood stain removal products


Similar Posts

Best Stain Removers

How to Remove Stain From Wood – Detailed Step-by-Step Tutorial

There are a number of reasons as to why you would apply wood stain to the wood. The first reason for adding a wood stain is to improve the appearance of wood, and the second is to protect the wood. Most wood paints drip right onto the surface of the wood. While wood stains are beneficial to wooden furniture, there will be a time where it will be necessary to remove the wood stain. Knowing how to remove stains from wood is a requirement for every homeowner. Therefore, this guide will address the process of how to remove a wood stain.


How to Remove Stain from Wood

There are several steps that need to be followed in order to remove a wood stain successfully. We have outlined the main methods required for preparing, applying, cleaning, and finishing the process of removing wood stain.

Deck Stain Remover


Preparation for Applying Wood Stain Remover

  • Consider the type of wood stain remover. If the paint stain remover expects you to exercise precautionary measures, ensure that you do so. When using paint stain remover that produces strong fumes, rather work outdoors. When working outside, make sure the weather doesn’t tamper with the end result.
  • Always work in a clean area. Begin by wiping the area that you are working on with soapy water. Thereafter, you can use dry paper towels to clean.
  • You need to ensure that the chemicals used for removing wood stain do not splash elsewhere. When using wood stain remover, start by applying painter’s tape to the hinges and other parts of the surface that do not need to come into contact with the wood stain remover.

Safety Advice: Never use a chemical stripper on a wood stain remover that contains chemical ingredients. Always keep safe by using protective glasses, long-sleeved clothing, unused nitrile gloves, and a breathing mask. 


Applying the Paint Stain Remover

  • Start by pouring the contents of the paint stain remover into a container. Always consult the manufactuer’s instructions prior to, during, and after the process. Remember that both traditional chemical strippers as well as citrus strippers work well.
  • Be sure to opt for a paintbrush that has natural fibers. This paintbrush type will ensure that you apply thick layers to the surface. Position the brush in such a way that the paint seeps into every corner.
  • Let the stain remover rest on the surface for 20 minutes before you reapply more products. There is no hard-and-fast rule about how many times you will need to reapply the stain remover, but many paint stain remover types require quite a few applications.

Working Advice: If you are a novice when it comes to using stain stripper, begin with smaller areas first. Begin by working in an area of just one square foot.


Scraping Away Wood Stain Remover Debris

  • Many novices wonder as to how they can know when the paint stain is ready to be peeled. You can begin peeling when the stain remover swells up.
  • Ensure you tackle the stain before the stain remover dries. Remove any excess debris with a plastic scraper or a putty knife. Try to scrap the debris into a packet or dustbin to avoid having to clean the area again.
  • A steel wool pad can take off any additional debris. When using steel wool, gently scrape using the grain direction as a guide.
  • A final step would be to wipe your surface areas with a slightly wet cloth. This method will remove any excess debris.
  • All these steps mean that you don’t necessarily have to opt for the sanding process. For novices, sanding can be hard, especially if you are fearful about sanding an entire layer of furniture off.

Scraping Advice: Be sure not to use metal tools or tools with sharp edges to scrape, as they can scratch the wood.


The Sanding Process

  • Before attempting to sand, allow for a full day of drying for the deck or surface you are working on. Make sure that you wear protective gear when beginning the sanding process.
  • You must use a medium-sized grit sandpaper of 100- to 150-grit. Alternatively, you can use a sanding block or even an orbital sander. Use a 180-grit paper to remove marks and sand the surface.
  • Use a fair amount of pressure for stain removal.
  • Once you are happy with the sanded surface, and all flaws have been taken away, you can wipe away the excess dirt and dust with a fine sandpaper grit.

Sanding Before Using Wood Stain Stripper


The Clean-Up Process

  • To ensure that your surface area is clean, use a damp cloth. Dampen the cloth with mineral spirits.
  • You ought to vacuum the area to remove debris and sawdust.


Use Wood Bleach for Brightening

  • The entire process is almost complete. Remember that a removed wood stain doesn’t indicate the end of the process. What many novices fail to realize is that it is equally as important to neutralize the stripped surface and make the wood appear brighter.
  • Once the stripping and cleaning are done, apply oxalic acid. The chemicals in the oxalic acid will ensure that you brighten the wood. Natural colored wood will be visible. The main reason why we add this chemical to the removed area is to prevent any further strain from the wood stain remover.
  • You can also use chlorine wood bleach, which is actually calcium hypochlorite. This is the same substance that we use in swimming pools. To create a chlorine solution, amalgamate chlorine crystals with water. Mix a saturated solution by adding crystals to water until no more of the crystals dissolve. This solution does not work well when removing color stains left behind.
  • To remove any excess pigment, you should make use of two-part bleach for wood. Two-part bleach is a mix of sodium hydroxide and peroxide. The kit that you buy for the purpose of removing excess pigment will have instructions for use. Be cautious when using bleach of any kind.
  • Try to wear protective gear whenever you work with bleach. It will also be helpful to keep a respirator nearby.
  • Dust the bleach onto the unfinished wood. You will notice that bleach will lift the color. If you allow the bleach to rest for 12 hours, the results will be more pleasing. For most kinds of bleach (not all bleach products), you will apply part A first. Thereafter you will apply part B. The function of bleach is to brighten and lighten the wood. You must first test the result that the bleach will produce by adding some bleach onto a small patch of the wooden surface.

Wood Stain Stripper


Allow for a Drying Period before Applying Paint

  • For using both oil-based or a semi-transparent based paint afterward, you need to make sure the wood you are working with is dried completely. The drying time is not known in advance, and is instead based upon the stain remover type.
  • A deck stain remover will dry fully after a good few hours have passed. We always advize novices to invest in a moisture meter. The moisture meter can be found easily at any homemaker store and allows you to assess the internal moisture of the wood. Once you know exactly how moist the wood is, you can ensure that you maintain the best results. If your moisture meter reflects that the wood is less than 12% wet, you can apply an additional paint coat.
  • Although this step doesn’t seem as important, it is essential to ensure the wood is actually ready for oil-based paint.


Tips on Removing Stains from Wood Using a Deck Stain Remover

  • In order to achieve an excellent finish, let the product settle for a few minutes before you start applying it to the deck. By doing this, you allow the wood stain remover to infiltrate into the deck, thus stripping away the old paint. The time required for the wood stain remover to actually work depends on the paint itself that needs to be removed. It is a known fact that semi-transparent oil-based stains are easier to remove than solid stains.
  • For decks that have stubborn stains, trying a simple wood stain removal method is not enough. A deck stain remover needs to seep into the stains so as to make them softer. Many deck stain removers are more effective than ordinary stain cleansers.
  • Always ensure the deck is cleaned thoroughly to yield the best results. Get rid of dirt on the surface and make sure to remove any mold or mildew. This means that when a new coat of paint is applied to the stripped deck, the paint will last for a longer duration of time.
  • We believe that the best wood stain remover types have a combination of dodium hydroxide and other powdery substances. They work best to remove stains as they can be applied with a sprayer when they are mixed with water.
  • Stubborn stains may take a longer period of time to remove. You may need to put acrylic- or silicone-based stains directly onto the deck. You also need to apply these stains a few times. For stains that are taxing to remove, sanding can also help.
  • You should only remove the stain with a power washer once the deck stain appears to have gotten softer. The amount of pressure you apply need not be hard but mild. Due to the fact that a caustic stripper increases the PH level of wood while stripping it, the wood will appear darker. Use a wood brightener to brighten the surface area and restore the wood’s brightness. Although many feel it is possible to neglect the brightening process, it is important in allowing the wood to look more natural.
  • When you ask, “How do I remove stain from wood?”, you actually need to be asking, “What is the best wood stain remover?” In this way, you will buy a wood stain remover that yields the best results. With no stains, a new coat of paint can seep through the wood to produce the best finish.

How to Remove Stain from Wood


What is Vital About a Wood Stain Remover?

There are a few ways to remove a wood stain, but many homeowners prefer using a wood stain remover, as this is the easiest and most convenient option for removing a wood stain. Alternatively, a scraper could be used, but scrapers work too slowly to remove the stain. Due to this fact, it would be far better to use a wood stain remover.

A heat gun is another alternative, but yet again it takes quite a long time to remove the stain. To get the job done rather quickly, you can use either a power sander or rotary grinder, but this will result in the removed paint and dirt being displaced and floating in the sir. It is not advisable for novices to use either of these machines because of how much dirt can accumulate as a result of the removal action. Both methods can cause the user to choke if care is not taken.


Different Types of Products for Removing Wood Stains

Each stain stripper has been formulated in a different way with diverse ingredients. Most products are made to work as a type of wood stain remover, but the different types of wood stain removers need to considered when deciding how you would want to remove stains from wood.


Solvent

Wood stain removers that are classified as solvents include chloride, acetone, alcohol, toluene, chloride, and methylene. The main perk of solvents is that they work by soaking up the previous stains and have intensive cleansing abilities. Solvents are of the few product types that act as a paint stain remover in addition to normal wood stains. You must keep yourself safe when you are working with solvents.


Caustic Strippers

Caustic strippers are similar to solvents in that they work by soaking up the finish. However, in soaking up the finish, it transforms the finish into another substance. In fact, this type of wood stain stripper is quite popular. Since caustic strippers are an amalgamation of acids and bases, additional care is required when using this type of stain remover. Some caustic strippers contain lye and oxalic acid. Out of all the types of caustic strippers, lye and oxalic acid may be strong, but when combined these chemicals form solution for hard-to-remove stains.


Biochemical Stripper

Biochemicals are made from chemicals, although these are less purified. The biochemical wood stain stripper is made from natural ingredients so as to be a safer wood stain stripper option. These products are made from the likes of citric acid, lactic acid, soy oil, and wood-pulp extract.


How to Remove Stain from Wood

Deck stain stripper is an excellent alternative for removing varnish and other stains on decks. The deck stain stripper should be put on a deck that has been moisturized so that it can penetrate the wood. Thereafter, you will need to wash off the deck after the designated period of time. And voila, a job well-done!

Everyone chooses to remove wood stains differently. People who make wood stain removers indicate that a deck stain stripper should always be applied with a weed sprayer. The reason for this suggestion is because a weed sprayer creates an even, flat surface to work on.

Another way to apply the deck stain stripper is by using a pressure washer. A quality pressure washer possesses a detergent injection feature into which you can pour the stain remover. This particular application method requires no additional equipment, and will yield the same outcome as if the deck remover was applied with a paint roller, big paintbrush, or even a mop. When using a pressure washer, however, you may need to work faster. The reason for this is so that you can prevent the stripper from drying prior to washing it away.

Many manufacturers advocate the pressure washer solution because it often leads to the best finish. When looking for the best deck stain remover method, it is best to use the pressure washer method for most decks. You can achieve similar results without purchasing a pressure washer by using a common hose pipe to remove the stains after the deck stain remover has been applied to the deck.

Paint Stain Remover


Some of the Best Wood Stain Remover Types

You will need a wood stain remover of a good quality so that you can remove a wood stain from your surface with ease. Below, you will find our list of recommendations for the best wood stain removers.


RESTORE-A-DECK Paint Stain Remover

This brand of paint stain remover is a powdery solution that, once diluted with water, can cover a large surface area. The exterior wood surface that can be covered with this product is about 500 to 1000 square feet. The reason this brand is stated as one of the best when it comes to removing wood stains is that it is capable of removing oil-based, latex-based sealers, varnishes, transparent stains, and dirt.

Like most types of paint stain remover, this product works best when used with a watering hose or pressure washer. You may have to reapply this paint stain remover to remove tougher stains. Another suggestion is to create a solution using less water and more of the Restore-A-Deck powdery substance for a more concentrated product.

This paint stain remover must not be applied over acrylic-based stains. When applying Restore-A-Deck to oil-based or latex-based stains, you will need to perform additional steps once the initial application has been done. Once you have applied the stain remover, you should follow up with other refinishing steps, such as the addition of wood brightener for neutralizing wood’s natural PH level.

This product’s formula is known to be biodegradable, which means that it is not harmful to the environment. Despite this fact, all plants must be covered to prevent them from burning when being exposed to the substance. Another suggestion is for you to wet the plants and soil, which will then dilute any Restore-A-Deck paint stain remover.


SaverSystems Stain Stripper

A well-loved fact of the SaverSystems stain stripper is that it is a ready-to-use solution with no need to dilute the substance. This product can cover a larger deck surface area of 100 to 150 square feet. Most stains are able to be removed, including clear and semi-transparent stains. The stain stripper can be applied by spraying it or by using a paintbrush. The substance needs to rest on the deck for about 30 to 60 minutes so that the substance can penetrate the surface. After the this period, clean the area with a pressure washer.

The key rule to the application of this product is to ensure that you do not let the stain stripper dry. Keep some of this wood stain stripper nearby so that you can reach it with ease, as you will need to keep applying it so as to ensure the surface doesn’t dry too rapidly. Ideally, you should apply the wood stain stripper on a cooler day. As a deck stain remover, all types of dirt, mold, and other stains can be removed. This is not a paint stain remover, however, and and it cannot tackle tougher stains.


DEFY Exterior for Removing Wood Stain

The DEFY brand is made for removing wood stains that are clear or semi-transparent in color. Varnishes and sealers can also be removed with this wood stain stripper. This is another wood stain stripper that is effortless to use because it does not need to be diluted. The Defy brand works to beautify the appearance of the wood by being a paint stain remover that gets rid of wood stains that no longer look attractive.

This wood stain remover is the initial step of a 3-step process for getting rid of wood stains so that you can reapply stains. While it works by removing the wood stain, the product alone doesn’t allow the wood to look better. For this reason, we apply a brightener or bleach thereafter. The last step is to apply a stain to achieve a better finish. The brand of stain stripper does excel in returning the wood to its bare beautiful texture.

The Defy wood stain remover solution is quick to apply and follows all the same rules as other wood stripping solutions. The difference with Defy’s deck stain remover is that it produces impeccable results. After one use, you will immediately choose to repurchase this deck stain remover.

Like many other brands, it is a biodegradable stain stripper. It is made of sodium hydroxide and sodium metasilicate that are known to be dangerous if the solution gets absorbed by the skin. A tip given by manufacturers is to wear chemical preventative gloves, glasses, and even shoes during the application process. Keep a respirator handy when you decide to use this particular stain stripper. Also, try to only use this brand when the climate is higher than 50°F.

Opt for applying the solution on a slightly dampened surface area. Apply the stain stripper using a polyester brush or a pump-up sprayer. We believe that applying with a brush will produce better results. Try to prevent the stain stripper from drying too quickly under the heat of the sun, as this will result in streaks on the surface. Allow the solution for removing wood stain to rest on the surface for at least 25 minutes before you observe the results of the product.

This product is fast-reacting, so when the solution has reacted on the surface, a stiff bristle and scrub brush can be used to apply a powdered washing solution. You can also use a simple garden hose to spray a light coating of water over the stain remover. Thereafter, the damp solution can be washed using a pressure washer.


Selecting Your Paint Stain Remover

When choosing what kind of stain stripper to use on your wooden surface, there are a number of factors that you should keep in mind. You will need to take the products effiacy, safety, and workability into account when making your selection.

Removing Wood Stain


Efficacy

The reason as to why people purchase a paint stain remover is simply to take away stains from the wood’s surface. It would therefore be senseless for you to buy one that is unable to remove stains effectively. When making a purchase, opt for a brand that promises to clean out the bulk of the stains (99% of stains). You can look at the product details of the paint stain remover to see what kinds of stains can be taken off. Some paint stain removers are for stains that are difficult to remove, others work on stains on furniture, and some are for removing exterior stains. Try to find paint stain removers that work well on all sorts of stains.


Precautionary Measures

Some of the best stain remover types only need to be used with gloves as a safety measure. Other wood stain stripper types, however, require you to wear heavy-duty gear to avoid exposure to dangerous substances in the products. If a stain stripper can be used inside your home with no risk to anyone living there, consider buying that brand of stain remover.

If precautionary measures are mentioned on the stain stripper, it means you should use the strippers outside as a deck stain stripper or exterior wood stripper. These strippers need to be handled with consideration and alertness. An expert may need to be called in if it seems too dangerous for you to do alone. Thus,  considering every aspect of the wood stain stripper is essential to producing an ideal outcome.


Workability

Certain stain removers come in formulas that have already been mixed. Other formulas need to be mixed by the consumer. The mixing process can be quite tedious and time consuming. We suggest that you try a premixed formula initially as it is much easier to use.

It is best to mix your own stain remover for stains that are harder to remove. As you need to use a special powder to create this mixture, you will be able to control the consistency of the stain remover to suit your needs.


Frequently Asked Questions


Can I Use Vinegar to Take Off Stains?

Vinegar can be used to take off freshly painted marks. To do this, you need mix one part of vinegar to two parts of water. You can use a sponge or stiff bristle brush to remove the stain, although the vinegar must first be given time to infiltrate the stain. Thereafter it can be washed off gently. The wood must be given a suitable amount of drying time.


Can Mineral Spirits Act as a Wood Stain Remover?

You can use mineral spirits to remove oil-based stains, or to change the appearance of the stain. For wood that appears dark, wiping the surface with a cloth drenched in mineral spirits or turpentine will cause the wood to appear lighter.


Can I Use Paint Thinner to Remove Varnish?

Allow the alcohol or thinner to settle into the stains for a few seconds. Remove this with a cloth or some steel wool. If you notice that the stain takes well to the thinner, you can then remove the entire stained area with thinner and alcohol. You just need to ensure that you work quickly to avoid the drying of the alcohol and lacquer thinner before it peels the paint off.


How Can I Make My Own Varnish Remover?

A DIY recipe for creating your own varnish remover includes one cup of boiling water, ¾ cup of washing soda, ½ cup of ammonia, and a tablespoon of vinegar. This warm solution now needs to be applied using a brush. The solution won’t work when it is cold, so re-heat if necessary. Once the paint appears softer, you can clean it with hot water and a rag.


Can Acetone Work as a Wood Stain Stripper?

Yes, acetone is a chemical substance that can be used to remove wood stains. The truth is that acetone may not completely remove the surface’s finish.


Does Bleach Lighten Wood?

All types of bleach and chlorine work to take away stains from wood, although these can hinder the wood’s natural color. If you use chlorine and bleach together, they will undergo a chemical reaction that results in lightening the paint color and even the surface of the wood.


Is Sanding Effective for Stain Removal?

Stains take a while to remove. In the case of certain paints, the stain possesses harsher pigments that are stubborn and difficult to remove. In this case, you would get a better outcome by sanding. You can sand with a piece of sandpaper of approximately 100-grit.

Similar Posts